
A Guide To Sewing Machine Feet
Some of the links below are affiliate links. As an Amazon Associate I earn from qualifying purchases. This means that, at zero cost to you, I will earn an affiliate commission if you click through the link and finalize a purchase.
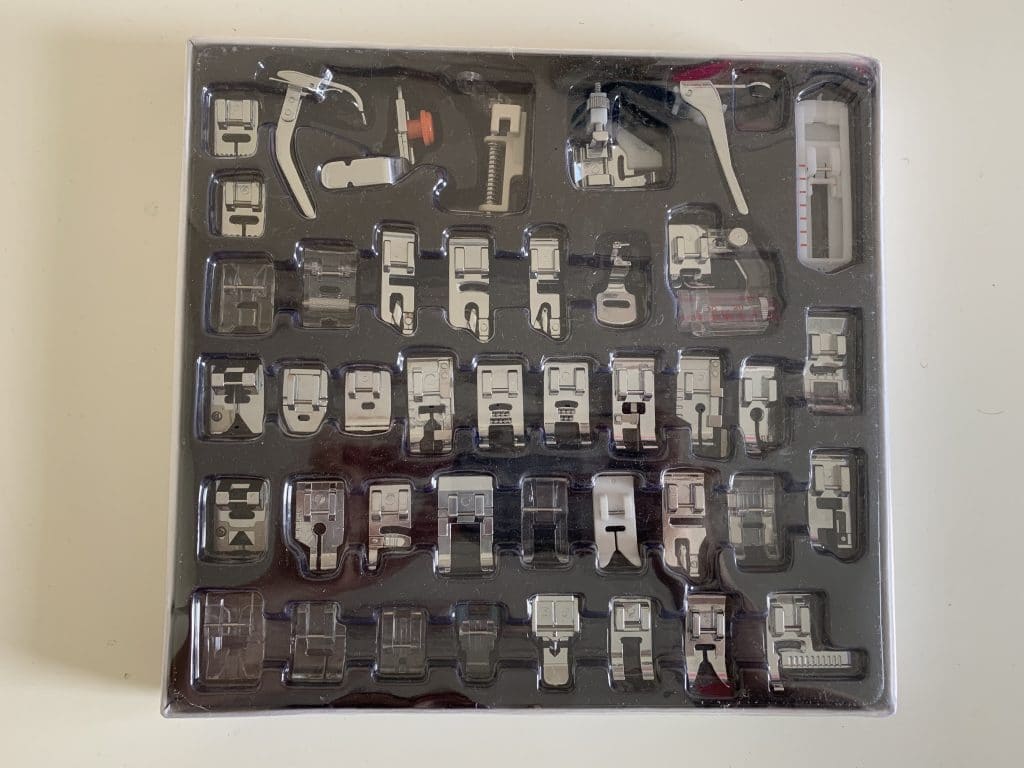
There are so many different sewing machine feet on the market it is hard to know what you need and what each does. I decided to invest in a large collection and create my guide to sewing machine feet.
Are Sewing Machine Feet Universal?
Firstly, I wanted to go through one of the most popular questions when it comes to sewing machine feet. Are sewing machine feet universal? No, they aren’t. You can find packs on eBay, Amazon and other online selling platforms that have created universal clip-on feet.
These are cheaper unbranded sewing machine feet that can fit a variety of sewing machines. I know that some styles of Janome, Brother and Toyota along with many more fit these sewing machine feet.
If you find a sewing machine foot that is perfect for your project but doesn’t quite fit you can also find an adapter that enables you to use that foot on your machine. There is plenty of company’s that have made them and are available on the market.
If you are unsure I would suggest either buying one of the best-reviewed packs online, try them out and return them if they don’t fit. Or pick out 2-3 feet you definitely will need and use and buy those from your brand sewing machine specially.
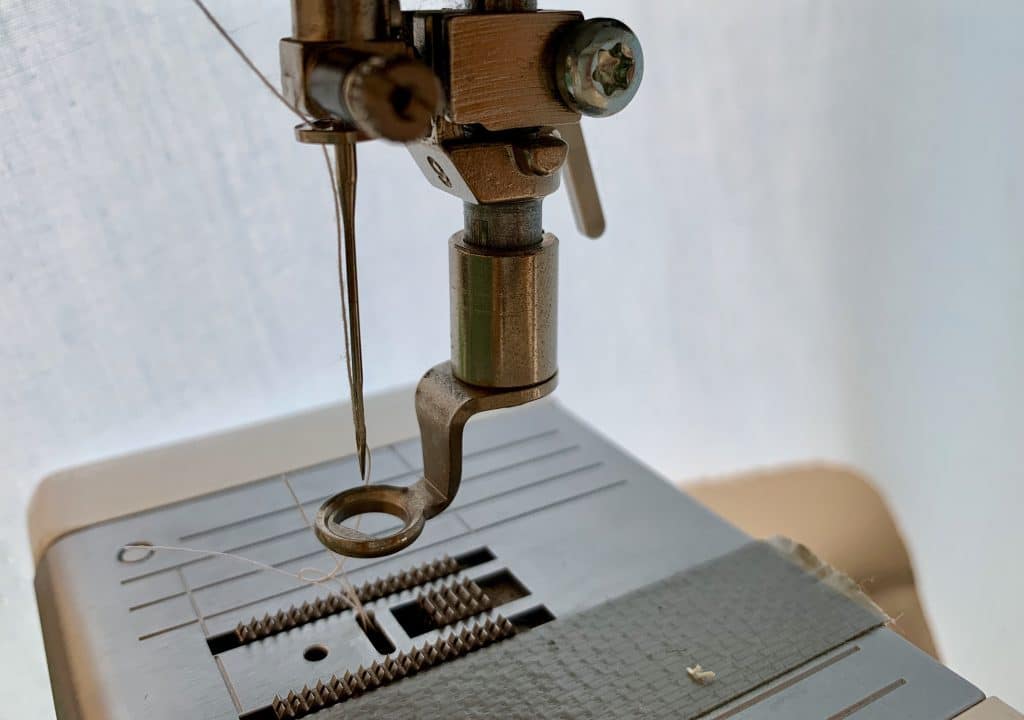
What Is A Shank?
Before we got started on the feet you might want to learn a little about shanks, these sounds aggressive but they aren’t. They are the bar that runs from the main bulk of the machine down to where the needle is held, that leg that comes down in the shank.
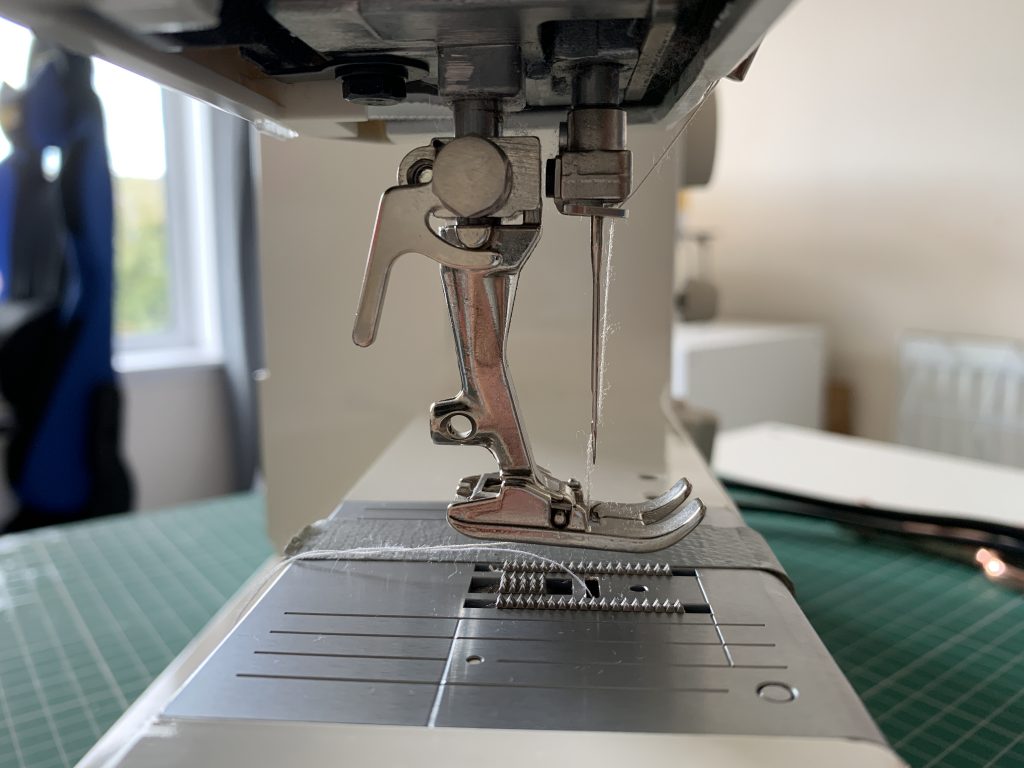
Some machines have high shanks (tall) and some have low shanks (short). This is important to take notice of as when you go to purchase your new and exciting foot you will need to know if you are buying a short or tall leg ( ie low or high shank).
You can work out if you have a low or high shank by placing the presser foot down and measuring the gap from the base to the top. If the measurement is 3/4 inch from the base of the presser foot to the screw on the side, then you have a low shank, more than that it is a high shank.
Low Shank
A low shank is the leg that supports the needle and attaches to the foot. A low shank measures 3/4 inch and is shorter in length. Most modern brands and models have a low shank.
High Shank
A high shank is the longer/taller length piece of metal that hold the needle from the main body of the machine. It is noticeably taller and can be found on earlier models of sewing machine.
What Are The Different Styles Of Attachments
Press On Sewing Machine Feet
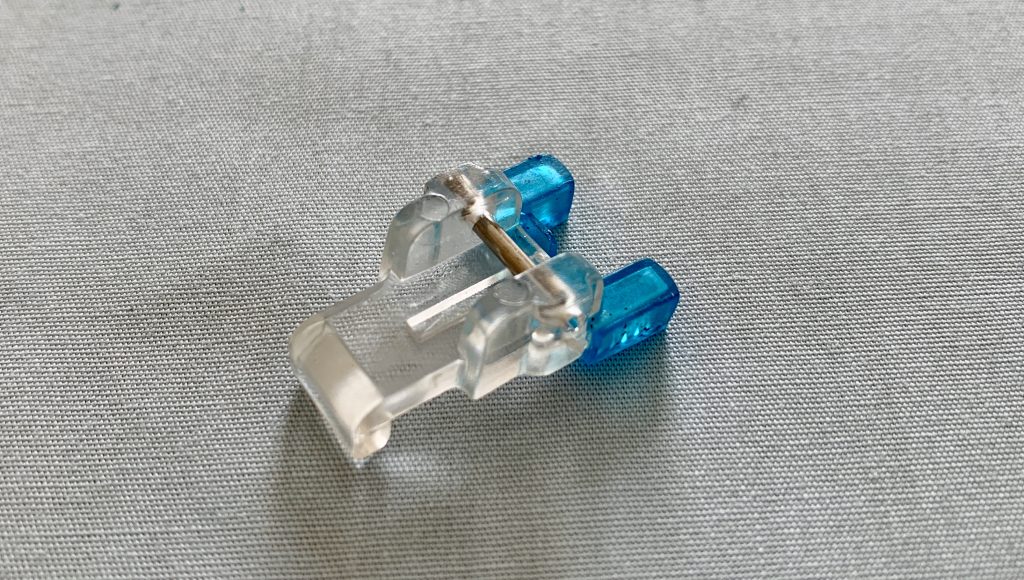
Press on sewing machine feet are quite simply what they say. This is a style of foot that means you can change the base of the foot without having to remove the shank or main leg of the machine.

You can simple press a notch or level and the base will fall off, some are magnetic and some are done by a level or notch. The base would then fall off leaving behind a horizontal arm, you would then fit your next foot into that space.
Screw On Sewing Machine Feet
These are much different and can be much more harder to change. As the name suggests in order to change the foot you have to unscrew the screw that is located on one side to loosen it.
Once it is out you can then change the foot and screw in tight the next foot.
A Guide To Sewing Machine Feet
Satin / ZigZag Foot ( AKA All-Purpose Foot)
This is the most basic foot that will come as standard with every sewing machine. This foot is the basic foot which will allow you to do basic stitches and seams.

The foot is versatile as it can be used on many of the stitches and fabrics. The foot will be the most universal looking foot from brand to brand and easily recognisable. This is the most universal foot on our guide to sewing machine feet.
Zipper Foot
There are 3 types of zipper foot, the invisible, the narrow and standard. Zipper foots are firstly great for sewing in zips, whether these are chunky zips, normal zips, metal and hidden.


The narrow zipper foot is great for making piping cord and sewing close to an edge as you have a better guide.
Buttonhole Foot
The buttonhole foot is an attachment placed onto your foot to help create the stitch for a buttonhole. The foot can be set to a measurement/ size to create the size you need and works with your machine to make it.

Walking Foot
This handy tool is used for knits, quilting and those pesky slippy fabrics that are hard to sew. The general gist of this foot is that it comes with 2 add-ons which create 3 settings. The settings include the basic sole, the quilting sole and the edge stitch sole.
These add-ons are a piece that works as an extra layer of feed dogs, this helps grip the top of the fabric as well as the bottoms. This is great for quilters using more the 1 layer of fabric as it keeps the layers together and prevents slips.
Edge Stitch Foot
This foot is perfect for creating a simple easy line, it works for watching to sew in the ditch of a previous line of stitching or just next to it. There is a thin blade that sits under the foot that can run along the edge of a fabric piece, ribbon or previous line of stitching.

This is to create the perfect perpendicular line of stitching. You can set your needle a click or two to either side to create the line.
Satin Stitch Applique Foot
This foot is very similar to the all purpose foot in shape and design with a couple of changes.

The foot has a clear plastic bottom instead of the metal so the sewer can see where they are going and over the lines they are appliquéing. It is also slightly shorter in length for better ease while sewing.
Stitch Guide Foot
This foot is amazing if you are wanting to be able to do lines at a steady distance from the edge of the fabric or from a previous line of stitching. The guide will help you keep on track to create the second line of stitching without having to draw lines all over your fabric.

This is different to the Edge Stitch Foot as that foot doesn’t have the capacity to give you more than a 5mm gap from the previous line of stitching. Whereas the Stitch Guide Foot can change to much higher and wider widths.
Braiding Foot
A Braiding foot is a foot that allows you to sew down embellishments such as cord, braid or ribbon. The foot has an adjustable section to allow different widths of cord and braid to pass through.

As the machine is sewing the foot will feed through the braid and sew it into place. You can use a straight stitch or zig zag stitch with this foot.
Button Foot
A botton foot is a handy tool that allows you to place to button in place and be sewn. The button foot holds the button while a simple stitch will pass through the holes and sew the button on.
Cording Foot
A cording foot is quite similar to the braiding foot in which the foot holds the ribbon, braid or cord and stitches in place. It can also be very useful foot to use while stitching cording in place to create a gathered effect.
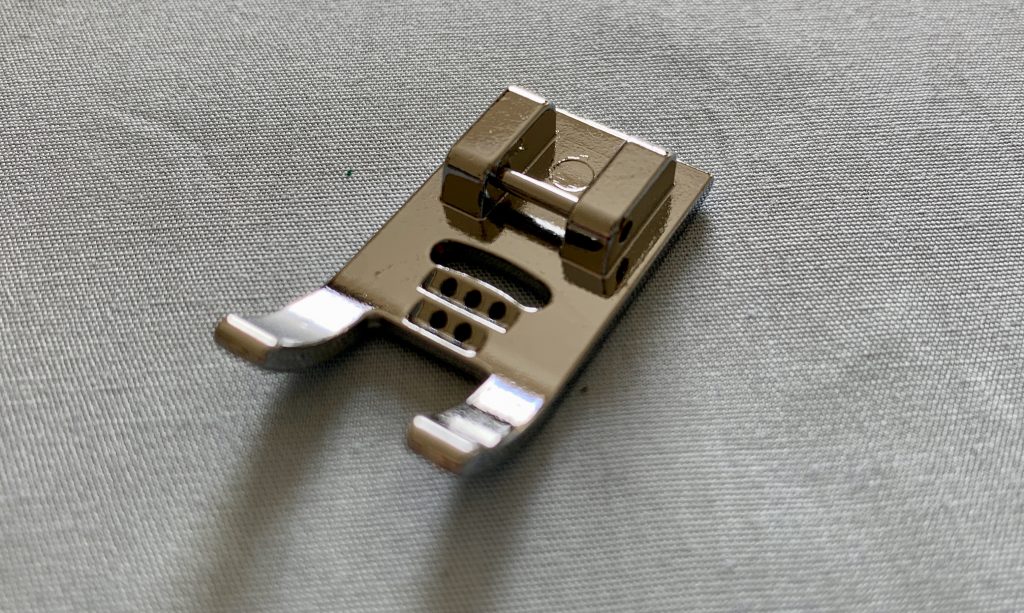
The foot has a clip and grooves on the top that hold the cords in place and then have a cut out in the bottom for the foot to slide over smoothly. You can get these in 3 holes and 5 holes, meaning you can have a strand of 3 or 5 pieces.
Darning Foot / Free Motion Foot
The free motion foot is a simple foot that allows you to move the needle around the fabric freely. You can use this to create a variety of designs and also use the needle like a pencil.

To use this foot you would need to lower your feet dogs or cover them. This is a great foot to use if you are quilting or doing any machine embroidery.
Double Welting Foot
A double welting foot is again similar to the Cording foot and the braiding foot. However the difference if that this is used for the create of braid, cord and decorative trim.

It is used to make what I call Piping but other people would call Welting. It is mostly used in upholstery and home furnishings to create a fine finish and tailored look.
Embroidery Foot
This foot is pretty explanatory, it is a clear based foot that is open and spacious to give the needle and foot room to move over the fabric.
It is often used for embroidery with extra bulk in place such as gems, sequins and appliqués. This is one of my favourite feet to use on our guide to sewing machine feet.
Fringe Foot
A Fringe foot or also known as a looper foot or tailor tack foot is a foot that has a raised bar in the middle. The raised bar creates a small loop or extra thread on every stitch.

This foot is more commonly known to create decorative stitches and fringing. The bar creates an ease in the thread which then creates a loop, saggy stitch which then can be cut to create the fringe effect.
Flower Stitch Foot
The flower stitch foot is probably one of the most impressive feets. Though this foot doesn’t just clip on, the arm has to be removed to attach this foot.
The purpose of the flower stitch foot is to create a perfect stitched circle. The circle is formed by the fabric being rotated while the stitches are created. To use this you have to lower or drop your feed dogs.
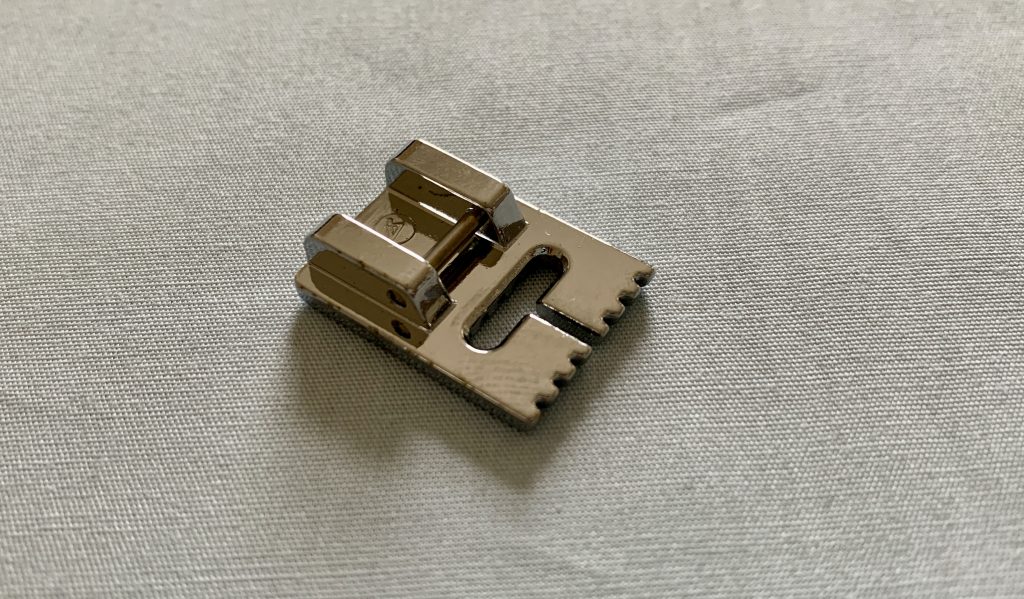
Gathering Foot
A gathering foot is a foot that has an uneven surface on the base which catches the fabric to cause gathers. The gathers can be altered by changing the stitch length and width on the dials.

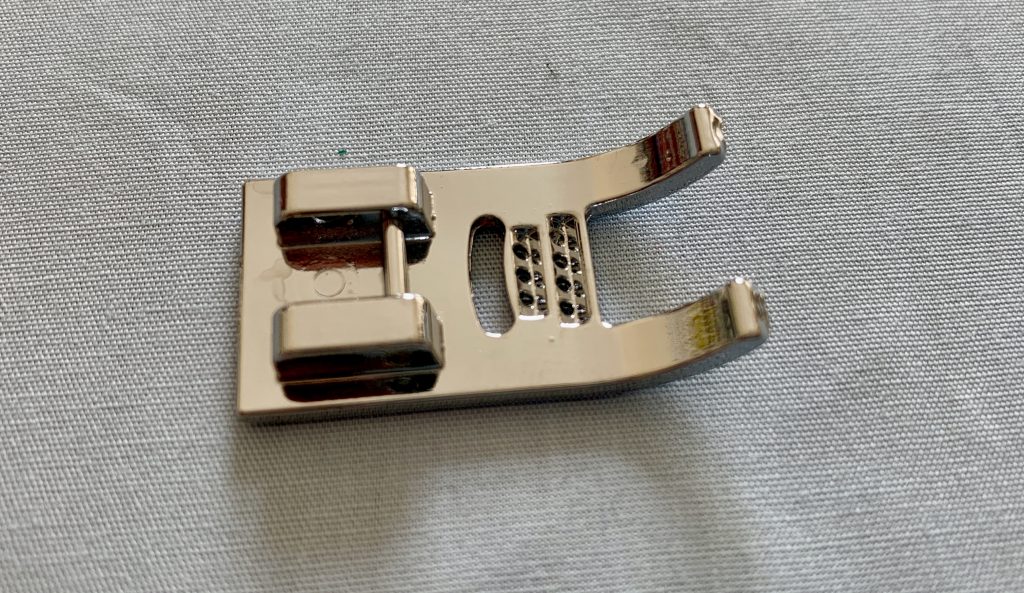
Over Edge (overcast) Foot
The over edge foot is perfect for hemming as it creates overlocking like stitches to encase and wrap around the edges.

Using a zig zag stitch you can bind the edges with perfect tension to create a casing around the fabric edges to stop the fabric from fraying. This is a great foot to have as it opens up your hemming and decorative stitches much more. It really is a great foot to use and worth trying from the guide to sewing machine feet.
Knit Foot
A knit foot allows you to work with stretch fabrics and knit fabrics. By holding the material in place as the needle pierces it but then lets go of the material as the feed dogs move it along.

Making it easier to sew with the stretch fabrics and not damaging them at the same time.
Pintuck Foot
To use the pin tuck foot you need to be using a twin needle, this caused the pin tucks to be created. The higher the stitch tension the greater the pin tucks will be.
Quarter Inch Quilting Foot
This foot comes with a guide to the right, this is the guide in which to push your fabric up to to give you the quarter inch seam. There is an edging piece that comes further out, this is to give you the perfect distance for a corner.

As that piece lines up with the edge of the fabric, leave the needle down, bring the foot up and twist the fabric to start a new line.
Rolled Hem Foot
This is mainly used for lighter weight fabric, nothing heavier than quilting cotton. This foot creates a soft light hem perfect for sheer fabrics and lightweight fabrics.

To get started simply create a double fold with the hem and tack into place. Place that edge under the foot and start sewing, keeping a slight tension in the fabric to create a uniformed hem.
Round Bead Foot (sequin foot)
This is a foot that works in partnership with beads and sequins. They can get passed through the groove that is in the centre of the presser foot and stitched into place.

Make sure your dials are set to zig zag and are going to slot into place. If you want to have a neater look try using invisible thread.
If you want to learn more about different accessories, tools and threads to use check out my other posts for more information.
That is my guide to sewing machine feet, I hope this has been helpful to give you a better insight into the different types of sewing machine feet and that they do. If you have tried any of the above and have any feedback we would love to know!

