How to Make a Reading Cushion With Pocket & Handle
Some of the links below are affiliate links. As an Amazon Associate I earn from qualifying purchases. This means that, at zero cost to you, I will earn an affiliate commission if you click through the link and finalize a purchase.
If you’re a new sewist looking to make a simple yet practical handmade gift then a reading cushion is a great place to start.
This reading pillow tutorial is an easy project that includes the process of making a handy pocket on the front for a good book and a handle for carrying. Depending on your experience, this project should take between 1 – 2 hours to complete.
The reading cushion I made during this DIY tutorial was 16″ by 16″ and was a great gift for my little boy who is a big book lover. However, you can easily adjust the size and the fabric used in this tutorial depending on your personal preferences.
Tools & Equipment
- 1x Fabric – cut to 16.5″ by 16.5″ for the front.
- 2x Fabric – cut 16.5″ by 12″ for the envelope back
- 2x Fabric – cut to 16.5″ by 11″ for the pocket and pocket lining
- 1x Fabric – cut to 9″ by 3″ for the handle
- Bondaweb*
- Iron
- Fabric Marking Tool
- Quilting Ruler
- Rotary Cutter
- Scissors
- Thread
- Sewing Machine
- Cutting Mat
- Pins or Clips
- Cushion Filler
*Optional

I’m using one piece of 16.5″ by 16.5″, and two pieces of 16.5″ by 12″ fabric to create my reading cushion, and will use a quarter of an inch seam on each side, bringing the total dimensions of my cushion to 16″ by 16″.
If you would like to make a smaller or larger cushion then you’ll want to adjust the size of your fabric measurements. For example, if you’d like a cushion 20″ by 20″ then you’ll need to adjust the fabric cuts listed above to allow for seam allowance.
How to Make a Reading Cushion: Tutorial
This reading pillow tutorial should take between 1 and 2 hours to complete depending on your sewing experience. Before making this reading cushion, I recommend a basic cushion sewing project without a pocket or handle.
While you can change the measurements of the cushion to fit whichever size or shape you want, I recommend purchasing the cushion insert first and using this as a template.
Step One: Cut Your Fabric
Before you begin making your reading cushion, you’ll need to look through the fabric requirements and cut your six pieces of fabric to size:
- 1x Fabric – cut to 16.5″ by 16.5″ for the front.
- 2x Fabric – cut 16.5″ by 12″ for the envelope back
- 2x Fabric – cut to 16.5″ by 11″ for the pocket and pocket lining
- 1x Fabric – cut to 9″ by 3″ for the handle
Given the size of the reading cushion, I’m able to make this using fat quarters. When cutting your fabric I recommend using a quilting ruler and a rotary cutter to get straight, neat lines.

Step Two: Lining The Pocket
Now we’re going to line the pocket using our two 16.5″ by 11″ pieces of fabric. This will strengthen the pocket piece and create a neat edge along the top.
To begin, lay one piece of your 16.5″ by 11″ fabric right side (print side) facing upwards. Then, take your second piece of 16.5″ by 11″ fabric and lay that on top with the right side (print side) facing down. At this point, your fabric pieces should be right sides together.

If you’ve printed fabric, then you’ll want to make a note of whether it’s directional or non-directional.
In the case of my Thomas & Friends fabric, it’s non-directional and therefore I didn’t need to take into account whether the print was facing the right way. However, if you have directional fabric, you’ll want to ensure you do this before pinning.
Once you’re happy that the two pieces of your fabric are facing the right way and the edges are aligned, you’ll want to pin (or clip) one of the 16.5″ edges together, using four to five pins. However, if you need to use more, then feel free to do so.
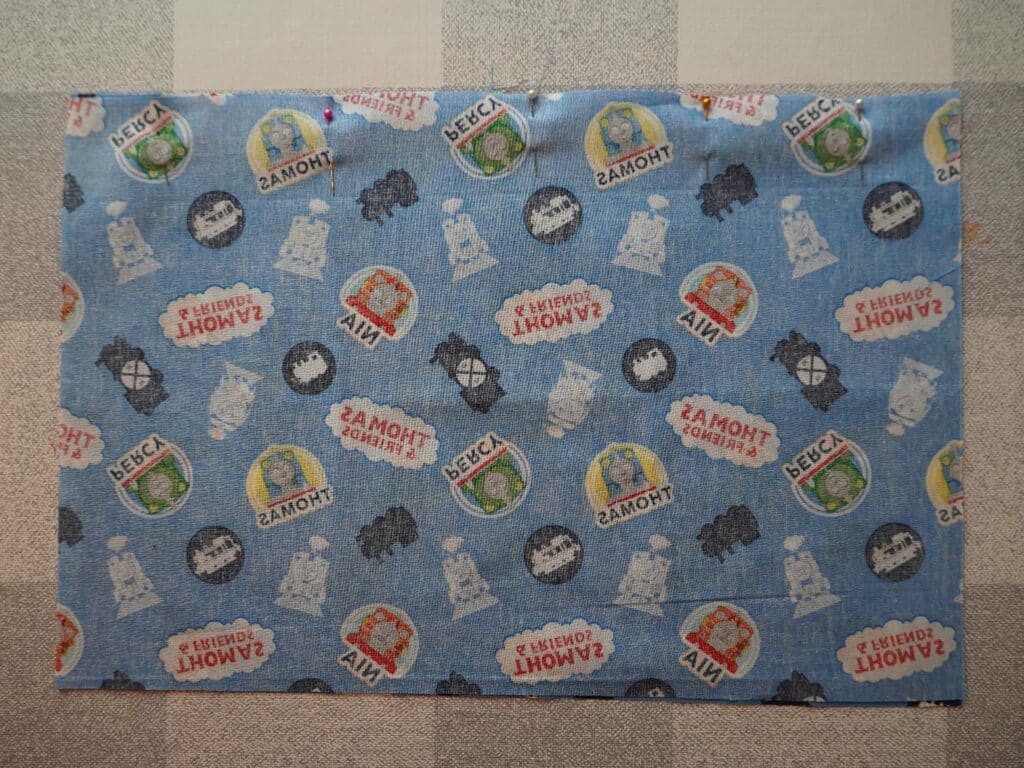
Then, go ahead and take your fabric over to the sewing machine and sew together the pinned edge with a 0.25″ seam allowance and a small to medium straight stitch.
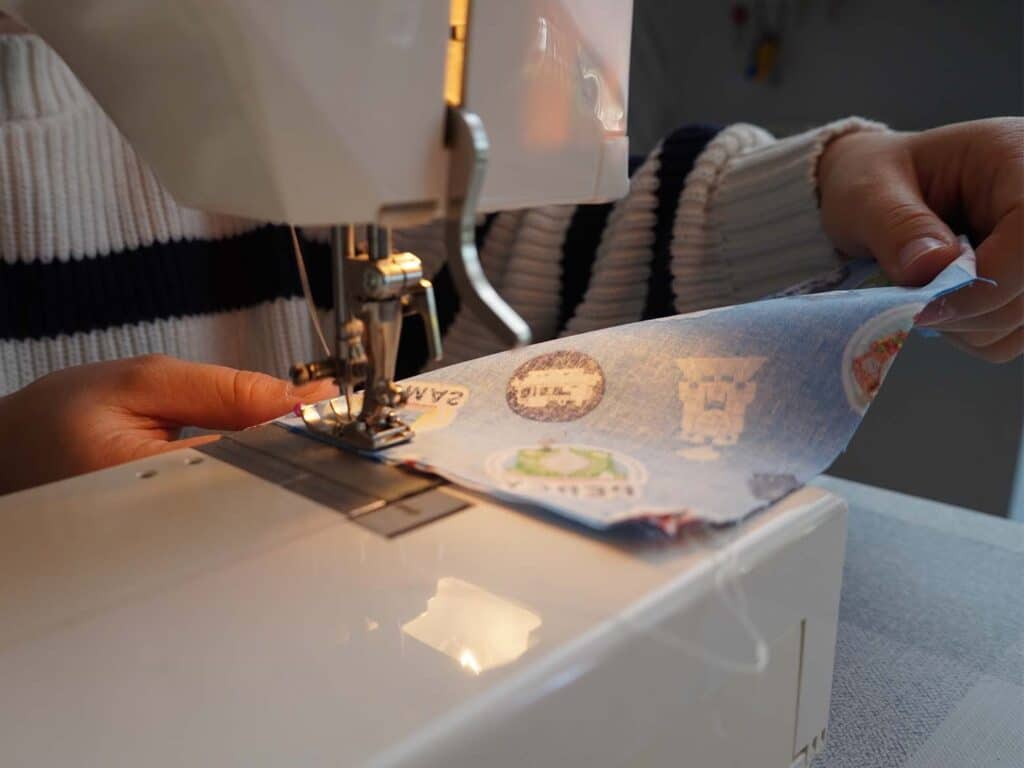
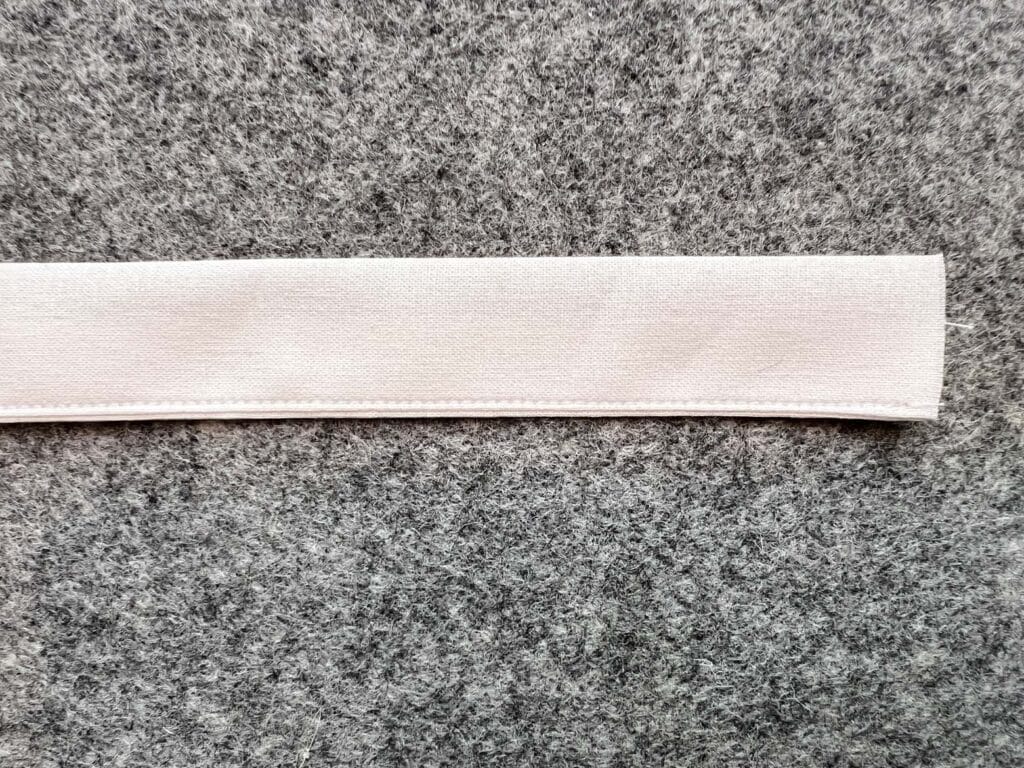
Once sewn together, you’ll want to unfold your pocket so that the right sides (printed sides) are facing out and iron using a mini iron, pressing the seam well to ensure it’s neat.


Step Three: Attaching The Pocket
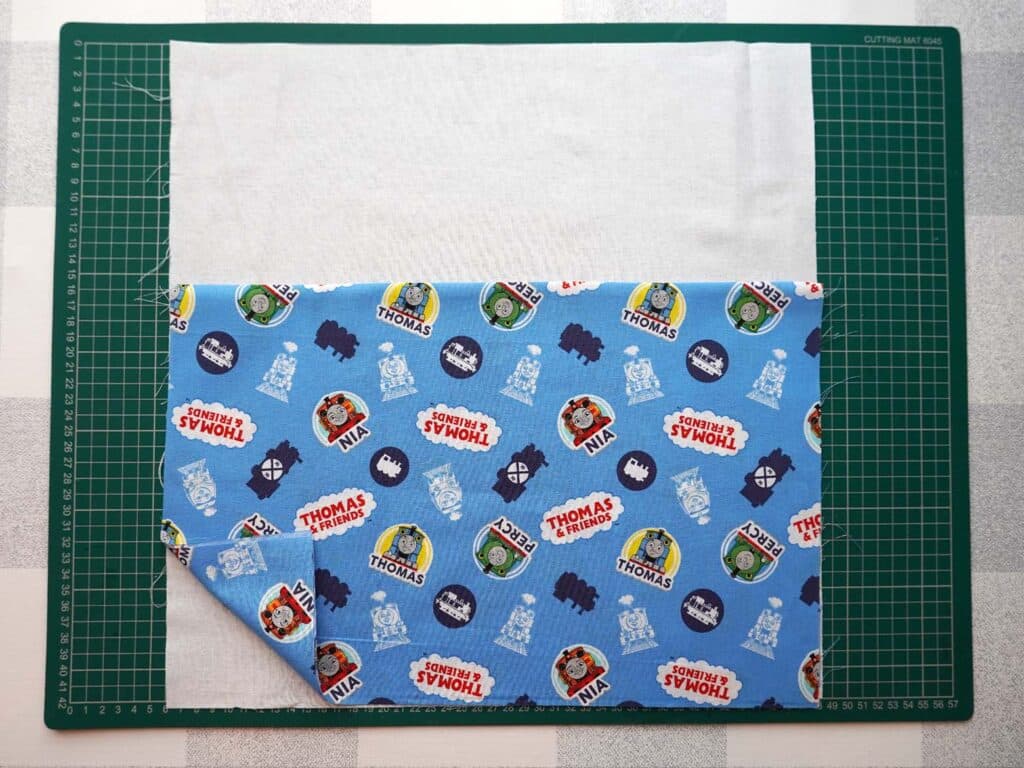
Now, we’re going to sew the pocket onto the front of the pillow piece of fabric. For this, you’ll need the pocket pieces of fabric you’ve sewn together and the 16.5″ by 16.5″ piece of fabric you’ve cut for the front of your reading cushion.

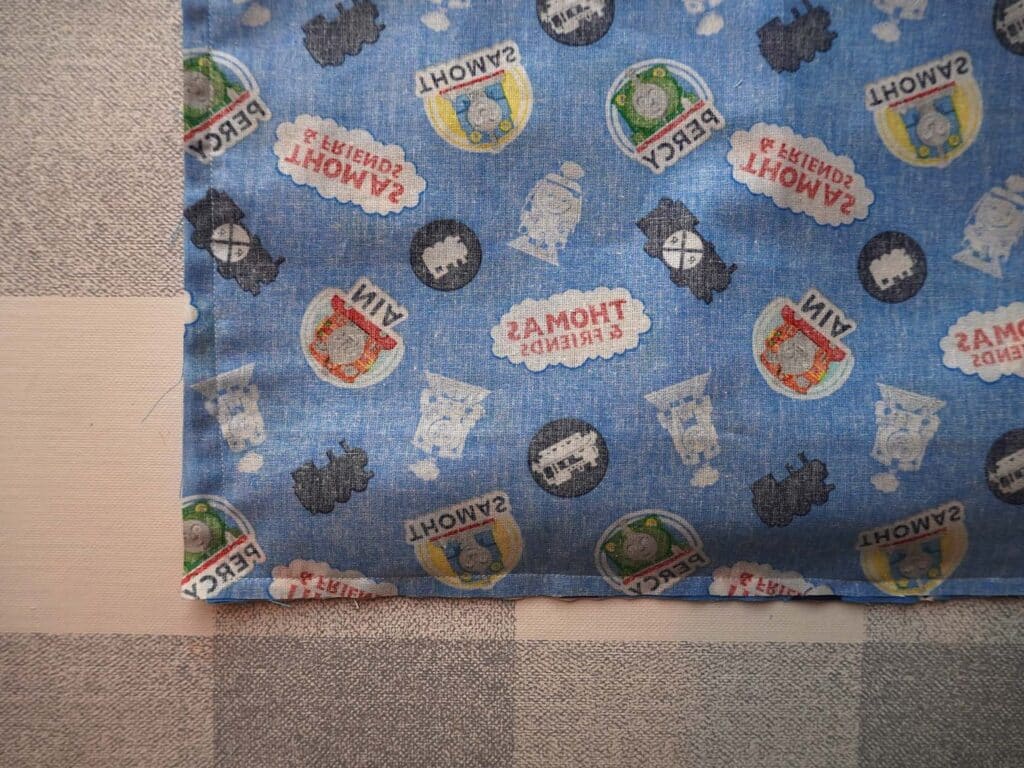
To begin, you’ll want to lay your 16.5″ by 16.5″ piece of fabric down onto your cutting mat or flat surface, right side up. Then, go ahead and lay your pocket over the top, again right side (printed side) up.
You’ll want to ensure that the edges of your pocket fabric are aligned with the edges of the 16.5″ by 16.5″ piece of fabric for the front of your cushion at three points and that the stitch for the recently sewn together pocket in the middle of your cushion front.
Once you’re happy, go ahead and pin (or clip) the fabric in place on all three sides using three to five pins on each side. Again, feel free to use more should you require.
Then take your fabric over to the sewing machine, and sew from the top left-hand corner of the pocket, around all three edges using a 0.25″ seam and a small to medium straight stitch. As you follow the seam of the fabric around each edge, make sure you create a corner, not a curve.

Step Four: Create The Handle
Now it’s time to create the handle for the reading cushion. If you’re not planning on adding a handle to your cushion then you’re welcome to skip this step.
For the handle, we’re going to be using the piece of fabric you cut to 3″ by 9″. As an alternative to fabric, you can use cotton tape. However, the fabric will offer a durable, longer-lasting handle and is, therefore, my personal preference.

To begin take your 3″ by 9″ piece of fabric and face it the wrong side up, so that the right side of your fabric (the outside of the handle) is facing your ironing board, table or cutting mat.

Then, you’ll want to fold the top of the long edge of the fabric in by 0.5″ and iron it in place. Then you’ll want to repeat this process for the bottom of the fabric, folding the long edge of the fabric in by 0.5″, again ironing the folded edge in place.

If you’re working with particularly thick hardwearing fabric then you may need to use the steam function with your iron to create those neat, crisp lines. At this point, your fabric should measure 2″ by 9″ and have the raw edges facing inwards.
You will then want to fold your 2″ by 9″ strip in half again, with the folds on the inside. You should then be left with a 1″ strip with an opening on one of the 9″ sides.
You’ll then want to use your sewing machine to sew the open edge close on both sides using a top stitch. This not only creates neat edges for your handle but also reinforces the fabric since the majority is now double-layered from the fold.
Step Five: Sew on The Handle
Now it’s time to take the handle and sew it onto the front piece of your fabric. To begin, you’ll want to lay the front piece down on the cutting mat with the right side (with the front pocket) facing you and the wrong side of the fabric (the inside of the cushion) facing the cutting mat.
Then you’ll want to go ahead and place your handle on the top of your fabric. You’ll want to measure the distance between your handle edges, and the edges of your cushion to ensure the handle is central.

Once you’re happy with the handle placement, line it up with the top edge of the pillow fabric so that the seams of both the handle and the top of your fabric meet and pin in place.

I recommend measuring the distance from each of the handle edges to the edge of each side of your cushion once again to ensure that the handle is central.
Then we’ll go ahead and sew the handle in place. To do this, take your fabric over to the sewing machine and stitch the handle pieces with a small to medium straight stitch with a 0.25″ seam allowance.

I also recommend using a back-stitch at the start and the end of each handle to increase the strength of the stitch ensuring the seam doesn’t unravel.
Step Six: Hemming The Envelope Back
Our reading cushion is going to feature an envelope backing which will allow you to insert the cushion. To create the envelope back we’ll be using the two 16.5″ by 12″ pieces of fabric.
However, before we sew the pieces in place, we first need to hem them, creating a neat edge. To begin, take your two pieces of 16.5″ by 12″ fabric and lay them right side (print side) down.
Then, take the first piece of fabric and fold the longest edge, the 16.5″ edge inwards by 0.5″. At this point, your fabric should measure 11.5″ and show 0.5″ of the right side (print side) fabric. Once you’re happy with this, iron the fabric fold.

Repeat this step, folding down the longest edge, the 16.5″ edge inwards again 0.5″, reducing the height of the fabric to 11″, again, showing 0.5″ of the right side (print side) of the fabric. Once you’re happy you’ll want to press this fold in place with an iron and pin in place.
Then, take your second piece of fabric, and repeat this process. Folding the longest edge, the 16.5″ edge of the fabric inwards by 0.5″ and iron in place, repeating this process twice. Once you’ve folded the edges in twice you’ll once again want to pin the fabric in place.

At this point, you should have two pieces of fabric that are identical. Both pieces should measure 16.5″ by 11″, with the 16.5″ edge showing 0.5″ of the right side (print side) fabric which has been pinned in place.
Now it’s time to sew your folds in place. To begin, take your pieces of fabric over to the sewing machine and sew both of the fabric folds as close to the edge of the fold as you can, using a small to medium straight stitch, making sure to back stitch at both the start and end of your stitch.

Step Seven: Creating The Envelope Back
Once the two back pieces of your fabric are hemmed you can can go ahead and create the envelope back to your reading cushion. To do this, simply place the front of your cushion right side up, so that you can see the pocket.
Then, take one of the two pieces for the back of the pillow and lay that right side (print side) down, on top of the front piece, right side to right side. Make sure that the hemmed edge of your back piece is at the centre of your cushion, and not at the edge.


At this point, the first of your two backing pieces should be right side to right side with your front piece of fabric, the three edges of the backing piece should be aligned with the three edges of your cushion front and the hemmed back piece should be in the middle of your cushion.
Once you’re happy with this, go ahead and pin the three edges in place using three to five pins (or clips) on each of the edges. Again, feel free to use more pins should you require.

Now it’s time to do the same with the second of your back pieces. Take the piece of fabric and lay it right side (print side) down, on top of the front piece at the opposite end to where you placed the first of your fabric back pieces.
The second of your back pieces should overlap the first of your back pieces by 3.5″, this is what creates the envelope.
Again, you want to make sure that the fabric is right side to right side with the front of your fabric, the three edges of your back piece are aligned with the edges of your cushion front and that the hemmed edge is at the centre of your cushion and not at the edge.

Once you’re happy with this, go ahead and pin the three edges with three to five pins on each edge. These pins (or clips) should also be applied to the 3.5″ overlap.
Now it’s time to sew the backpieces in place. To begin, take your fabric over to the sewing machine and sew from any of the four corners around the full perimeter of the cushion using a 0.25″ seam allowance and small to medium straight stitch.
Be sure to backstitch at both the start and edge of your stitch and create corners, and not curves.
Step Eight: Cut The Corners
Now it’s time to cut the corners of your cushion, to remove bulk and create crisp corners.

To begin, lay your fabric down on the cutting mat, and angle your scissors on a diagonal across the corner on each of the four corners. When you do this, be sure not to cut the seam.
Step Nine: Turn Your Cushion Right Side Out & Fill
Now you can go ahead, and turn your pocket pillow the right side out, pulling the front and back of your cushion out through the envelope opening.
Take your book pillow over to the iron and press all of the seams along the edges. At this point, you may want to use a pointing tool or a pencil to go into the cushion through the envelope opening and push out the corners.


Now you’re ready to fill your finished pillow. To do this you can either use cushion filling or a pre-made pillow form depending on your personal preferences. Alternatively, if you want to personalise your reading pillow cover further, with say a name, then consider adding some embroidery design.

How to Make a Reading Cushion With Pocket & Handle
Materials
- 1x Fabric - cut to 16.5" by 16.5" for the front.
- 2x Fabric - cut 16.5" by 12" for the envelope back
- 2x Fabric - cut to 16.5" by 11" for the pocket and pocket lining
- 1x Fabric - cut to 9" by 3" for the handle
Tools
Instructions
- Cut your fabric to the measurements shown in the materials section.
- Lay one piece of your 16.5" by 11" fabric right side (print side) facing upwards.
- Take your second piece of 16.5" by 11" fabric and lay that on top with the right side (print side) facing down.
- Pin (or clip) one of the 16.5" edges together, using four to five pins.
- Sew the two pieces of fabric together using a small to medium straight stitch with a 0.25" seam allowance.
- Unfold your pocket so that the right sides (printed sides) are facing out and iron using a mini iron.
- Lay your 16.5" by 16.5" piece of fabric down onto your cutting mat or flat surface, right side up.
- Lay your pocket over the top, again right side (printed side) up.
- Ensure that the edges of your pocket fabric are aligned with the front of your cushion at three points and that the stitch for the recently sewn-together pocket is in the middle.
- Pin (or clip) the fabric in place on all three sides.
- Sew from the top left-hand corner of the pocket, around all three edges using a 0.25" seam and a small to medium straight stitch.
- Take your 3" by 9" piece of fabric and face it the wrong side up.
- Fold the top of the long edge of the fabric in by 0.5" and iron it in place.
- Repeat this process for the bottom of the fabric, folding the long edge of the fabric in by 0.5", again ironing the folded edge in place.
- Fold your strip in half again, with the folds on the inside. You should then be left with a 1" strip with an opening on one of the 9" sides.
- Use your sewing machine to sew the open edge close on both sides using a top stitch.
- Lay the front piece of your fabric (with the pocket) down onto your sewing mat right side up.
- Place your handle on the top of your fabric, and measure the distance between your handle edges, and the edges of your cushion to ensure the handle is central.
- Line the handle up with the top edge of the pillow fabric so that the seams of both the handle and the top of your fabric meet and pin in place.
- Sew the handle in place with a small to medium straight stitch with a 0.25" seam allowance, using a back-stitch at the start and the end of each handle.
- Take your two pieces of 16.5" by 12" fabric and lay them right side (print side) down.
- Take the first piece of fabric and fold the longest edge, the 16.5" edge inwards by 0.5", and press this fold in place with an iron.
- Repeat this step, folding down the longest edge, the 16.5" edge inwards again 0.5", reducing the height of the fabric to 11", iron in place and pin (or clip)
- Repeat steps 22 & 23 for your second piece of fabric.
- Sew the folds on both pieces of fabric as close to the edge of the fold as you can, using a small to medium straight stitch, making sure to backstitch at both the start and end of your stitch.
- Place the front of your cushion right side up, so that you can see the pocket.
- Take one of the two pieces for the back of the pillow and lay that right side down, on top of the front piece, right side to right side, making sure that the hemmed edge of your back piece is at the centre of your cushion, and not at the edge. Then, pin in place.
- Take the second piece of fabric and lay it right side down, on top of the front piece at the opposite end to where you placed the first of your fabric back pieces. The second of your back pieces should overlap the first of your back pieces by 3.5". Again, you want to make sure that the fabric is right side to right side with the front of your fabric, the three edges of your back piece are aligned with the edges of your cushion front and that the hemmed edge is at the centre of your cushion and not at the edge. Once happy, pin in place.
- Sew from any of the four corners around the full perimeter of the cushion using a 0.25" seam allowance and small to medium straight stitch. Be sure to backstitch at both the start and edge of your stitch and create corners, and not curves.
- Cut the corners of your cushion
- Turn your pocket pillow the right side out, pulling the front and back of your cushion out through the envelope opening.
- Press all of the seams along the edges using an iron.
- Use a pointing tool or a pencil to go into the cushion through the envelope opening and push out the corners.
- Fill the cushion using cushion filler.