
How To Do Reverse Applique By Hand
Some of the links below are affiliate links. As an Amazon Associate I earn from qualifying purchases. This means that, at zero cost to you, I will earn an affiliate commission if you click through the link and finalize a purchase.
Are you looking at how to do reverse applique by hand?
Applique is a really fun way of adding an extra flare or design to a project. I never used to be much of a fan but I have discovered new ways of using the techniques and creating fun designs.
Applique can be done in a number of ways with a number of tools and techniques so there is something for everyone and every size sewing box.
Tools & Equipment
- Scissors
- Thread – this can be contrasting or matching depending on your design.
- Sewing Needle
- 2 pieces of fabric – this works better if the fabrics are contrasting so the pattern is visible
- A paper pattern outline of your design
- Fabric Marking Tool
How To Do Reverse Applique By Hand
Reverse applique might seem a little tricky but it doesn’t have to be. Once you have pracitced a couple of times it can be really fun and quite theraputic.

Reverse Applique is the method of layering two pieces of fabric together, both right sides up and cutting out a shape in the top layer to reveal the bottom fabric.
You can then stitch a number of ways on the top to hold the layers together and to create fun and intricate pieces.
Step One
To get started you want to work out the size of your project. If like me you are trying out the technique first I used 2 squares of contrasting fabrics 6 x 6 inches squared.
I create my squares using a rotary cutter and quilting ruler to create accurate and neat squares.
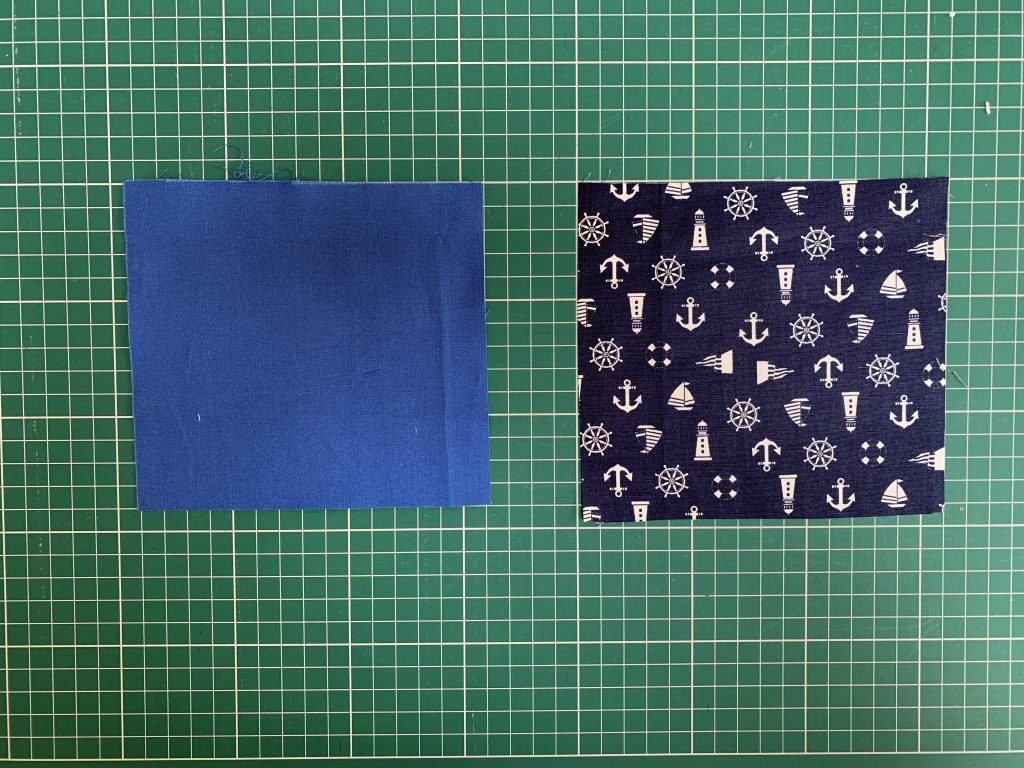
If you are working on a project such as quilt block or garment find your area in which you are working and lay it flat on a self healing cutting mat if you have one to hand.
Tip: If you are working on something like a skirt which has a lot of layers or bulk, use an embroidery hoop to select your chosen area so you don’t loose it.
Be sure not to stretch the fabric and don’t use it on delicate fabrics incase you cause any rips or pulls.
Step Two
Once you have selected your area you want to create the image you want to make.

You can do this in a number of ways from drawing your own, tracing one you like from a book or printing one from the computer you found earlier.
Print, draw or trace and cut it out.
Tip: Don’t try and reverse applique anything that is too thin and intricate as you will struggle to turn under the raw edge to sew.
Step Three
To get started place your fabric pieces together. The top fabric should be the fabric you are seeing the most of – in terms of the garment it will be the fabric it is made from.

Tip: You can place bondaweb around the edges of your pieces and pattern to hold the fabric together to create a solid feel. This will work better on projects for bags and quilts.
The bottom fabric is the contrasting fabric in which you want your design to be. Place the contrasting fabric right side up behind your main fabric (also make sure your main fabric is facing right side up).
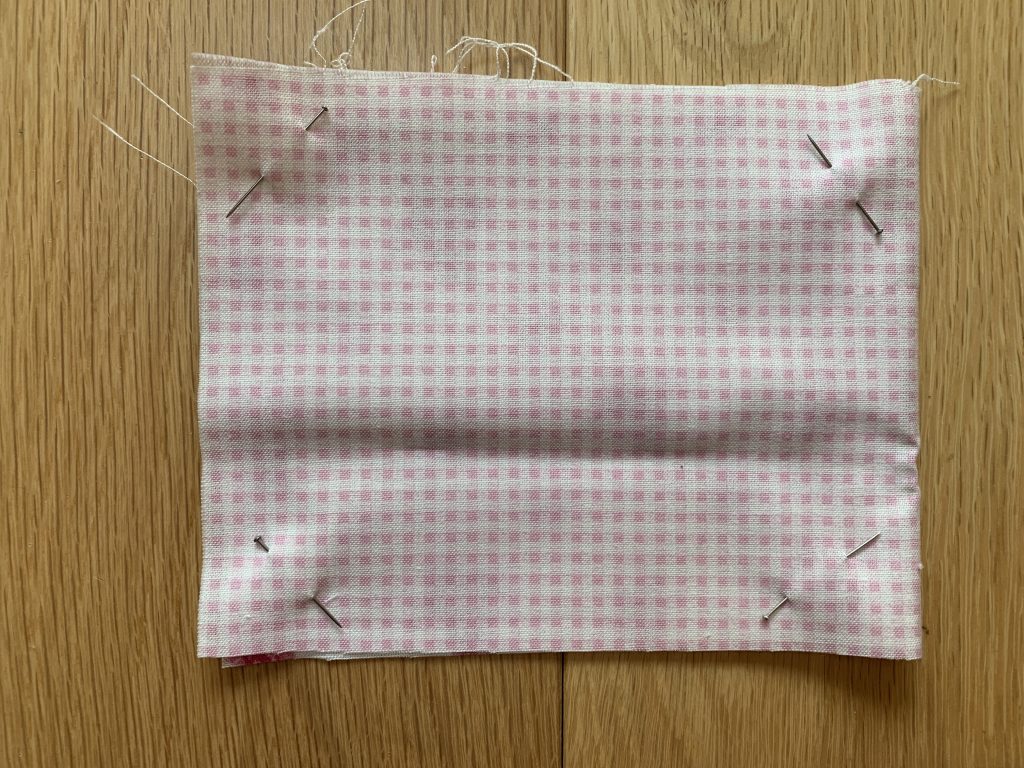
Pin into place to keep the fabric from moving.
Step Four
Take the paper pattern piece and place it on the top of the fabric. Hold it in place with your hand or you can pin it into place.
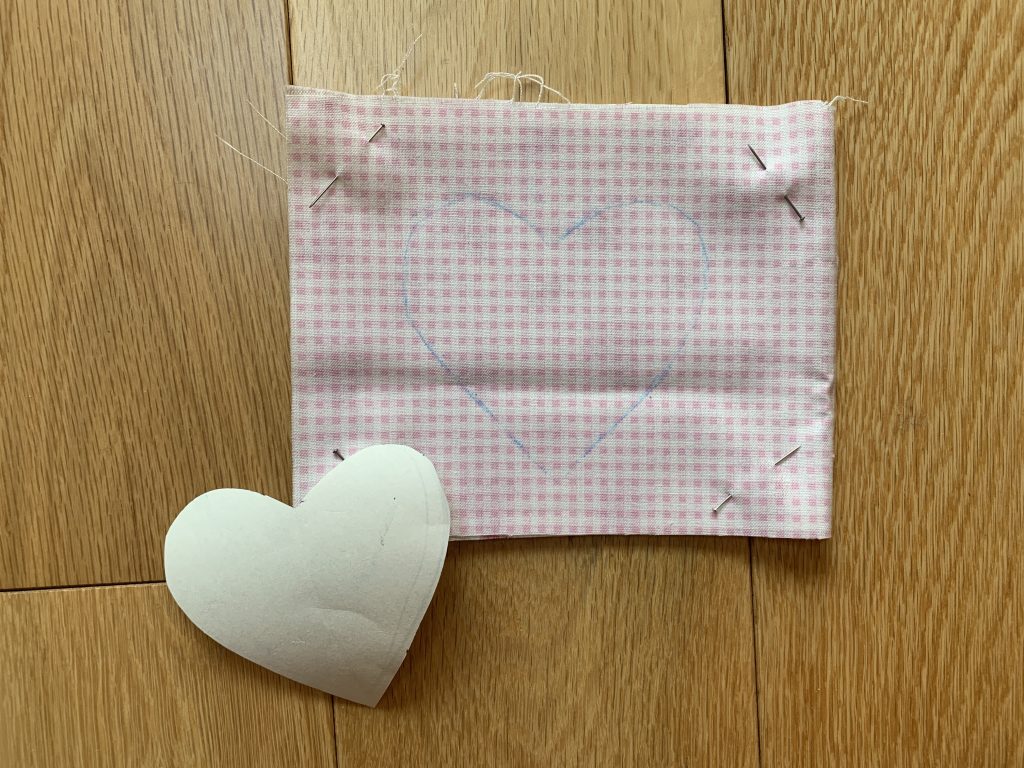
Draw around the shape using a fabric marking tool, preferably one that disappears with heat or rubs away.
Step Five
To cut the top layer of fabric pull apart the layers. You can do this by pinching the fabric on the front and back and slowly pull them apart.
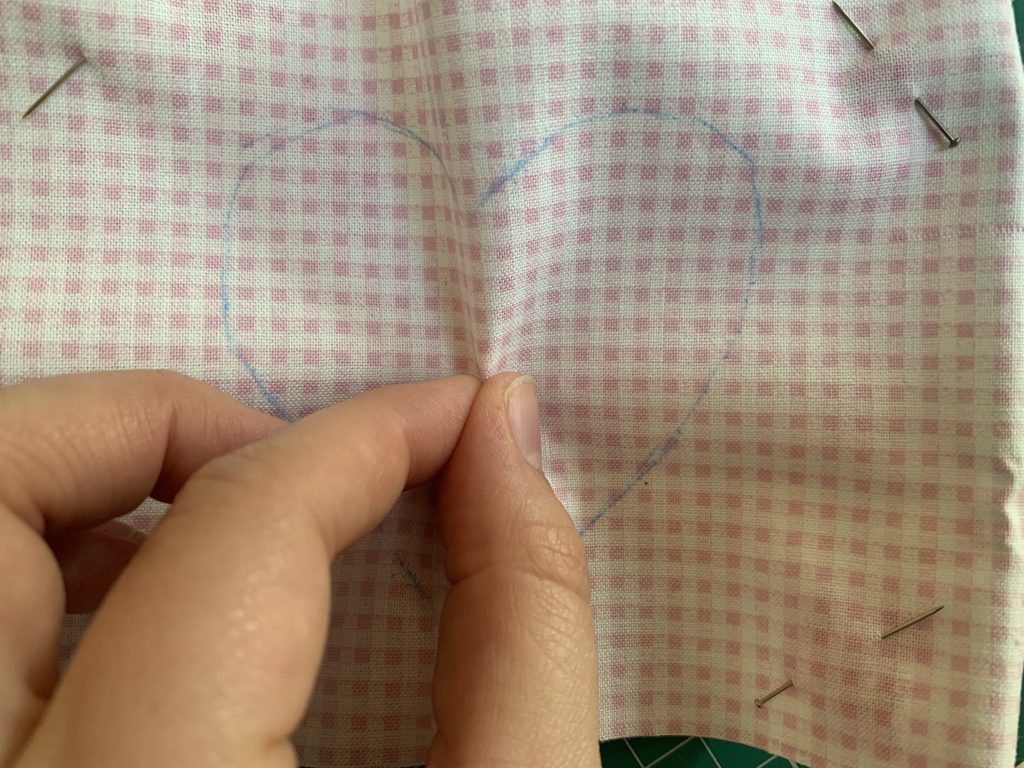
If your pieces are pinned you can place your hand through the gaps and stop the scissors from catching the bottom fabric.
Cut a small snip in the middle of your design, start cutting nearer the edge of your line, leaving a 1/4 inch gap. \
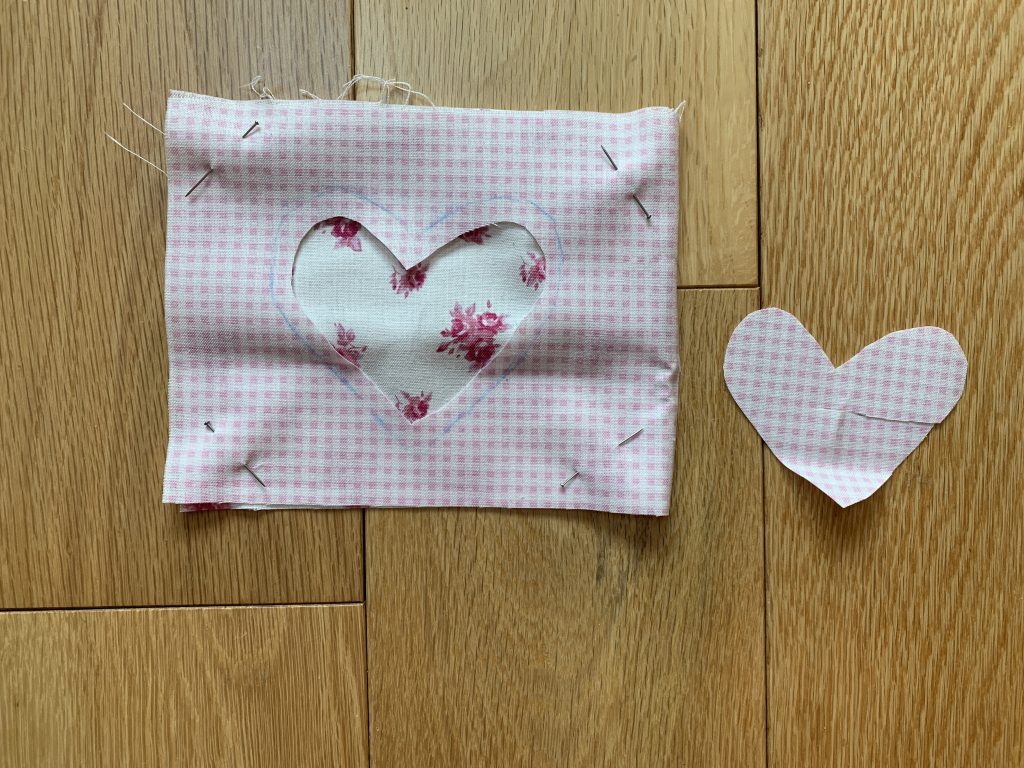
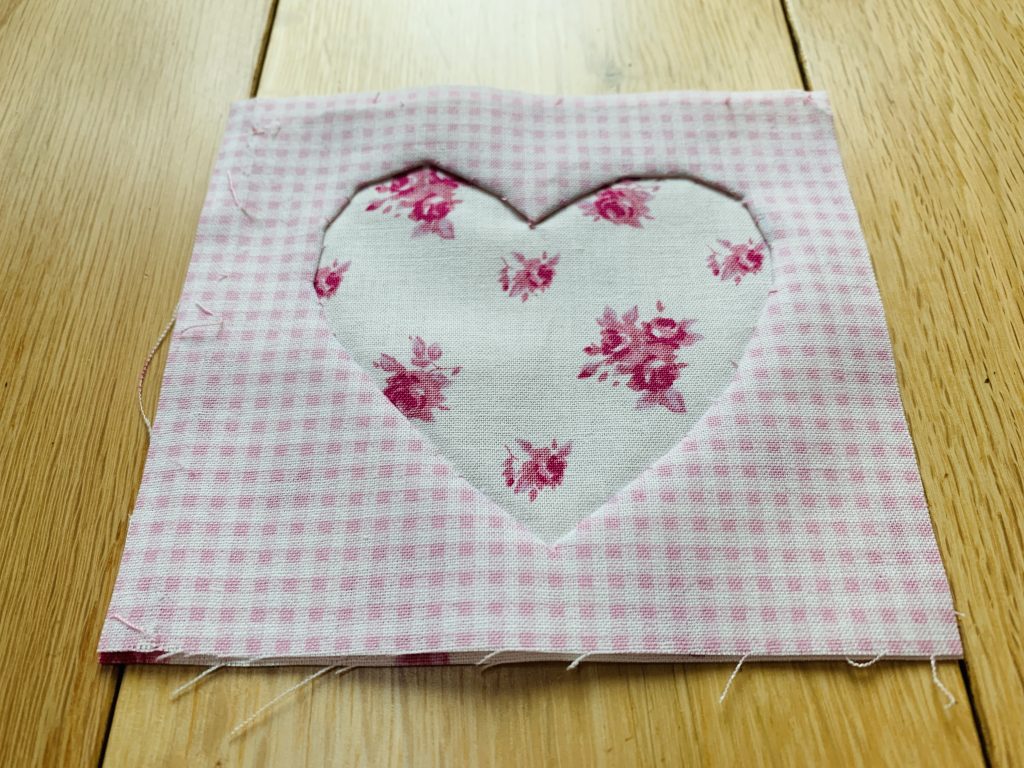
Once you have cut out your shape in the middle remove the loose fabric.
Step Six
There are a couple of ways in which you can sew the reverse applique in place. The first is to fold the raw edges under and slip stitch into place.
You can also use this method and then layer on a decorative stitch like a blanket stitch or chain stitch.
If you are working with a pattern that has curves in like flower petals, hearts or circles then you will need to cut into the seam allowance. Cut small clips into the seam allowance roughly 0.5 cm apart.

Cut right up to the line to allow the fabric to tuck under and sit flat.
Start by knotting your matching colour thread and come up from the bottom. Using your finger or a tool such as a seam ripper fold the raw edge under the fabric to create a neat edge.
Slip stitch the edge in place, be careful to keep the stitches small, neat and roungly 0.5 cm apart. You want to make sure that all the curves and raw edges are well tucked under and held in place.

Iron to finish and give the applique a good press before adding a decorative stitch or finishing your project.
The second way to stitch the reverse applique is by leaving a raw edge. This doesn’t require cutting into the seam allowance. You can simply pick a stitch you wish to use such as a running stitch, chain stitch or split stitch.
I would recommend doubling your thread for this technique or using embroidery thread to make it look fun and with a little texture.
This technique won’t wash as well and could fray up to the sewing line. To help make it last longer you can add hemming tape around the edges to hold it place and give it strength.
Step Seven
Finish off your project by removing pins, cut down the bottom fabric to get ride of bulk and iron.

I hope you have found this tutorial on how to do reverse applique by hand useful and fun. If you head over to pinterest you can find a number of patterns and stencils to print out and use. Happy sewing!

