How To Gather Fabric On A Sewing Machine
Some of the links below are affiliate links. As an Amazon Associate I earn from qualifying purchases. This means that, at zero cost to you, I will earn an affiliate commission if you click through the link and finalize a purchase.
Are you looking at how to gather fabric on a sewing machine?
Gathering happens quite often in clothing patterns and sewing projects in general. It can often be sewn on the instructions and sometimes it can be a little vague.
Gathering is used for so many different techniques and reasons. It is mostly used for clothing for peplums, waists on skirts and detailing on cushions etc.
How To Gather Fabric On A Sewing Machine
There are also a couple of ways you can gather fabric on a sewing machine. These will depend on the fabric you are using, the style of gathers you want to create and the density of the gathers.
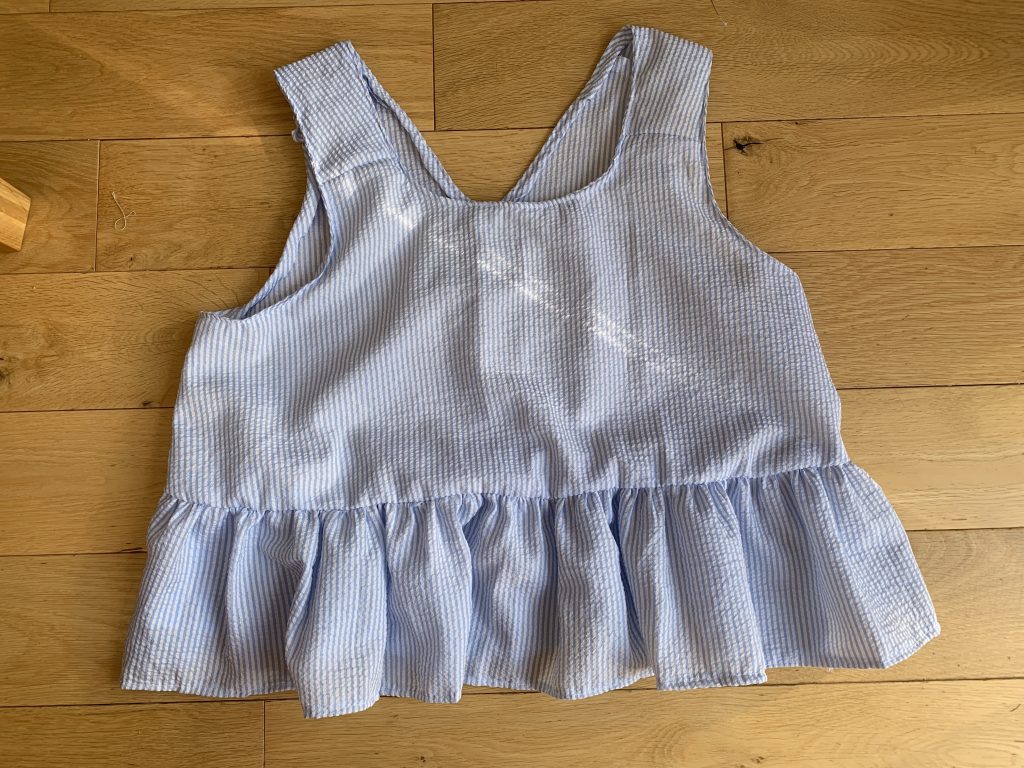
Here are a couple of ways to how to gather fabric on a sewing machine.
Before starting you will need to work out how long your fabric needs to be once gathered or a guide to the length.
Say your fabric is 1 metre long but your guideline is to make the fabric 60cm long then you can use this as a guide while you are gathering.
Clothing patterns will give you a guide or notches to work with to enable you to create the right length/width.
Method One
The first way to gather fabric on a sewing machine is the way I was taught at an early stage in my sewing journey. It is one of the easiest and most effiecient.
It requires no extra tools apart from your sewing machine, thread and fabric. This is a great way for beginners too to get to use to the symbols and adjustments on the sewing machine.
Whether you are gathering a little section of your fabric for a clothing pattern or a full length for a skirt or to make a ruffle. You want to create a mark with a fabric marking pen or a pin to mark your start and stop points.
This will help you see the stop and start points when you are sewing. Change your settings on your sewing machine to the largest stitch it can be, you want the length of each stitch to be as long as you can do on your machine.
Tip: Make sure you do a test on a scrap piece of fabric to make sure the stitches are right before starting on your project.
Once your settings are correct start your stitches from your first marker, remember to do a backstitch but ONLY on the start. Don’t backstitch on the end of your stitch line.

Create a second line roughly 1/4 to 1/2 inch lower than your first, create a parallel sewn line and do as the same above.
Tip: To give yourself plenty of room to work with, make sure you leave plenty of length of thread on your open end of your stitch lines.
Once you have your two lines sewn onto your fabric, take hold of the top two threads, one from each line. Leave the bottom threads loose and away from the ones you are holding.

The second line helps to create even gathers instead of using just one line.
With one hand holding the threads, it helps to wrap them around your hand a little to give you a good grip. With the other hand start push the fabric away to the opposite end.
You will feel movement under your fingertips and see the fabric starting to gather and buckle. Keep moving the fabric along at different intervals to keep the gathers equal.

Use a ruler or a pre made guide to work towards to make sure you don’t create too many gathers. Though the bonus with this technique is that you can always move the gathers out to fit a larger size.
Once you are happy with the gathers and are to the size you want place a long pin or 2 smaller pins at the end of the open stitch end. Place them vertically or horizontally – either way will work fine.

Wrap the loose thread round it in a figure of 8 to hold in place. That way you can try it on and make sure it is right for you before moving on and sewing into place.
This technique wouldn’t work for thick fabrics as the thread would easily snap and not be able to pull the weight and thickness. This is better suited to lightweight fabrics such as cotton, linen and satins etc.
Method Two
This option is pretty much the same or very similar to the one above, especially towards the end.
You will need to use extra materials in this version to create these gathers. This technique is great for thicker fabrics and is harder to gather. Fabrics such as jersey, corduroy and wool along with many more.
To create this technique you will need a length of cord the length of the area you are wanting to gather. This will require a large zig-zag stitch, change the settings on your machine to the required setting.
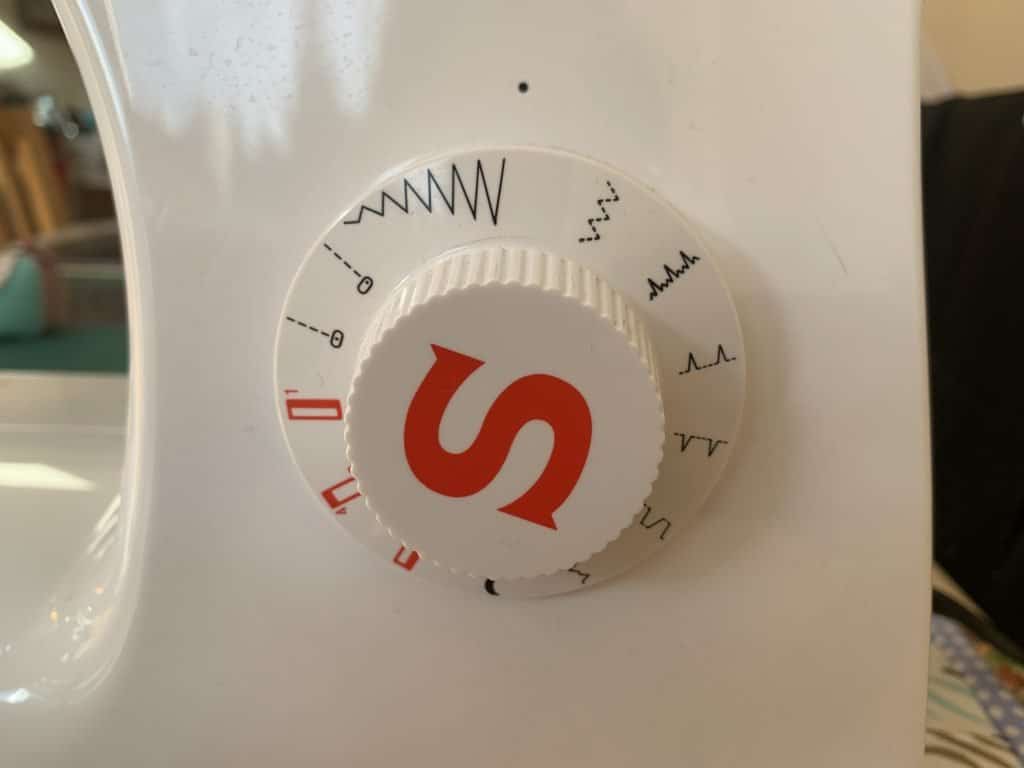
Make sure you test out the zig zag stitch before starting on your project, also make sure the cord isn’t too thick and the stitches go over the cord and don’t catch it – this part is very important.
Have at least 3 inches of cord available and unused on each end. Start sewing over the cord making sure you don’t catch it at any point. This time you want to put a backstitch on both ends to hold the stitches in place.

Once sewn start holding onto the cord at one end, pin the other through the cord and to the fabric to hold it in place for now. Hold the cord in one hand and push the fabric to the opposite end with the other.
You will start creating a ruched affect and the fabric will start to gather. Continue to gather the fabric while taking note of how full or loose you need to have your gathers.

Once you have gathered your fabric in place, sew a running stitch to hold the gathers in place and remove the pin from the cord. Pull out the cord to use again or store for your next project.
Method Three
The third and final option is probably the quickest but not always the simplest (not for me anyway!) This technique requires a gathering foot (the name gives it away right!)
The gathering foot must fit your sewing machine to enable it to work properly and efficiently.
Unfortunately, not all brands and styles of sewing machines have all the different feet or attachments so you may not be able to find one.

This technique is all done on the machine for you without a worry, no ruching fabric by hand or sitting for ages hoping your thread doesn’t break (unless you plan to play bobbin roulette, like I do!)
Simply place your gathering foot on your machine and set your stitch length. The higher the stitch length the more gathers you will get. Simply sew like you would usually.
Tip: If you are new to using a gathering foot or any new foot on your machine always look at how to use it, read instructions and test on a scrap piece of paper.
The foot will naturally gather the fabric and create small ruffles and pleats. Remember if you are only gathering a small area of your fabric to mark out the points with a fabric marking tool.

I hope you have found this tutorial on how to gather fabric on a sewing machine helpful and easy to follow. If you have any questions let me know in the comments.

