
How To Lay Out Pattern Pieces On Fabric
Some of the links below are affiliate links. As an Amazon Associate I earn from qualifying purchases. This means that, at zero cost to you, I will earn an affiliate commission if you click through the link and finalize a purchase.
There is a lot to learn when you decide to learn to sew, it isn’t something that can be easy to get into and once you are in you can feel like there is a lot to know.
But you don’t have to feel that way, some of the processes and techniques take a little more time to learn and need a little more explaining. When I first learnt to sew laying pattern pieces on fabric were simple for me (I loved jigsaws).
If you like jigsaws and puzzles this is a great way to understand the pattern pieces and layout options given to you on a sewing pattern.
The best way to layout pattern pieces on fabric is to follow the pattern directions for layout options. Alternatively, you can lay your patterns a number of ways to make the most of the fabric available from upside down, backwards and diagonally.
In this article, I am going to talk about the different ways you can layout your pattern pieces on your fabric, what different terms mean on the sewing patterns and the most important terms to pay attention to.
What Does Lay Pattern Pieces On Fabric Mean?
When your instructions indicate to place the pattern pieces on the fabric this is to arrange the pieces in the best format to get the most out of your fabric and to save waste.

This will require you to arrange the pieces onto your folded fabric and place them on like a jigsaw.
You will need to take your paper pattern and cut it out, lay it onto your fabric which should be folded in half lengthways to make the most of the fabric length.
Do All Sewing Patterns Come With A Pattern Layout Diagram?
Majority sewing patterns on the market whether they are store-bought or and indie sewing pattern found online or is pdf printed come with a pattern layout diagram.

There are a couple of different diagrams included in each instruction sheet that comes with a sewing pattern.
Some will come with more than others, this can depend on the pattern, the sizes and how many different elements are needed to create the garment.

For example, the pattern may require interfacing so you can often get a pattern lay specifically for interfacing to get the most from your fabric.
You can also get special layout plans for specific fabrics such as stretch knits or pattern lays.
How To Lay Out Pattern Pieces On Fabric
Pattern pieces once cut out are like different pieces of a jigsaw puzzle but don’t actually match up, you just need to make sure that they fit on a certain width of fabric with enough space around them to provide cutting room or seam allowance.
Here are som tips and things you need to look out for to enable you to lay your pattern pieces on your fabric and do it well. If you don’t manage it the first time and you need to take them off and try again, do it.
It is better to take your time to get the pieces in the right place and get more practice so you feel confident going forward.
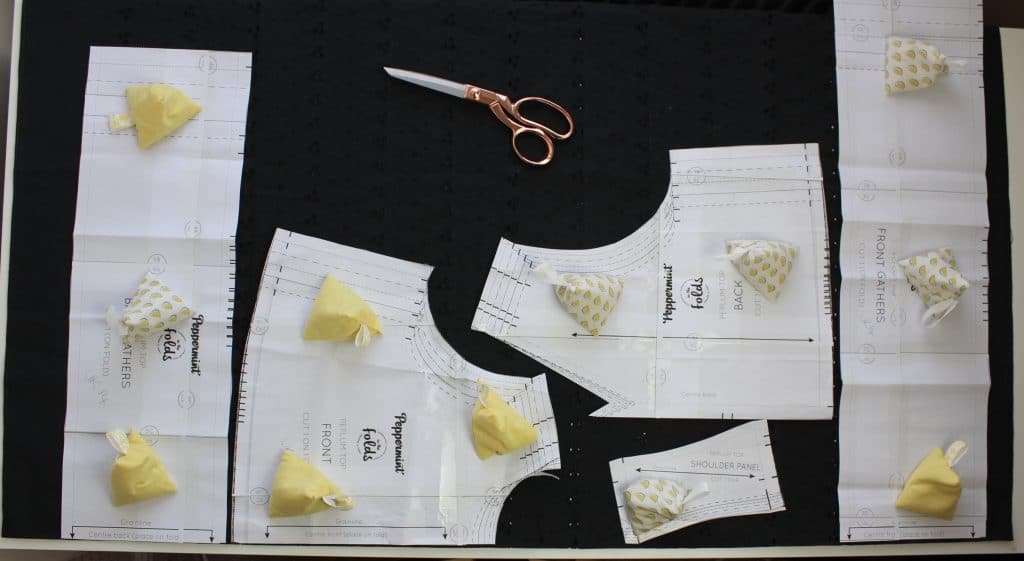
I used the Peppermint Magazine Peplum Top for this demonstration if you wish to download it for free click here.
Use The Pattern Guide Provided
Most sewing patterns will provide you with information on how much fabric you will need, what types of fabric work well with the garment makeup and any other parts you may need such as buttons, interfacing or zips.
Within the pattern you will also see different layout options for your fabric, this will be designed to get as much from your fabric as possible (especially if you bought just the right amount for the project).
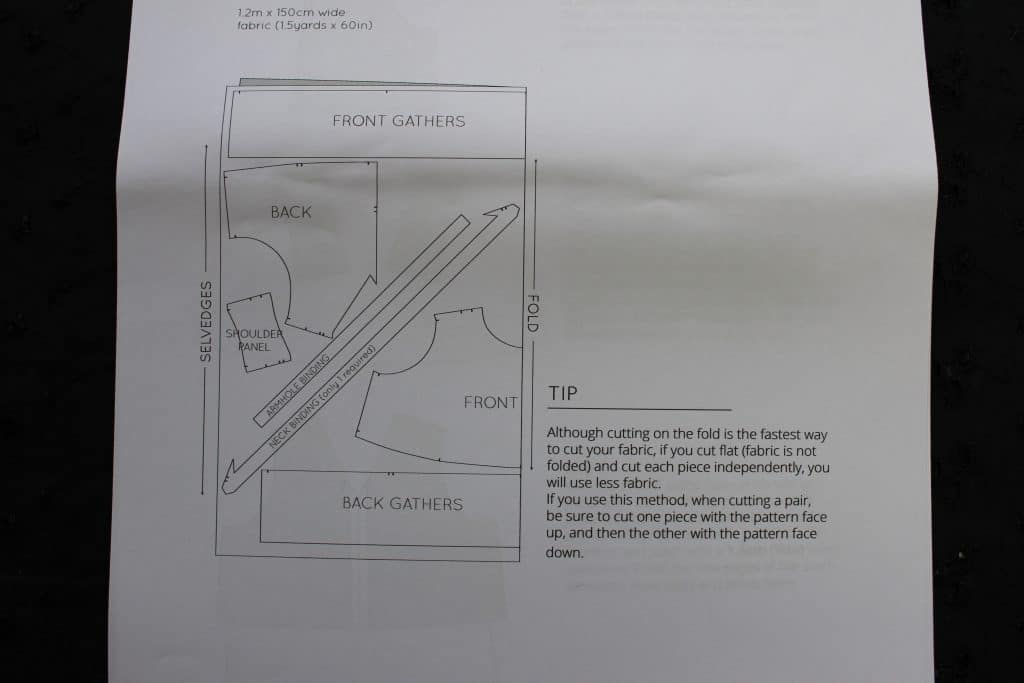
This will be provided to you in a number of ways in the form of small diagrams as shown in the image. Each diagram will show an alternative to the previous. The diagrams will explain that one will be for View A of the garment, one for View B and so on.
Depending on what variation (most patterns come with variations or a combination of garments in one pack) will depend on which you need to focus on.
You will also see another which may show you a bigger pattern layout, this will be for fabrics that are wider so make sure you know the width of your fabric before starting.
Pay Attention To Your Grainline
One of the most important parts of a pattern piece is the grainline. This is the line that runs down the pattern piece and indicates that the sewing pattern should be level from the grainline of the fabric to that line.
The grainline is important as fabrics have patterns, weaves, wefts and grains. All these parts can affect the way your fabric looks, hangs and works with the other pattern pieces.

To make sure the grainline is equal measure the grainline at the top and bottom from the line to the grainline edge of the fabric. It should measure the same all the way down and be even.
This will need to be measured on each of you pattern pieces that show the grainline shown on the pattern piece.
Does The Pattern Include Seam Allowance
When you are placing your pattern pieces onto your fabric you will need to know of you sewing pattern included seam allowance or not. This will be stated on the pattern so make sure you read it thoroughly before cutting your fabric.
There aren’t many sewing patterns that don’t include seam allowance but it is always a good idea to triple check before getting started. Also don’t forget to look at what the seam allowance is on the pattern.

If you a required to add seam allowance you would need to place your pattern pieces on your fabric and create a border around each piece. You would need to measure the seam allowance on from the edge of the pattern piece outwards. You can do this with a tape measure and chalk pencil.
If you are to add on seam allowance you would need to give your pattern pieces more space around each one to allow the addition of seam allowance. This can be a little more tricky to do and can make the process a lot slower.
Pieces With A Center Front & Center Back
Centre front and centre back pieces are actually one of my favourite things to have in a pattern.
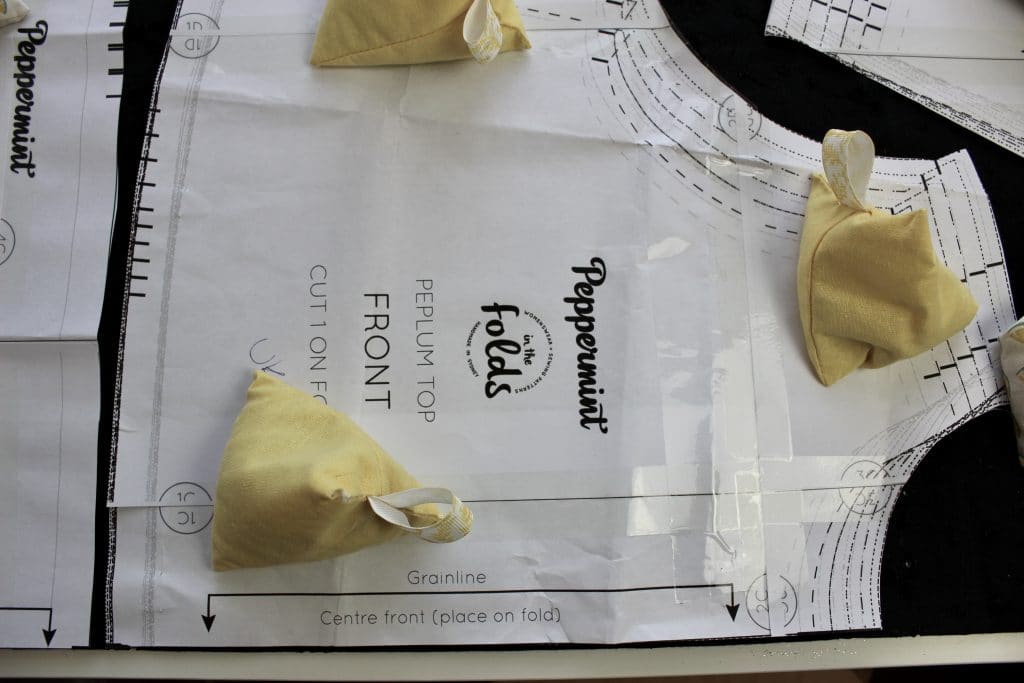
These are marked with the markings shown in the image below;
These are usually pieces that are used on the bodice front and bodice back to enable the garment to be seamless on the front.
Make sure these pieces are placed in place first as they can often take up most of the space or as important as they require a certain placement within the pattern layout.
This is also vital if you are using a patterned fabric you will want to position these pieces so your print sits right through the front of your garment.
Bias Pattern Pieces
Something that can often cause problems with pattern laying is bias pieces. As these need to be laid on the bias of your fabric, these are often the hardest pieces to lay out.
These can be the hardest part to layout but if you follow the pattern lay and the grainline you can adjust it to fit in the bias pieces.
Cut On The Fold
Something I love in a pattern is pieces that require being cut on the fold. These pieces are usually center front or center back pieces or pieces which require a seamless finish.
These pieces are to the lined up with the fold of your fabric, if you have lots of pieces that require a on the fold placement you may find you need more fabric in length to arrange these pieces.
Any piece that requires an on the fold placement will have the above mark on the pattern piece which is 2 arrows pointing outwards to the edge. Make sure the edges are even and use the solid line as the grainline.

