
How To Make A Fabric Crown
Some of the links below are affiliate links. As an Amazon Associate I earn from qualifying purchases. This means that, at zero cost to you, I will earn an affiliate commission if you click through the link and finalize a purchase.
Are you looking at how to make a fabric crown?
I love making these, they are super fun and easy to make and perfect to keep in the house for dress up days, parties and for world book day costumes – you know the ones that you forget about every year!
A fabric crown is a crown made of fabric but can be personalized, made in a number of colour combinations and reused time and time again.
I have plenty of other crafts you can do from making your own board games to Christmas decorations and even more on sewing tips and projects.
You can go the extra mile and add velco on the spikes so you can interchange the accessories and gems on the top or keep it simple. These are wonderful to make and so fun.
I have two nieces and two nephews (though at current time one is roughly 2 weeks old).
They all love to play in the wendy house at nannies house and play games and have fun together so I wanted to make these to add to that space for them to have more fun and really get into character.
Tools & Equipment
- Paper
- Scissors
- Thread
- Fabric – preferably two different patterns.
- Ribbon to tie at the back
- Sewing machine – though you can do this by hand
- Iron
- Pins & Sewing Clips
How To Make a Fabric Crown
You can make this tutorial as fun as you like or as plain as you like. I decided to show a different couple of versions you can make to change the styles up and give you ideas on what you can add.

I found some ribbon to use for the girls and decided to leave the boys quite plain. I might still let them add some detailing themselves which is something I think would be really fun to do together.
If you are a better learner from watching instead of reading I have a Youtube Video here.
Let the children choose what they want on their crown and let them help make it.
Step One
The first part of this tutorial is to create the crown shape. Whether you want something quite elegant and royal or something a bit more standard crown shape.

You can look at your favourite princesses to get inspiration such as Belle, Jasmine, Elsa & Anna or Cinderella. Or ask your children what they want it to look like.
Tip: Make the outline as simple as possible as it will be easier to sew.
Keep to block shapes and don’t have any cutout areas as that would be very hard to do.
The best way to measure how long the fabric crown should be, measure the head and roughly half it. I did this so then most of crowns would have a little space at the back to meet or expand.
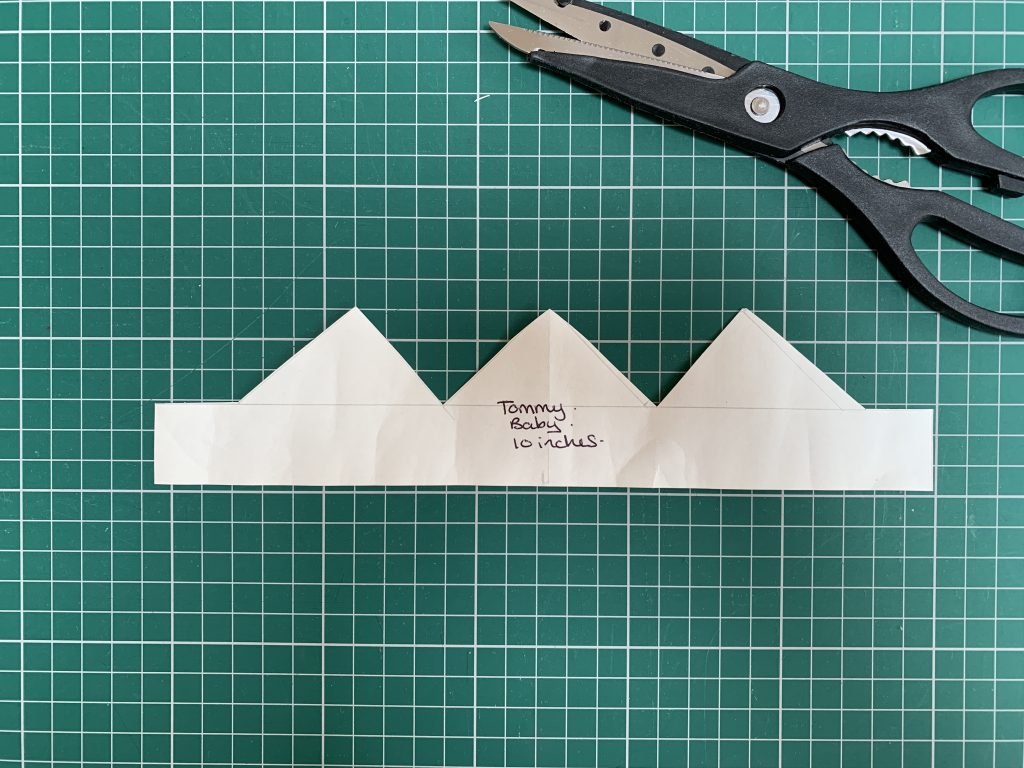
Each fabric crown is to tie at the back to enable it to grow with the person and even fit multiple people.
Step Two
Using your paper pattern cut the pieces into your fabric. You will need to cut one for the front and one for the back.

I chose to use contrasting fabrics for the front and back. I also added roughly 1/2 inch seam allowance around the shape of my crown so it would be the correct size I planned when finished.
Tip: If you don’t want to add seam allowance like I did, you can make your crown paper patterns lightly bigger and work that way.
If you are making a crown for anyone above the age of 3 or 4 I would add a layer of interfacing to help give the fabric some strength.
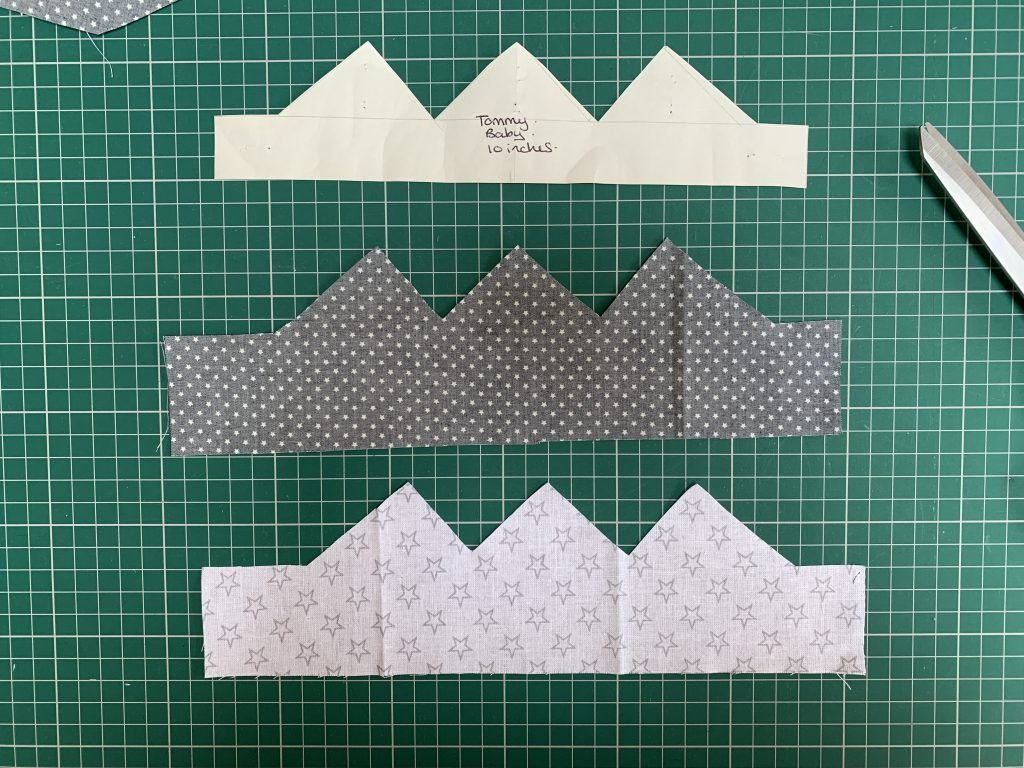
So in total you should have the following pieces:
- 1 piece in your front main fabric
- 1 piece in your backing fabric
- 1 piece of interfacing
Step Three
Start by ironing on the interfacing to one of your fabric pieces, it doesn’t matter which one as it will be encased in the middle.
Make sure the shiny side is placed face down on the wrong side on the fabric. Press and iron in place.
Trim down the overhanging interfacing if there is any to keep the edges neat ready to sew.
Step Four
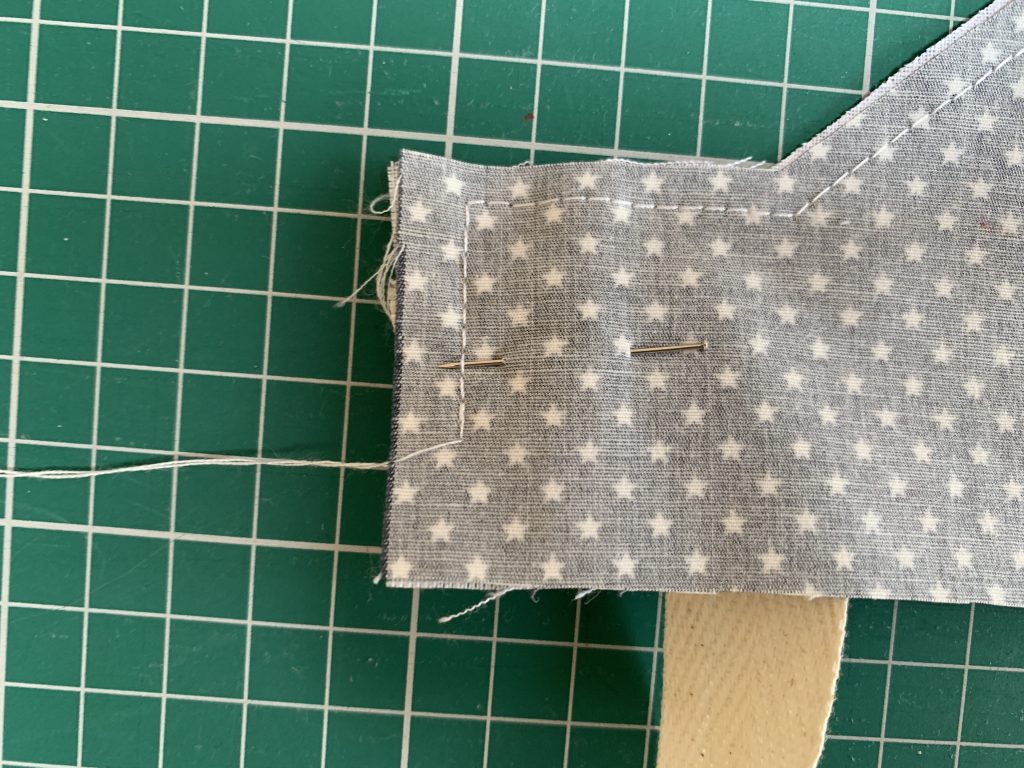
If you are wanting to add any sewn on decorations to your crown to make it personal or fun add those in this step before sewing the crown together.
Cut two strips of ribbon roughly 10 inches long, you can cut longer if you feel your fabric crown needs it.

Place one end of each strip into the shortest side of the crown. Pin into place and sew with a 1/4 inch seam. This will hold this into place while you sew the 2 crown pieces together.
Step Five
Layer the two fabric pieces together, make sure the right sides are facing each other.

Pin in place to hold the layers in place.
Tip: If you find pins hard to work with and you struggle, look at using sewing clips or also known as wonder clips. They are easy to handle and use for all types of projects.
Make sure the two loose ends of the ribbon are loose and are tucked downwards to come out of the bottom edge. This way they won’t be caught in the seam elsewhere.
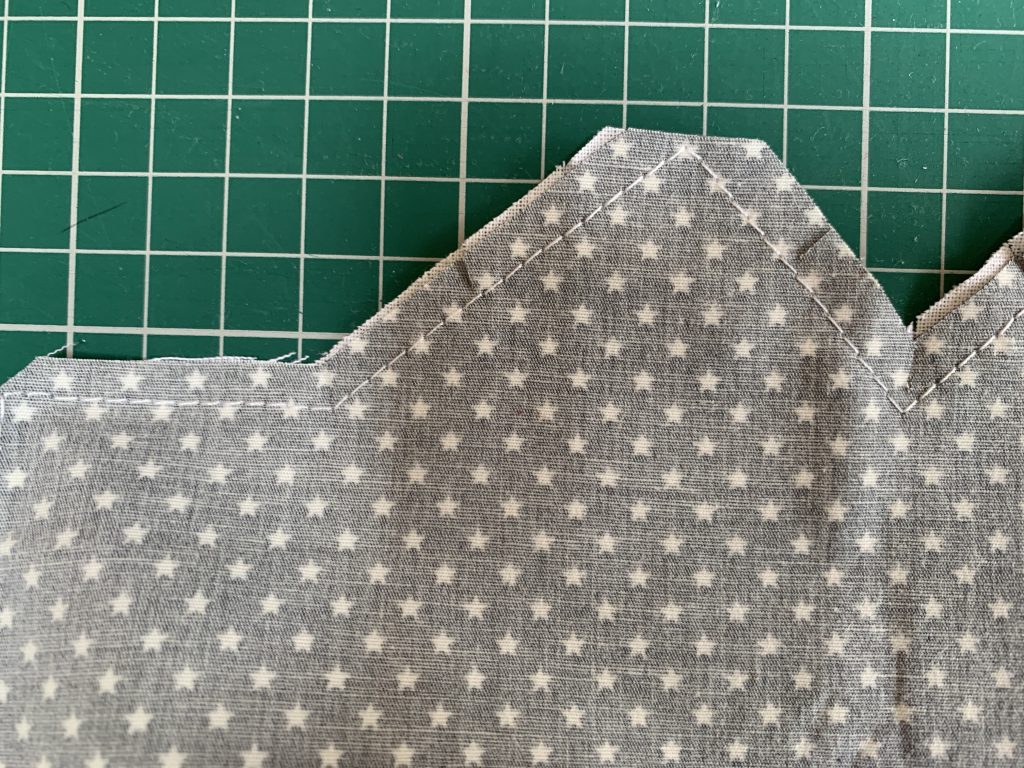
Sew around the 2 smallest sides and main part of the crown with a 1/4 inch seam. Make sure to leave the bottom seam open, you will need that to turn through later.
When you start to sew on your shortest edge leave a gap of roughly 1/2 inch, this will help turning the bottom edge under later on. Do the same for the other side.
Step Six
Once you have sewn the 2 pieces of fabric together, trim the edges to get ride of any unnesseccary bulk.
Cut the corners and tips of the triangles off to create diagonal or flat cuts. This will get rid of most of the bulk enabling the fabric to turn through and sit flat.

If you are unsure of different sewing terms I have a full post on the different terms, what they mean and how to do them.
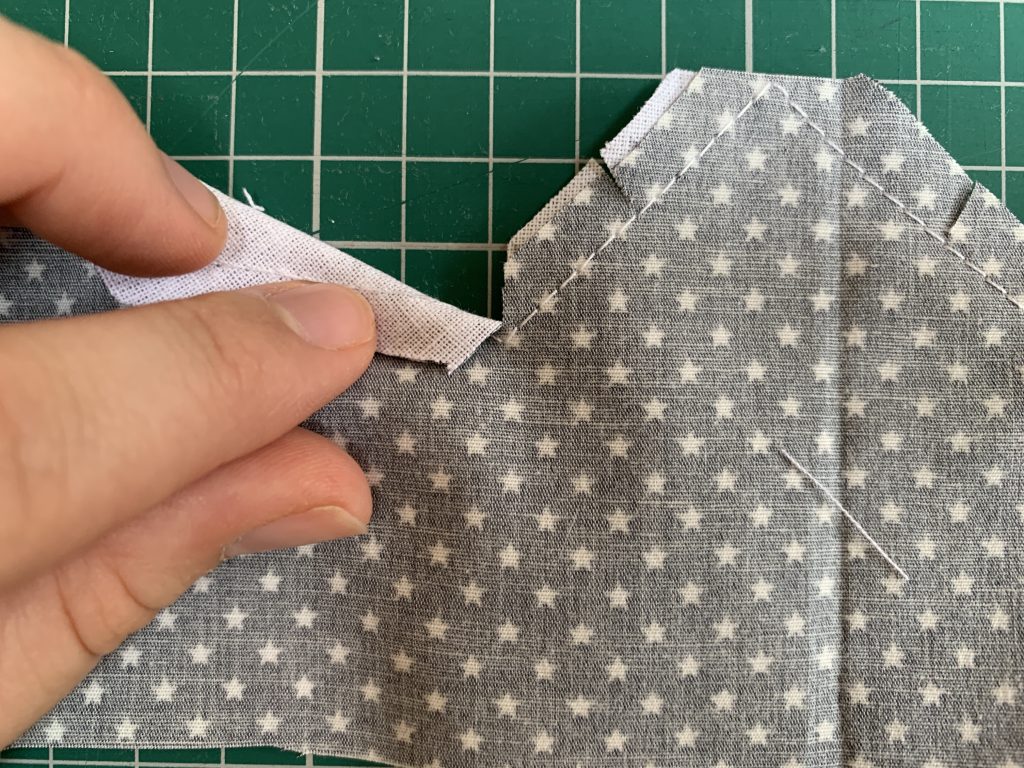
Snip notches into the v shaped sections of the crown. This will help the fabric to move and flex around the shapes and lay flat once turned through.
Step Seven
Turn through the layers to the right way out. Use a chopstick or end of a pen to help poke the points to make them sharp and crisp.
Roll the seams in between your fingers to make them crisp. Using your iron press the seam in place.
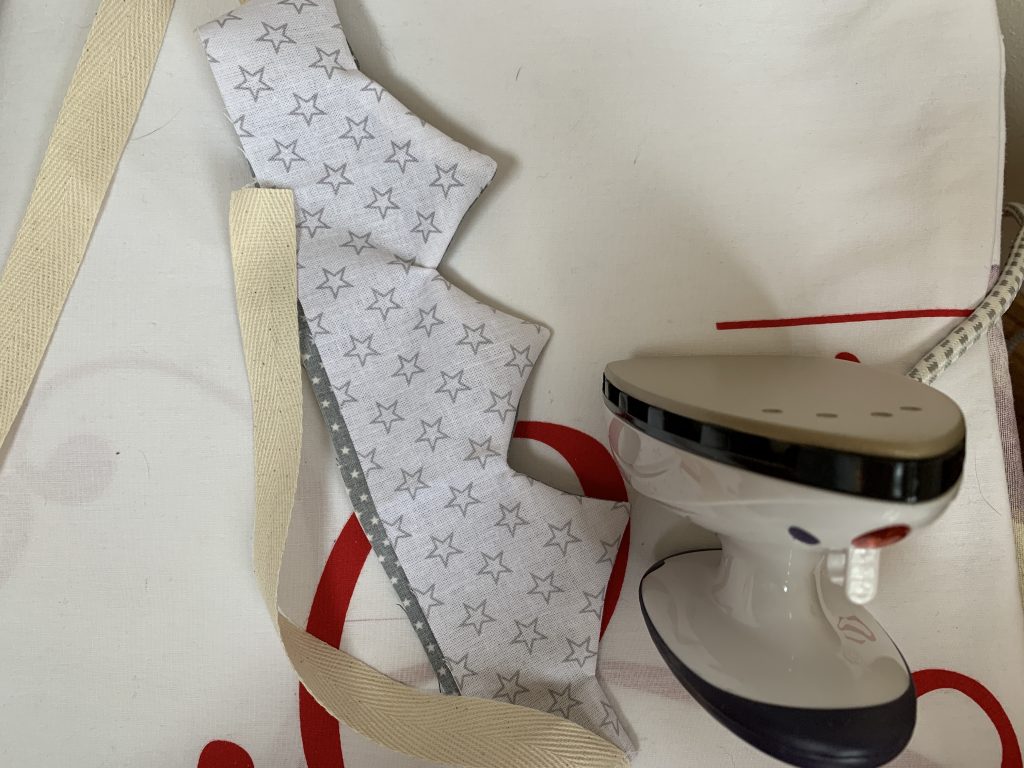
While using the iron open the bottom seam which is open and fold in 1/2 inch on both sides.
Iron the fold in place and pin in place.
Step Eight
Once the bottom seam is pinned together sew with a 1/4 inch seam allowance to hold in place.

You can carry on to top stitch the rest of the fabric crown to give it a decorative edge or leave it as it is.

Then you are done! Put it on and pick up your princess wand or princes sword.


I hope you have found this tutorial on how to make a fabric crown easy and simple to follow. I hope you have endless hours of fun making and decorating your own as well as playing with them. Don’t forget you can make these for anyone and any age and even any occasion!

