
How To Make A Pattern From Your Existing Trousers
Some of the links below are affiliate links. As an Amazon Associate I earn from qualifying purchases. This means that, at zero cost to you, I will earn an affiliate commission if you click through the link and finalize a purchase.
Are you looking at how to make a pattern from your existing trousers?
A great way of finding a pattern and finding something that doesn’t just fit you but also suits your body and you know you already love that style! I love using existing trousers to make new patterns to use over and over again.
One of the biggest perks is that when fashion changes and you can no longer find those harem pants you love or those big loose pj bottoms you have your pattern handy to make your own.
Having these patterns are a great way of saving money on buying a pattern and finding out its not for you. I have done it so many times it was heartbreaking, so I started to take record of the clothes I had and making patterns of them.
Tools & Equipment
- Tracing Wheel
- Chalk Pen – I use the Clover Chaco liner for smooth lines.
- Pencil
- Pattern Paper
- Pins & Sewing Clips
- Paper Scissors
- Tape Measure
- Iron & Ironing Board
How To Make A Pattern From Your Existing Trousers
You can use this method(s) on many items in your wardrobe but we will be focusing on how to make a pattern from your existing trousers.
You can do this in two different ways. One is using the garment as a template as a whole. This is the best way to do it if you are still using the trousers and wearing them.

This way isn’t as accurate but it still works very well, there may be some areas in the trousers that will need a little guesswork or measuring to make the paper pattern.
The other way is to carefully unnpick all the seams of the trousers to create the idividual pieces. Iron each one and then use them to create a template.
The second way is much more accurate as you can get more acurate lines and measurements of darts, folds, gathers and waistbands.
Step One
Make sure your trousers are well ironed and pressed, all seams need to be pressed and in line as these are going to be the main lines we follow to create the pattern.

Turn the trousers inside out so you can clearly see the seams.
Tip: If your trousers have french seams or concealed seams this may be a little harder but you will just need to add a little extra seam allowance to allow you to recreate the same effect.
If you have any pockets make sure those are also pressed along with hems and waistbands.
Step Two
Start by laying out your pattern paper, if you are using paper that has been folded iron it under a piece of fabric on low heat to work out the folds and wrinkles.
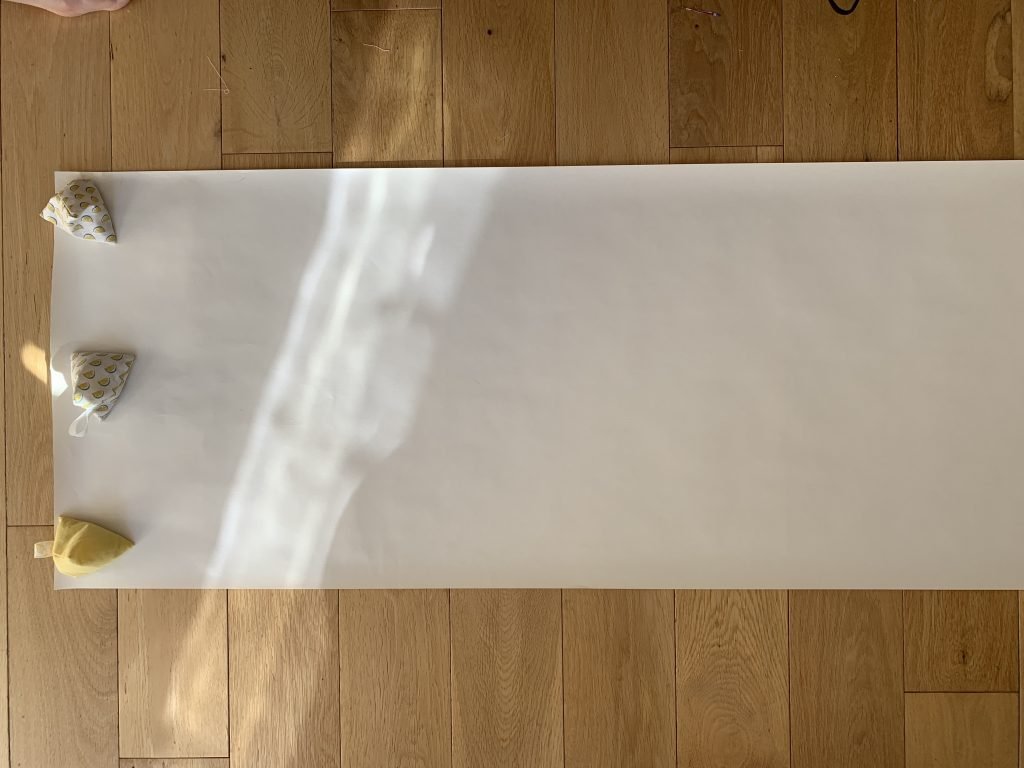
Lay the paper on your floor or work surface, choose a surface that is large enough for the trousers to lay on comfortably. Make sure you can also reach over the table or surface to reach all angles of the trousers without moving them.
Dicecting a garment to create a pattern it like working with pieces of a jigsaw. Working out the different shapes and where they fit.
Step Three
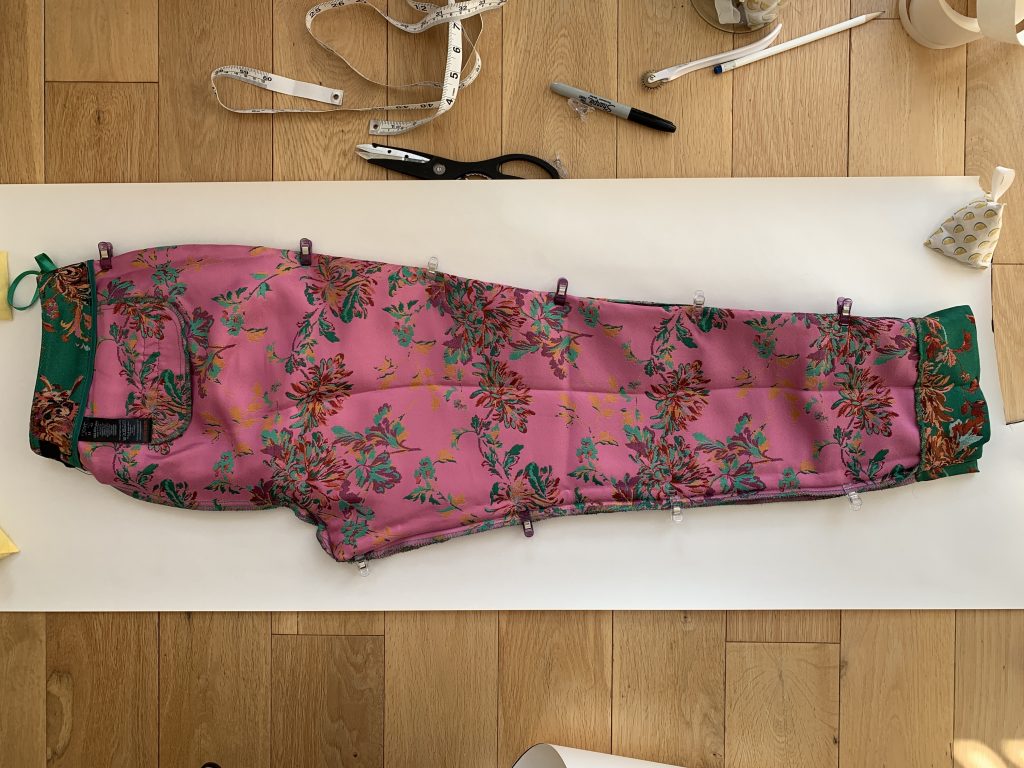
Fold you trousers in half with the front facing out.
Line up the legs and seams so that you can clearly see the seam line down each side.
Pin or clip together in place so you can keep the structure and shape in place while you trace around the pattern.

If your trousers are very basic with one piece making up the front leg then you won’t need to use the tracing wheel. If you have a seam running across or down the leg of the trousers you will need to mark this with your tracing wheel.

Draw around the leg shape following closely to the edges to get an accurate size and shape. When you are tracing make sure you aren’t adding in the added length of the waistband as that will happen later.
Step Four
Once you have done the front leg make sure you write on information to record the pattern. Remember to write on :
- Date Made
- Size Of The Trousers
- Style
- Pattern Piece eg Front Leg, Back Leg, Waistaband & Pocket
- Brand – not important it may help you remember what trousers they are from.
- No added seam allowance – this will mean each time you make these you will need to add on at least 1/2 inch seam allowance to create the correct fit.
- How many you need to cut – for example for the front leg you will need to cut 2.

Once you have recorded this information move onto tracing the back leg piece.
Tip: If you decided to pull apart the garment you will be able to use the seam allowance and won’t needed to be added to your pattern in teh future. It will already be included.
Take out the pins and fold the trousers in half the opposite way. Line up all seams and edges to create a clear view of the back leg piece.
Lay onto the pattern paper and trace the edges with your pencil. Mark with the above information.
Step Five
If your trousers have a waistband or cuffs on the legs simply take the measurement from the top to the sewn line.
Then measure the entire circumference of the waistband.

Double the width/ depth of the waistband to create the right width as this is folded over the top of the trousers.
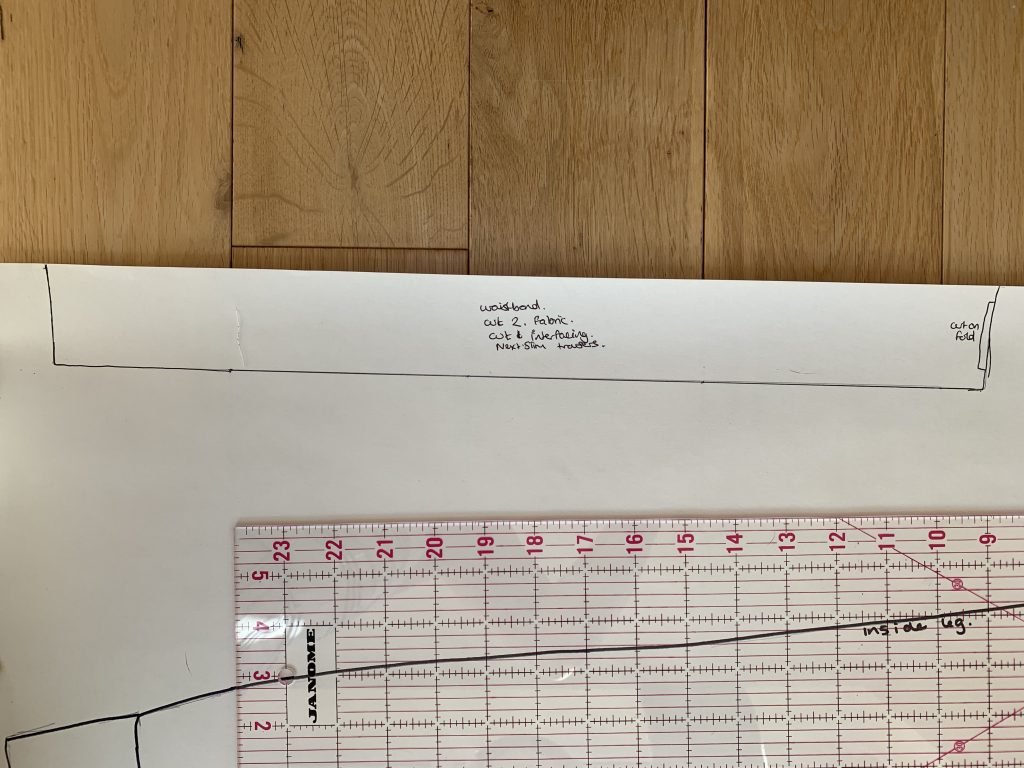
Create this on your pattern paper and label waitstband piece.
Step Six
If your trousers have any other special features such as pockets or plackets you will also want to make a pattern for those.
To create the pocket pattern piece, keep your trousers inside out and pull away the pocket (if you can) place it onto the paper and hold in place. Use pins or a pattern weight.

If your pocket is sewn into the waistband and not free to move away you can slide under a piece of paper larger than the pocket. Use a pattern weight to hold the layers in place and trace around the shape.
Using the tracing wheel follow the seam of the pocket to create the indentations on the paper on the back. Once you have gone around each seam remove the paper and draw the lines using a pencil.
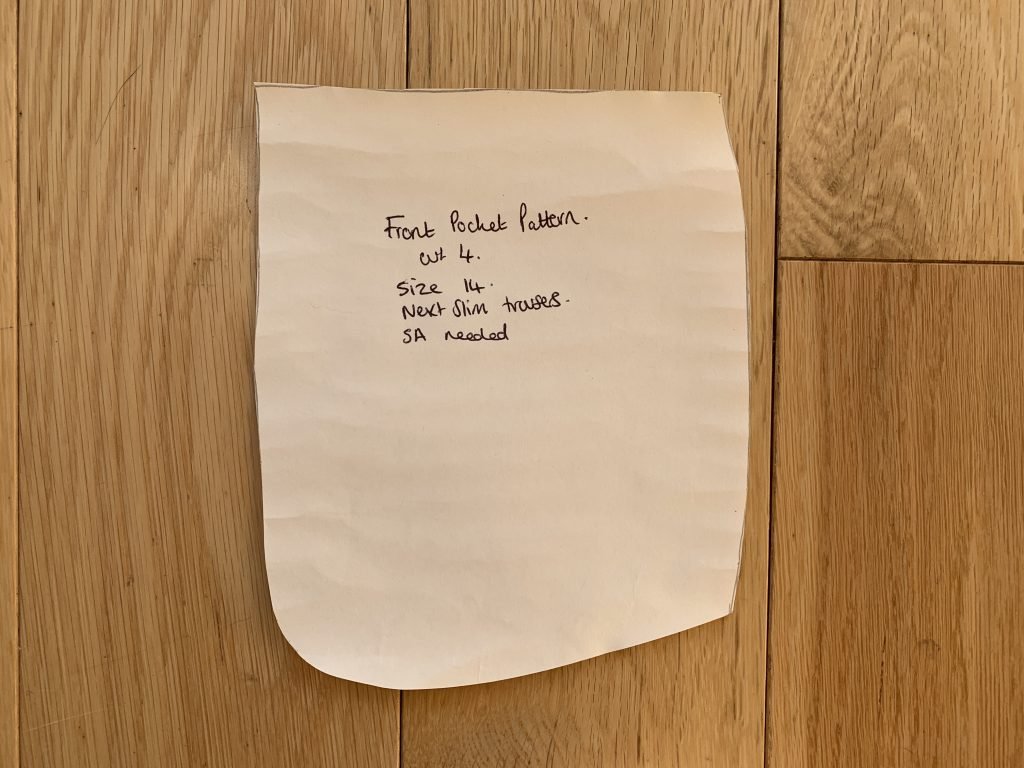
Follow the indentations like a dot to dot to create the shape of the pocket. Write on the information of what it is and how many you need to cut.

Repeat the same process for things such as plackets, invisible pockets, and small details on the trousers. Some parts you may have to measure and draw out if they are too hard to trace.
Step Seven
You can mark each piece with triangles like traditional sewing patterns so you can understand what pieces fit together.
If you are new to sewing you can find out many of these terms and learn how to read a sewing pattern here.
Once you have traced around all your pieces, cut them out and fold away into an envelope or plastic sleeve. You can add a drawing or picture of the trousers to use on the front to remember what style they are.
If you want to know more about how to store sewing patterns or how to organize your sewing patterns I have plenty of information to help you.
I hope you have found this tutorial helpful

