How To Make An Easter Carrot Treat Bag
Some of the links below are affiliate links. As an Amazon Associate I earn from qualifying purchases. This means that, at zero cost to you, I will earn an affiliate commission if you click through the link and finalize a purchase.
Easter is such a fun time of the year with the weather is getting better, kids doing Easter egg hunts and there’s loads of chocolate! What’s not to love! We love all of this but we don’t give the kids Easter egg as they get so many, so I decided to put together a little Easter carrot treat bag tutorial.
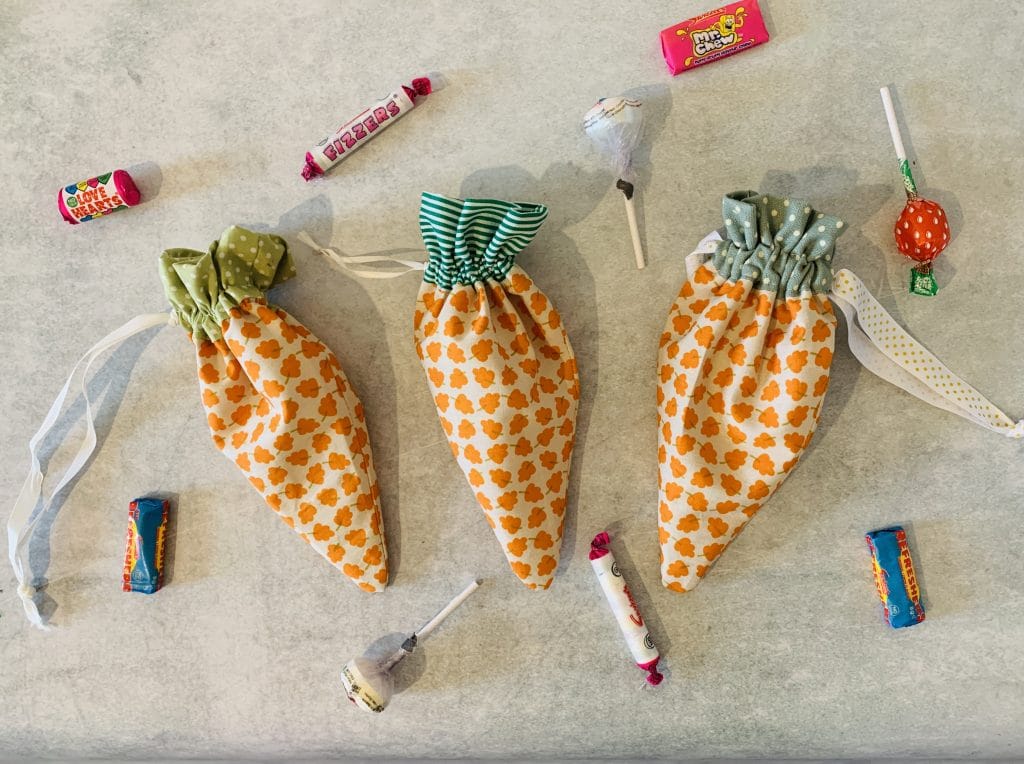
Giving them a different kind of treat helps spread out the sugar. I like giving them something different as it is fun, it lasts longer than chocolate and I can recycle my leftover sweets from Halloween!
Only kidding… As I started getting older my mum would ask if I wanted an easter egg or would I like something else. It started when I found a bunny soft toy in a shop and asked if I could have it. Mum offered me a trade of having the bunny instead of the Easter egg and I was more than happy with that!
Tools & Equipment
- Scissors
- Thread
- Fabric Marking Tool
- Fabric – I used some I had in my stash
- Template – I will show you how to make it.
- Ribbon or Cord
- Small Scissors
- Seam Ripper /Unpicker
- Iron & Ironing Board
You can find a full list of equipment, tools, and gadgets I use and recommend.
How To Make An Easter Carrot Treat Bag
These are super easy to make and fun to use for Easter egg hunts, for gifts or for storing treasure. I love that these can be used as an ornament, gift or just for fun. I love making little handy sewing projects like this as I get something out of it and so do the kids!
Step One
To start off create a template to use for the carrot body and the carrot top. I decided to create a template on paper so I could use it over and over again.
Tip: To Make sure your pattern is square and accurate use a quilting ruler or gridded pattern paper.
Buy Here: Prym Gridded Pattern Paper
Buy Here: 6.5 – 24 Inch Quilting Ruler
Or if you are a little more in the flow, use regular A4 paper and use a ruler and pencil.
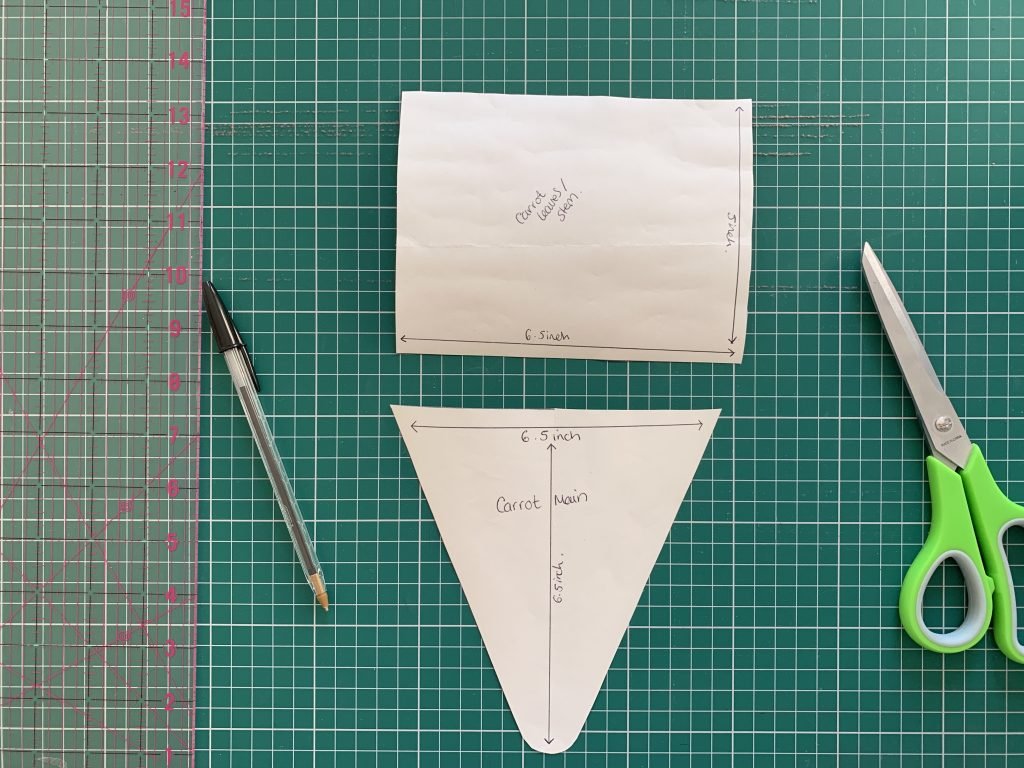
Start by creating the carrot, I used a triangle quilting ruler to create the initial shape of the carrot body. I then curved the bottom to make it a little softer and easier to get the sweets from the bottom.
Tip: You can make a template or go ahead and make this straight into fabric.
Though for best results cut out a paper template first – that way you can use it again in the future.
I made the carrot body 6.5 inches tall and 6.5 inches wide at the widest point (the top).
I then moved onto making the rectangle for the carrot top, I made this 6.5 inches wide and 5 inches tall. I wanted to make sure I had plenty of room to hem the top edge and create a full carrot top stem.
Step Two
Cut out your pieces into your chosen fabric, you won’t need to include added seam allowance as this will be factored into your paper pattern.

Tip: For best results make sure you have ironed your fabric before cutting.
This will eliminate any wrinkles and kinks that might cause trouble later on.
For each carrot, you will need to cut 2 carrot body pieces and 2 carrot top pieces.
Step Three
Piece together the top edge of the carrot body and the longest edge of the carrot top pieces.

Lay them right sides together with the edges in line.
Pin into place and sew with a 1/4 inch seam.

Step Four
Once you have sewn the pieces together take to the ironing board.
Run your finger through the seam so you are parting the two sides. Follow with the iron, this will help keep the fabric from bulking up and neaten the front side.

Give the fabric carrot a good press and make sure all loose threads and wrinkles are out.
Repeat for the other piece.
Step Five
Now we are going to hem the carrot top, we want to create a nice clean edge to stop fraying and to make it look neat.
You can do this using bias tape or by creating a 1/4 fold, use your iron to press it into place.
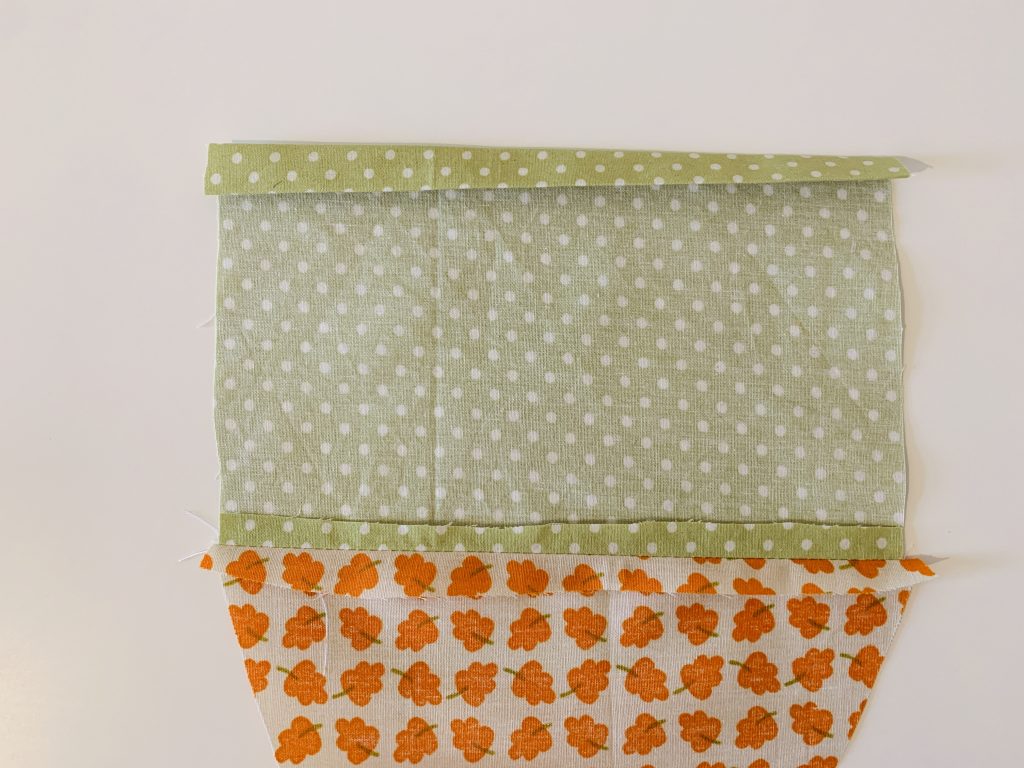
Once you have created the first fold, fold over again to contain the raw edge. Press into place with the iron and pin or clip.
Sew the edge with a 1/4 inch seam to hold into place. You can use matching thread or contrasting colour for fun.
Step Six
Take your two pieces and place right sides together, line up your seams from the previous step to make sure you are creating a seamless shape.

Pin into place and sew together with a 1/4 inch seam.

Step Seven
Before turning your bag right sides out, you will want to clip into the curve on the tip of the carrot. This will alleviate any bulk and let the fabric lay flat.

Top Tip: You can also use pinking shears that will also create a similar affect and work just as well. They tend to work out easier and quicker.
Be sure not to cut into your freshly sewn seam.
Step Eight
Now you want to fold the top part of your carrot back to meet the inside, line up with the previous seam of the carrot body and carrot top.

This will create a double layer of fabric to enable you to create a channel for the ribbon/cord to run through.
Sew two lines parral to each other big enough to fit your ribbon through.

Top Tip: Use a ruler and chalk pencil to mark your lines so you stay on track and don’t go too narrow.
Step Nine
From each side seam, you want to gently seam rip the seam open. Only between the two lines you have just sewn. This will make an opening for you to thread through your ribbon/cord.

Tip: Use a safety pin hooked onto the end of your ribbon/cord to use to thread it through the fabric.
Keep pushing and pulling, remember to pin the end to the outside so you don’t loose it.
Create a knot or tie at the end of your ribbon and there you have it. A finished Easter carrot treat bag!
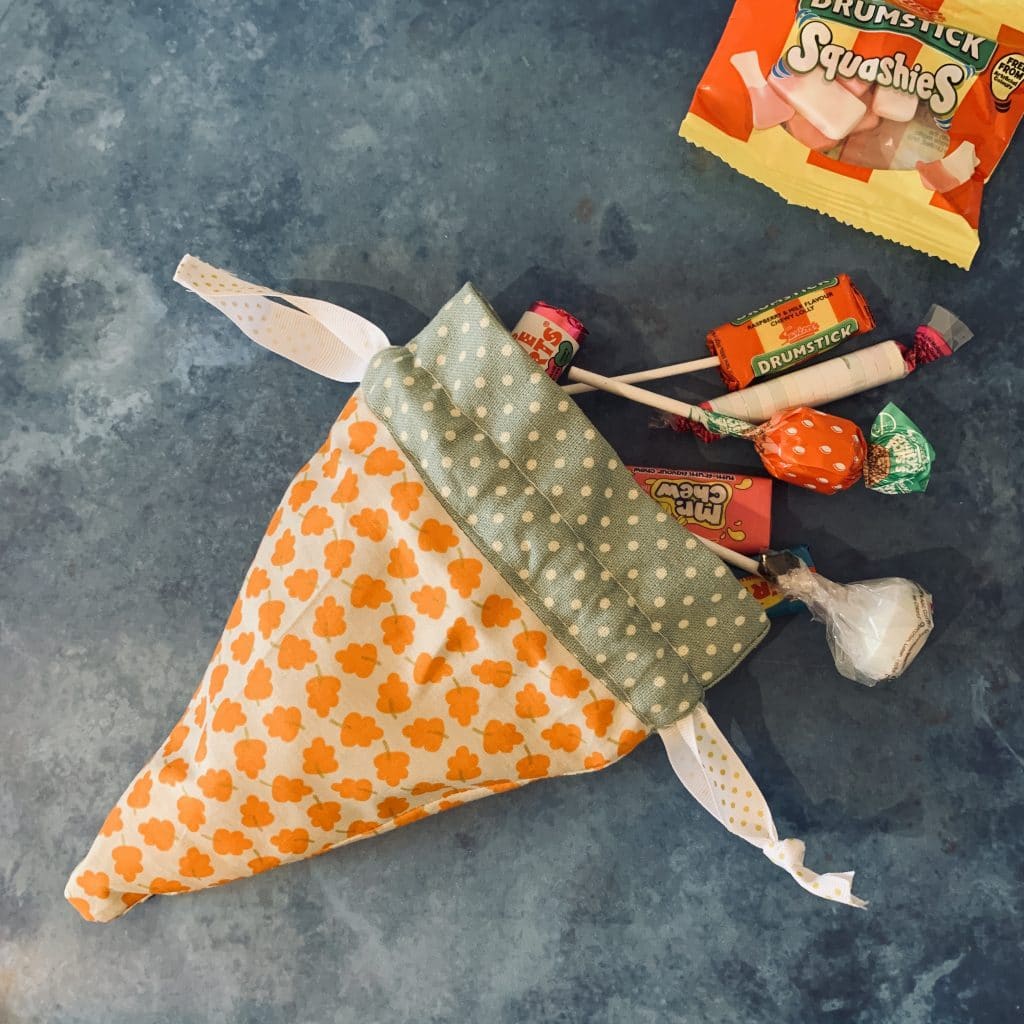
These are super fun to make and easy to do for a little party. You can swap out the drawstring back for a one-sided pull handle or a little handle for the top.
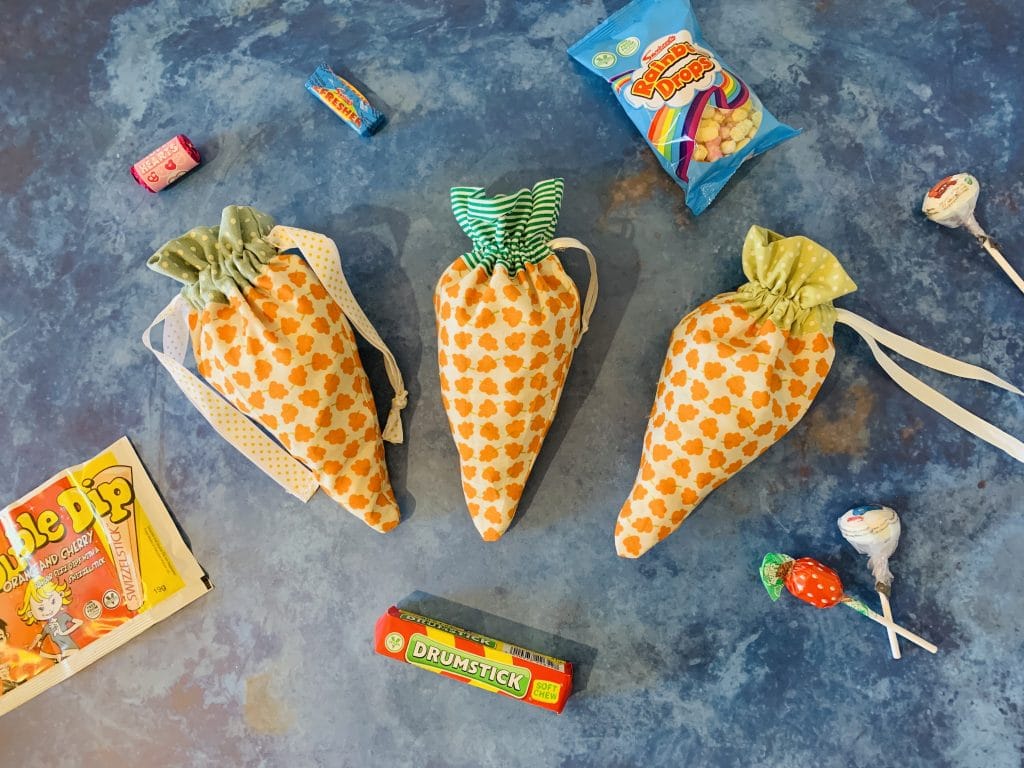
I loved making these and you can make them in a number of sizes from teeny tiny to giant-sized if you wish. They would be super fun to use in an Easter egg hunt or even a party. I hope you have enjoyed my tutorial on how to make Easter carrot treat bags.
