
How To Make An iPad Case Out Of Fabric
Some of the links below are affiliate links. As an Amazon Associate I earn from qualifying purchases. This means that, at zero cost to you, I will earn an affiliate commission if you click through the link and finalize a purchase.
Wondering how to make an iPad case out of fabric?
There are so many different styles of fabric iPad cases and many that are both practical and cute. I love making things that make great gifts or are useful in the long run and this is no different.
You can even convert this tutorial into a handbag, purse or cute little folder to hold your sewing supplies or notebook and pen.
Tools & Equipment
- Scissors & or Rotary Cutter
- Thread
- Pins or Sewing Clips
- Bias Mouse or pre-made bias binding
- Fabric for binding
- Fabric for lining
- Main fabric
- Interfacing
How To Make An iPad Case Out Of Fabric
I love spending the time to make something that is purposeful and useful. Learning how to make an iPad case out of fabric is great as you can use the skills and basic shape to create so much more.
For example, I thought about using the tutorial to make a peg bag, purse and hand bag in a larger size.
Let’s learn how to make an iPad case out of fabric shall we?
Step One
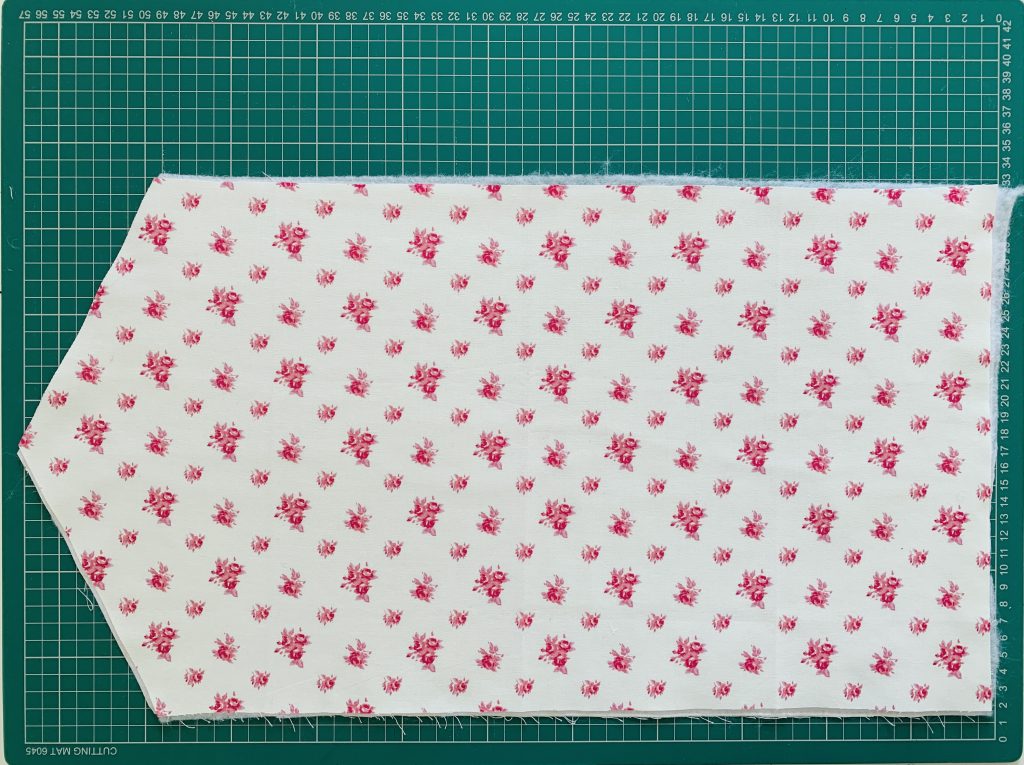
First you will need to create your paper pattern. I like to make a pattern into paper first so you can do a rough of sizing and fit before cutting into your fabric. You can also save the pattern for another time which I always like to do.
Start by measuring the length and width of your iPad.
If you are making this as a gift, you can find out the specific iPad or tablet model and google the measurements and use that as your base.
Take the width measurement and multiply by 3. As your iPad/tablet will sit longways in the case we need to make the case fit over that length 3 times. Add on 2 inches for seam allowance and room for the iPad to get in and out smoothly.
Also add 2 inches onto the length which will be come the width of you iPad case.
Draft your pattern onto paper, and cut out.
Tip: To create a really accurate and square template use a quilting ruler or set square ruler. This will help create an accurate right angle and straight neat lines.
Step Two
Transfer your paper pattern onto your main outer fabric. Cut one piece in your main fabric and one piece in your lining fabric.
Tip: Make sure your fabric has been pressed and ironed to make sure all wrinkles are out and the fabric has been given a chance to shrink to natural size.
Cut two pieces into the interfacing, this will help give the case a little more stiffness and body while carrying around the iPad. Alternatively cut one piece of your wadding/batting.
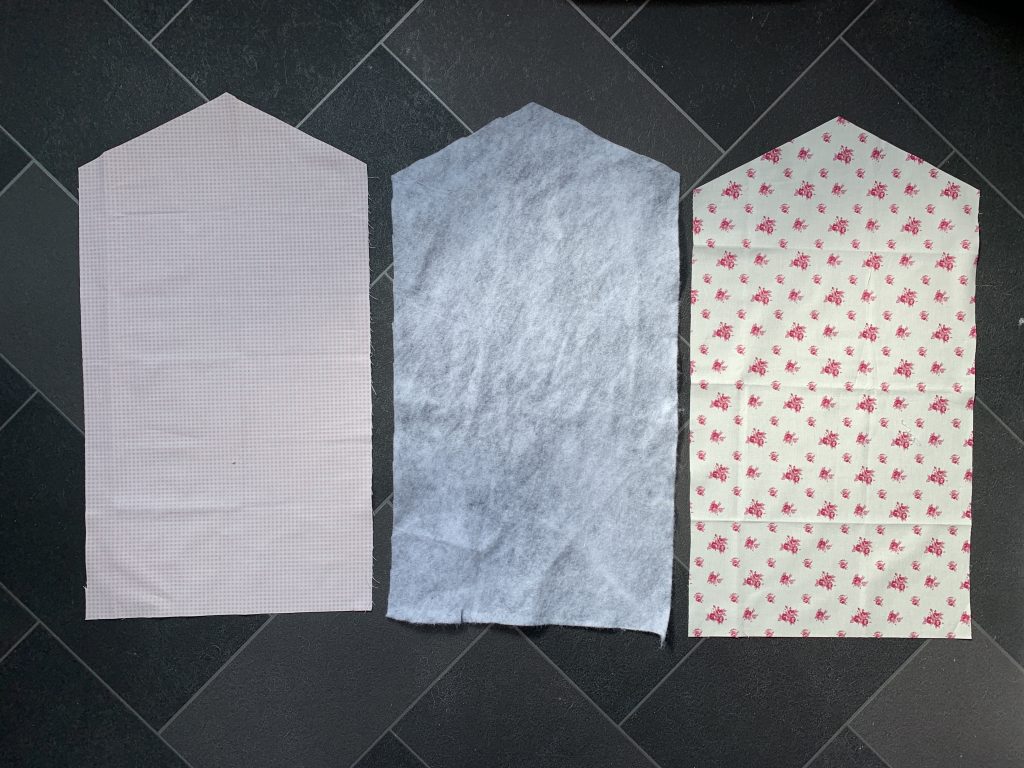
You can alter the thickness and weight of the interfacing if you wish to have a little softer case or heavier for a more rigid case. Change up the thickness of your middle layer to suit your needs.
Step Three
Iron your interfacing to the wrong side of your main fabric and to the wrong side of your lining fabric.
This will create a nice firmness and sturdiness to both sides of your iPad case.
If you are using wadding layer together the 3 layers, main fabric right side down, wadding/batting and then lining on top right side facing up.
Pin or clip around the full edge of the iPad case piece. Making sure the fabric is flat on both sides and smoothed out.
Step Four
Sew together with a 1/2 inch seam allowance.
Tip: If you struggle to keep a good neat measurement while sewing, place a piece of tape 1/2 inch away from your needle on the base of your machine.
Once you have sewn all the way around. Trim off the loose threads and any bulk or uneven lines around the edges.
Step Five
This is the step in which you create your bias tape. If you are using bought bias tape or you already have some made. Skip to step six.
If you are making your bias tape choose a matching fabric or contrasting to the 2 you have used.
If you haven’t made bias binding before you can check out my helpful tutorial for a full breakdown of how to make it step by step.
If you are making your bias tape for this project I suggest using a 2 inch thick binding to create a 1/2 inch finished binding.
Tip: When making bias tape use a quilting ruler and rotary cutter to create smooth and precise cuts.
Step Six
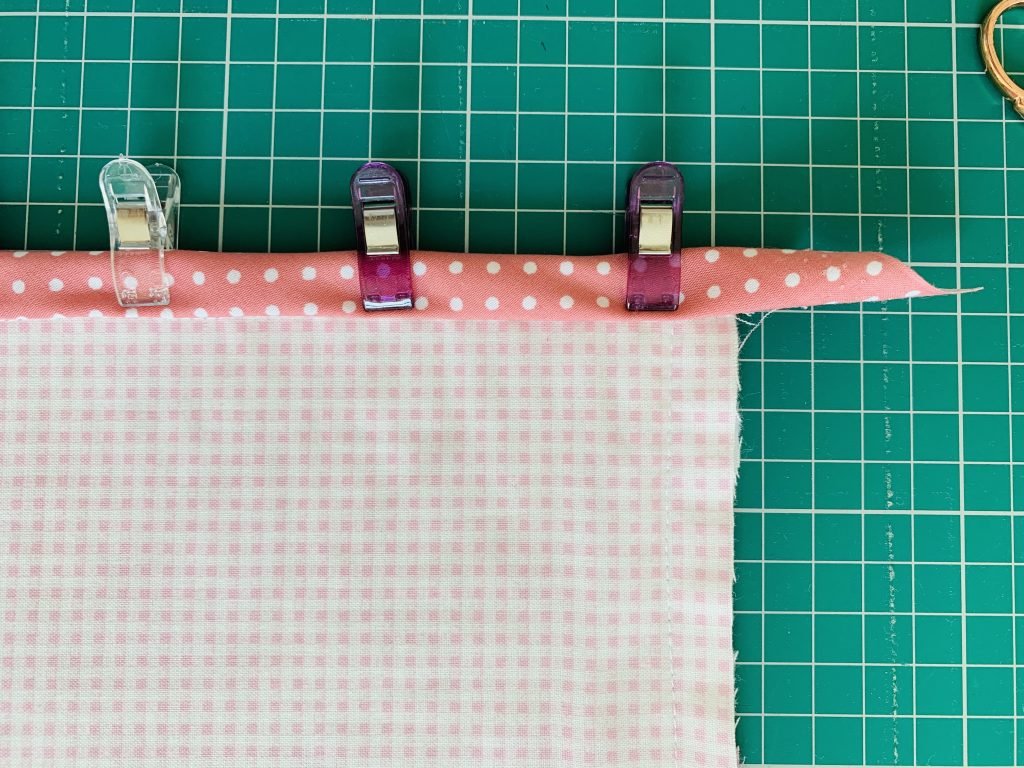
Using your bias tape run a section across the bottom edge (straight edge). This is eventually going to be folded up to create the pocket in which the iPad will sit.
Start by opening the bias binding so that it is flat. Place the right side down onto the right side of your iPad case. Line up the edges so that they are flush and there is no overhand.
Pin or clip into place, personally I like using clips as they are quicker and easy to take out during sewing. This is just personal preference, work with what you have and are most comfortable with.
When you have finished take your project to the ironing board. Pullover the bias binding so you can create a crisp clean edge with the iron.
Pull the binding to the opposite side and fold, using the natural line you created earlier with the bias mouse.
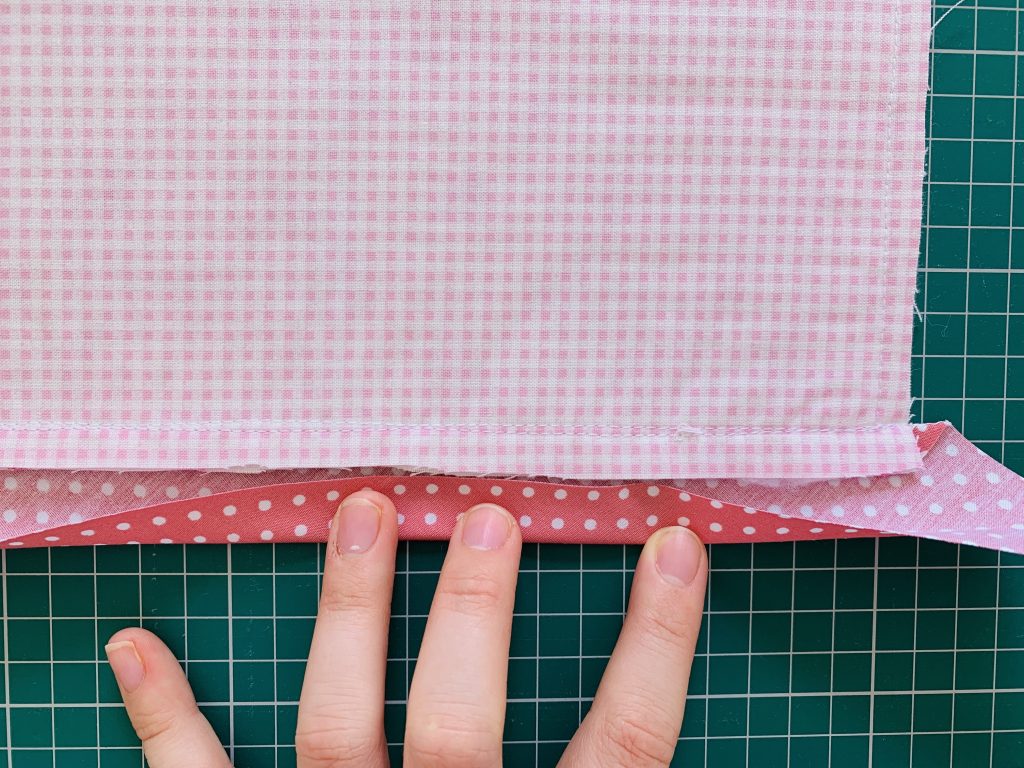
Fold along that line and fold down onto the fabric. This will create a neat edge and a binding of 1/2 inch approximately.
Tip: When you create the fold on the opposite side of the sewn binding, line it up with the previous stitch line.
This will hide that stitching along with giving you a good guide to work on.
Pin or clip into place and either hand sew by slip stitching in place with a matching thread colour or sew in place by sewing machine.
Step Seven
Fold the bottom of your iPad case up the width from your original measurements, for example, mine was 8 inches. Line up your edges to create an even fold and smooth lines.
Pin or clip into place, make sure you folded it with your lining on the inside. The lining fabric should be facing up and the folded pieces overlapping.
Sew into place with a 1/2 inch seam.
Step Eight
Once you have sewn the fold in place, cut off any rough edges and loose threads.
Then repeat step six with binding but covering the sides. You won’t need to bind the bottom length as that is already neat from the fold.
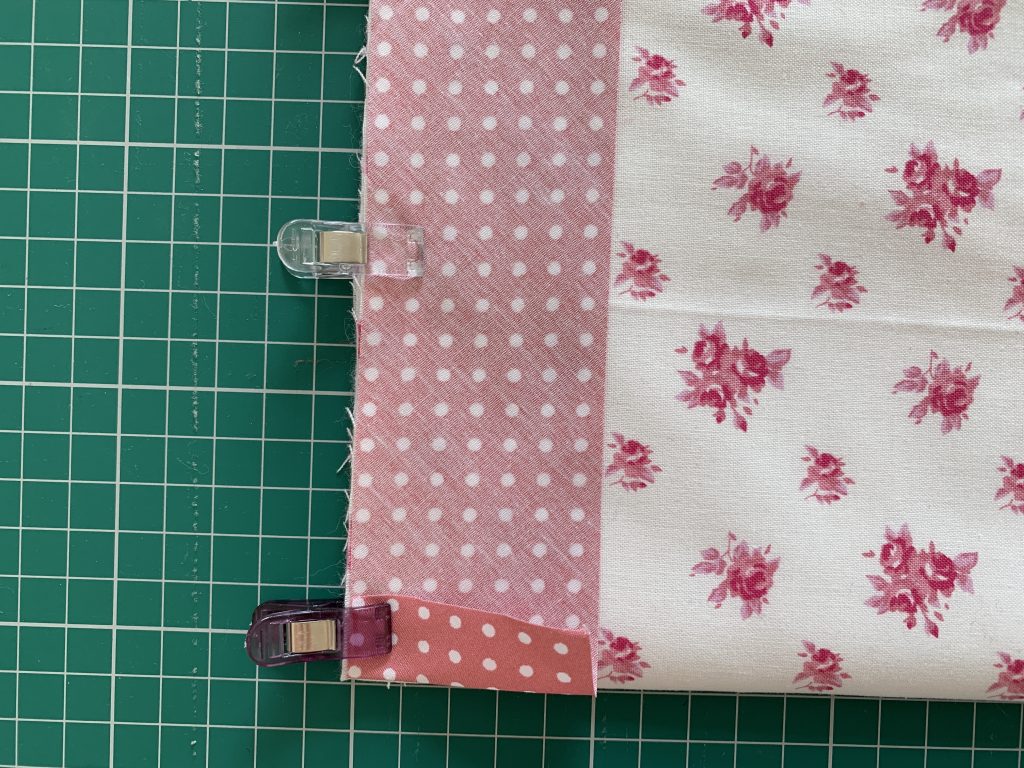
Start on one edge and fold the raw edge in to create a neat fold. Pin or clip into place and follow the same process as step seven, opening the binding and sewing in the ditch first.
Work your way around the edge, once you get to the 3 points pin as close to the point as possible then fold the binding to follow the new seam.
This will create a ripple at first but the extra fabric will be needed to stretch over the point later on.
Once you have successfully pinned your binding into place, sew with a 1/2 inch seam and follow the groove in the binding again.
Tip: When pinning on the binding make sure you leave 2-3 inches on the length, don’t cut the binding to fit as pinned as this can dramatically change when you sew it into place.
It may need less binding or need a little extra, leave some binding on the length to be able to make adjustments while you sew.
When you reach the corners while sewing simply sew to the point, lift your foot but leave your needle down. Move the excess fabric to the sewn side and put your foot back down. Carry on sewing along the groove.
This allows the fabric to stay flat and smooth but keeping the fold in place to fold over later on. If you wish to avoid working with points, you can always adjust your corners to curves as they are easier to bind.
As you approach the end of the binding clip of the excess length but leave 1/2 inch behind. Fold this over to create a neat edge as you did at the start of the binding.
Step Nine
Once you have sewn the binding in place, take out all pins and clips.
Iron the binding over the raw edge and pull over to the opposite side.
Create the natural fold within the bias binding and clip into place.
The corners and points will need to have a small fold/pleat made to create a nice flat binding. This is natural as there is too much fabric to stretch and even out amongst the space.
Simple fold the binding and clip into place. You can sew this into place by hand or on the sewing machine. If you sew by hand, use a slip stitch and matching thread.
Step Ten
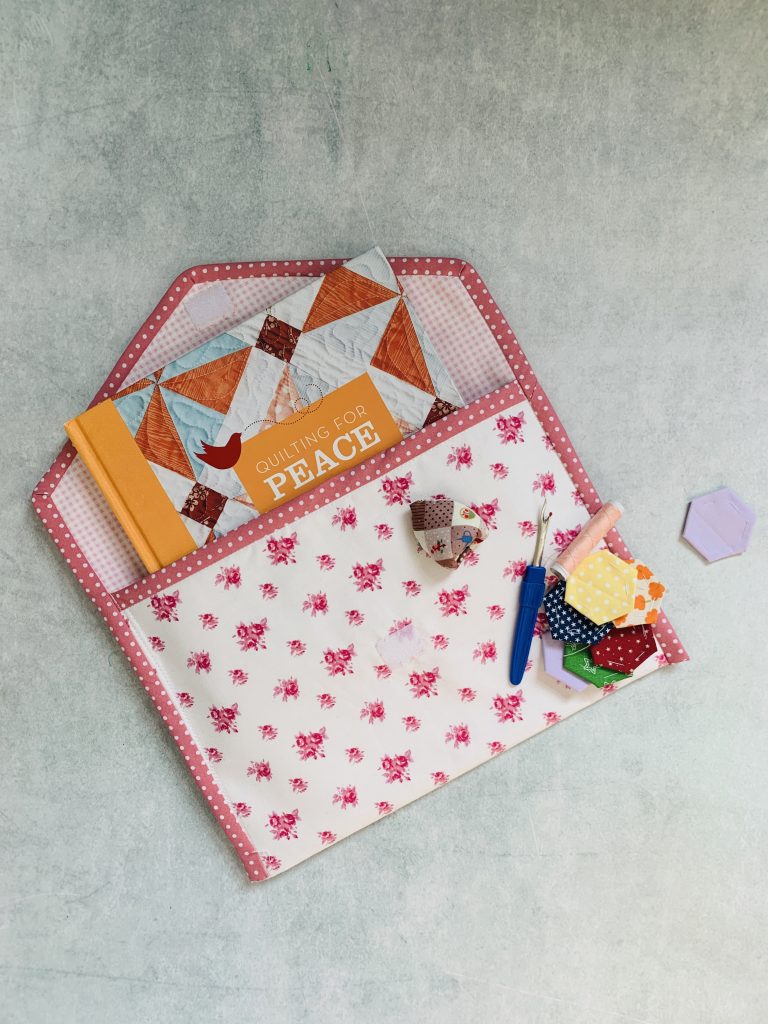
Add the final touches to your fabric iPad case.
I decided to add a fastening to make it more secure. I chose to use a simple velcro fastening as the iPad case was to be a gift and a fashion item than a heavy duty tool.
I cut a small square of velcro and attached to the tip of the flap and on the main pocket.
You can use different fastening such as a button and loop, snap fastening or a zip.
Once you have sewn your fastening in place your are done!
I hope you have found this tutorial on how to make an iPad case out of fabric helpful and easy to follow. If you have enjoyed this please share it and hope you can leave me some hints and tips for personalisation and detail!


One Comment
Comments are closed.