
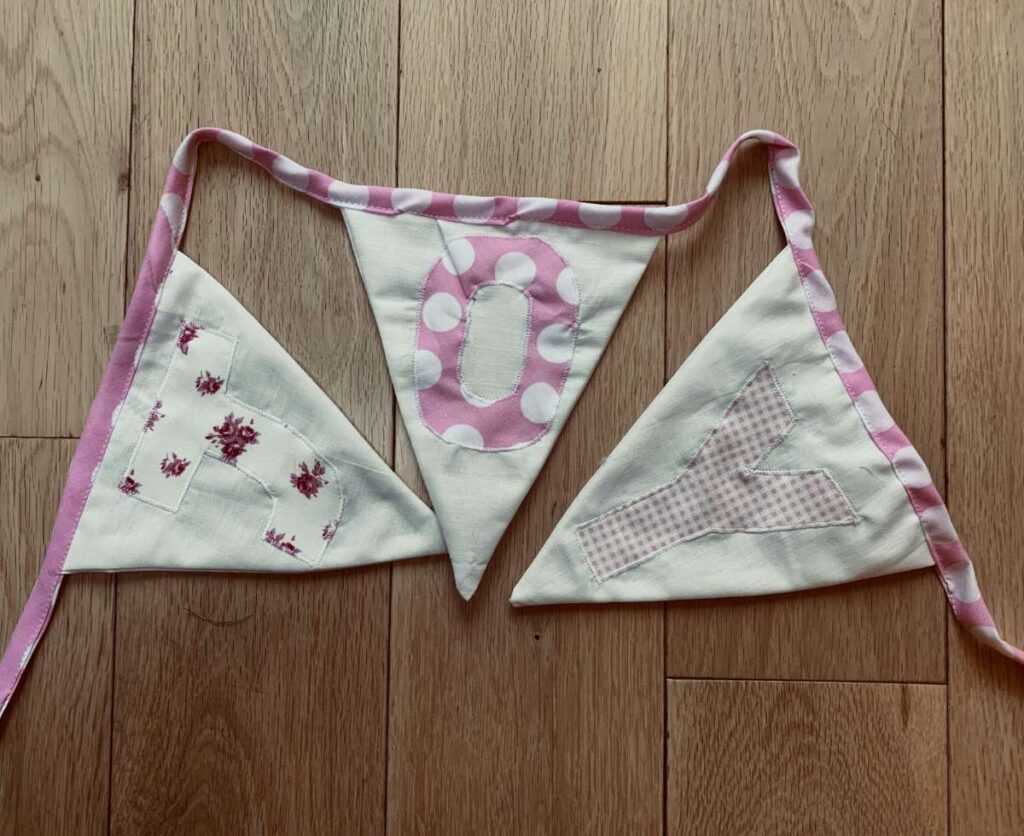
How To Make Fabric Letters For Bunting
Some of the links below are affiliate links. As an Amazon Associate I earn from qualifying purchases. This means that, at zero cost to you, I will earn an affiliate commission if you click through the link and finalize a purchase.
Are you looking at how to make fabric letters for bunting?
Letters and numbers can be one of the hardest things to make into fabric. As they are are often quite complex and hard to navigate but they don’t have to be.
Adding letters to bunting is a great way of making the bunting personal to the person, personal to an occasion such as Christmas or even to create fun and creative designs for rooms and workspaces.
I wanted to make themed bunting for a number of things and I love doing it everytime. I often change up the stitches I use to hold the letters in place and like to create something fun.
This is a lovely way of making a banner for a bedroom, name banner for a new baby or simply a birthday banner to use year in, year out.
What Fabric Should I Use For Fabric Letters?
There are no right or wrong answers to what fabric you use.
I always use a cotton or polycotton as I always have plenty of it and I find it easiest to use.
You can use other materials such as wool and felt. Felt is a great way of creating crisp clear letters without having to zig zag stitch raw edges.
Wool may be a little heavy but can still work just as well as felt and not always need a edging on the lettering.
I would stay away from lightweight fabrics such as silks and satins as you may find those harder to work with and they might stretch.
Though if you want to use up your scrap pieces of fabric make sure you are using the right style of fusible web to match the fabric weight.
Tools & Equipment
These are some of the things you might want to pull out and find ready to make your bunting. If you don’t have something like a printer you can look at asking a friend or even drawing the letters out yourself.
- Scissors – Small & Large
- Rotary Cutter – Optional
- Matching Colour Thread
- Fabric For Your Letters
- Ruler – Quilting rulers are great for using for measurements and to create straight cuts.
- Tape Measure
- Pins – There are a number of different ones you can use depending on what fabric you are using.
- Fusible Web – There are a number of different ones you can use depending on your fabric and project.
- Pen
- Fabric Marking Tool – Use what you have available
How To Make Fabric Letters For Bunting
I love making party supplies and bunting is always a good and easy one to do. There are a number of other things you can make from fabric crowns and reverse applique.
Step One
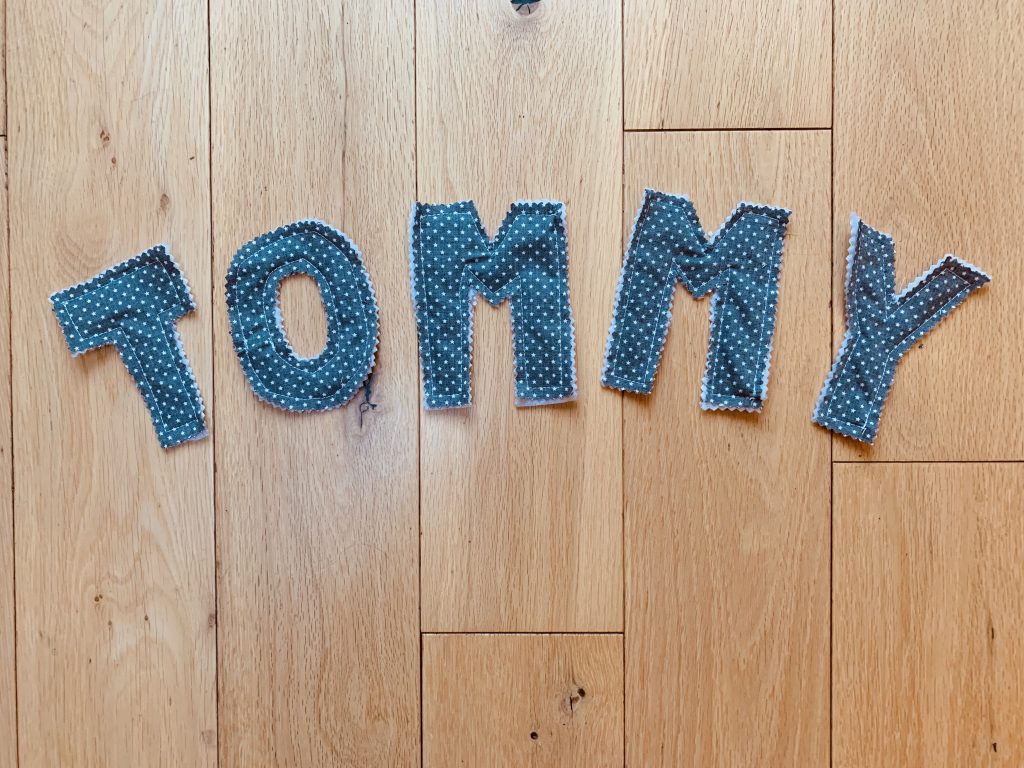
The best way to create the letters for bunting is to make sure they are clear and simple letters.
Start by measuring the size of your bunting to make sure your letters aren’t too small or too big. Make sure you have some room around the edge so the letters don’t over fill the bunting.
I always like to use printed out letters but that often be hard to understand the size the letters would be once printed out.
You can choose to use a clear bold font on a word document to print out and use as a template.
An alternative is to draw out your own by creating 2 lines at the height of what you want your lettering to be. This technique is very much a long way of creating the letters but is a great alternative if you don’t have access to a printer.
For example: I wanted to create a height of 4 inches tall so I drew two lines with a height of 4 inches.
Start drawing the shapes of your letters to touch both the top and bottom lines. Make sure your letters are fairly chunky and easy to read as when you cut them into the fabric you want to make sure they aren’t too flimsy and hard to read.
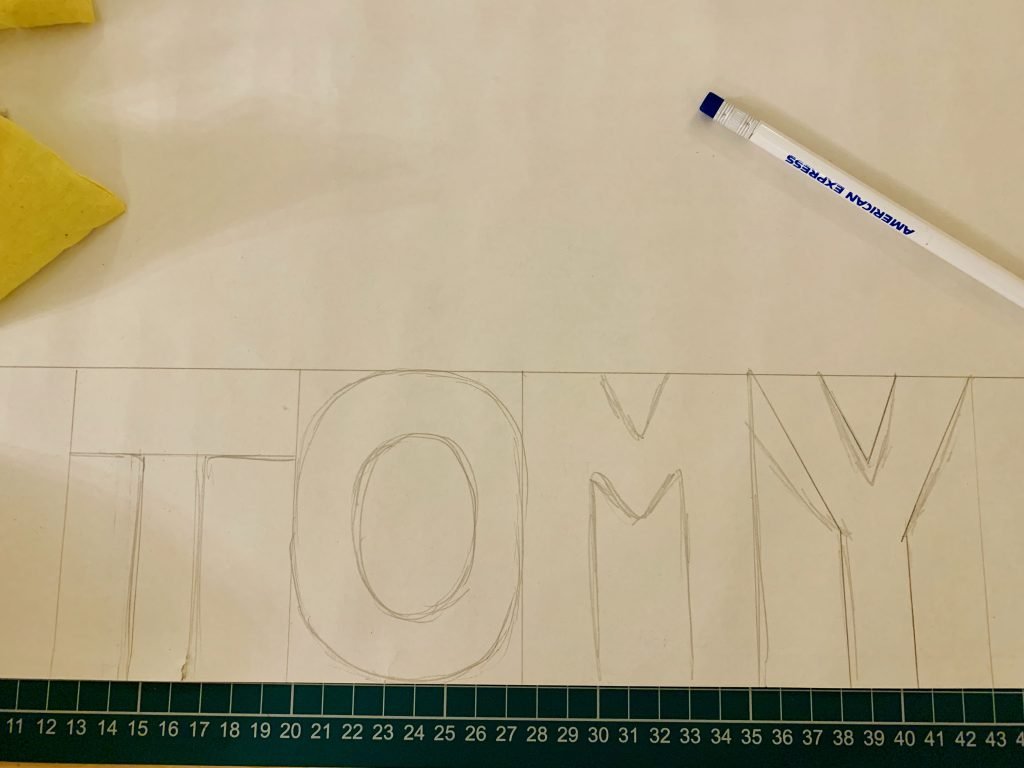
Make sure the holes for letters such a B, P and A are clear and big enough to cut out and make clear holes to sew.

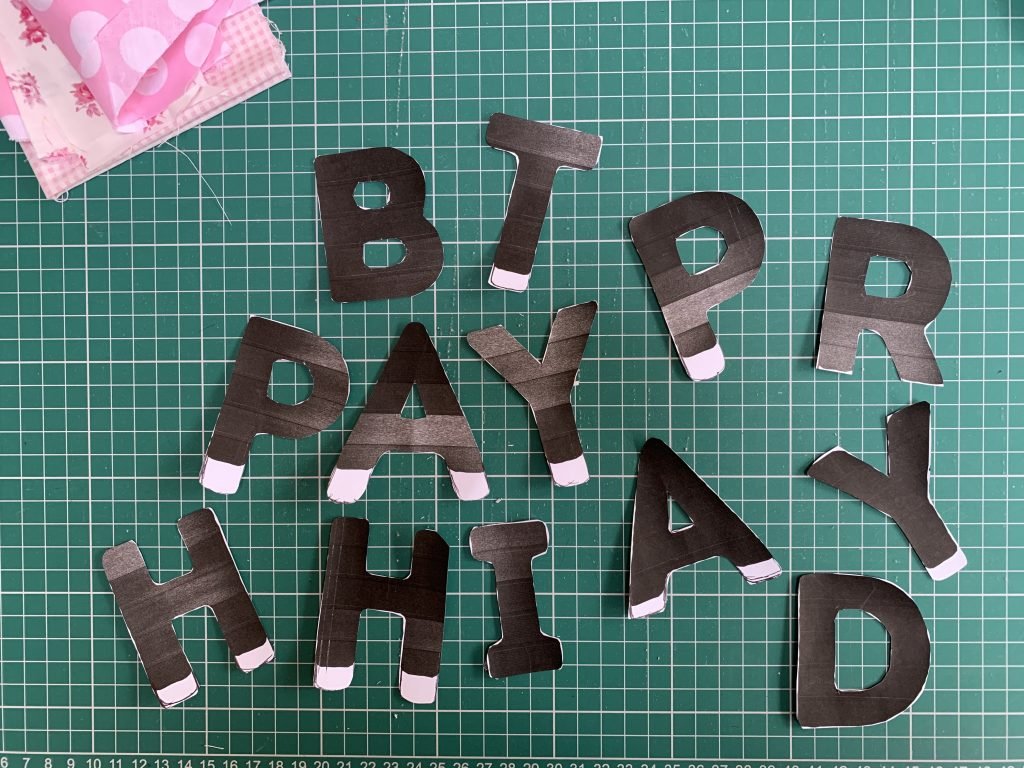
Once you are happy with your lettering, cut out in paper ready to use as templates.
Step Two
Using bondaweb or fusible webbing, iron one sticky side to your fabric. Make sure you are ironing the fusible web to the wrong side of your fabric.
Tip: The amount of fabric you will require to make your letters will depend on how many letters you are wanting to create. More letters will require more fabric and less letters will require less.
Leave the paper on the other side and use a pen or pencil to trace on the letters. Remember when you are tracing on your letters to trace them on backwards.
As then when you cut them out and stick them to your bunting they will be the right way round.
Draw on all of your letters including the holes.
Tip: If you are wanting to make letters that aren’t backed onto a traditional bunting triangle or backing at all and wish to make the letters the bunting themselves you will need to trace two of each letter on your fabric.
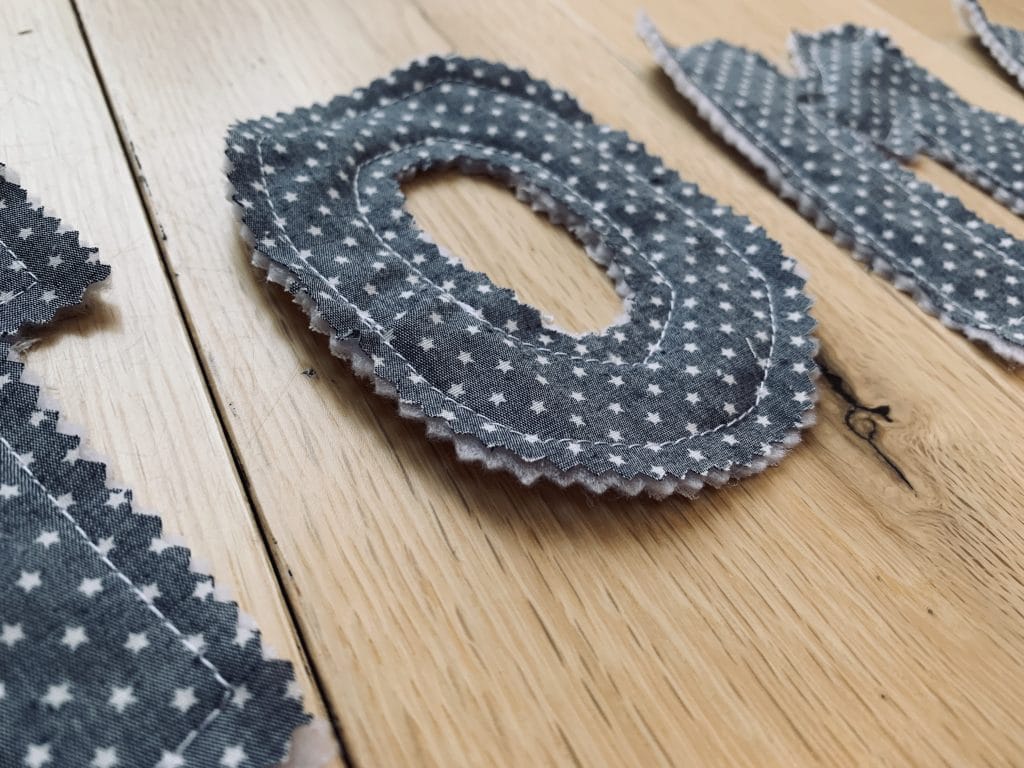
Once going the right way and one the wrong way, so you would have a front and back. You can then cut them out with pinking shears and then sandwich wadding in the middle and sew together.
Step Three
Cut out each of your letters, depending on the finish you are looking for will determine on how you cut your letters.

If you are leaving your edges raw or having a frayed edge you will want to cut your fabric letters with pinking shears.
If you plan to zig zag stitch your letters onto your bunting to coonceal the raw edge you will want to cut them with normal fabric scissors.
Step Four
Keeping the paper on the back of your letters for now. Transfer them onto your bunting pieces.
Lay them out and make sure you are happy with the look at position of each piece.
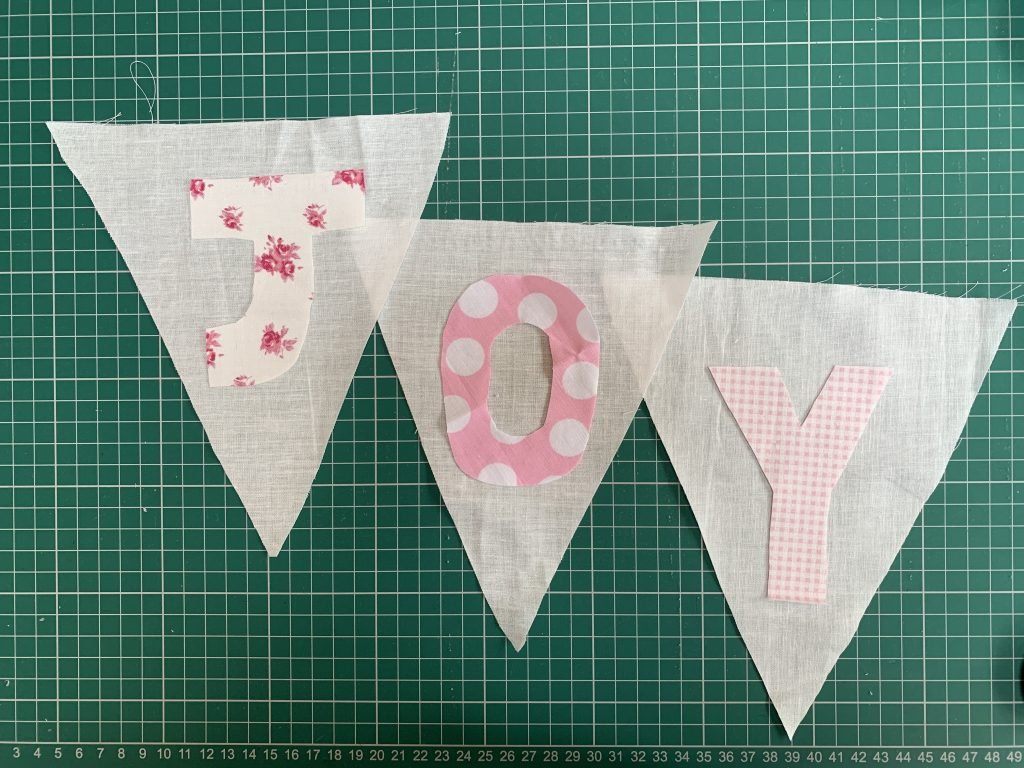
Tip: If you are using different patterned fabrics and colours you might want to make sure none of the letters blend into the background.
Take a picture of your letters in a position to make sure when you come to iron them in place they are as you planned.
Mark the bottom and top of the letter on your bunting piece with a pin, so that when you come to iron it back on you can line it up precisely to where you wanted it to be.
Taking each letter and bunting piece to the ironing board, start by removing the paper backing and placing the letter in place. Using your pins you placed earlier as a guide.
Make sure the letter is smooth and isn’t folded or creased anywhere. Iron in place and make sure your fabric are stuck together before leaving the ironing board.
Step Five
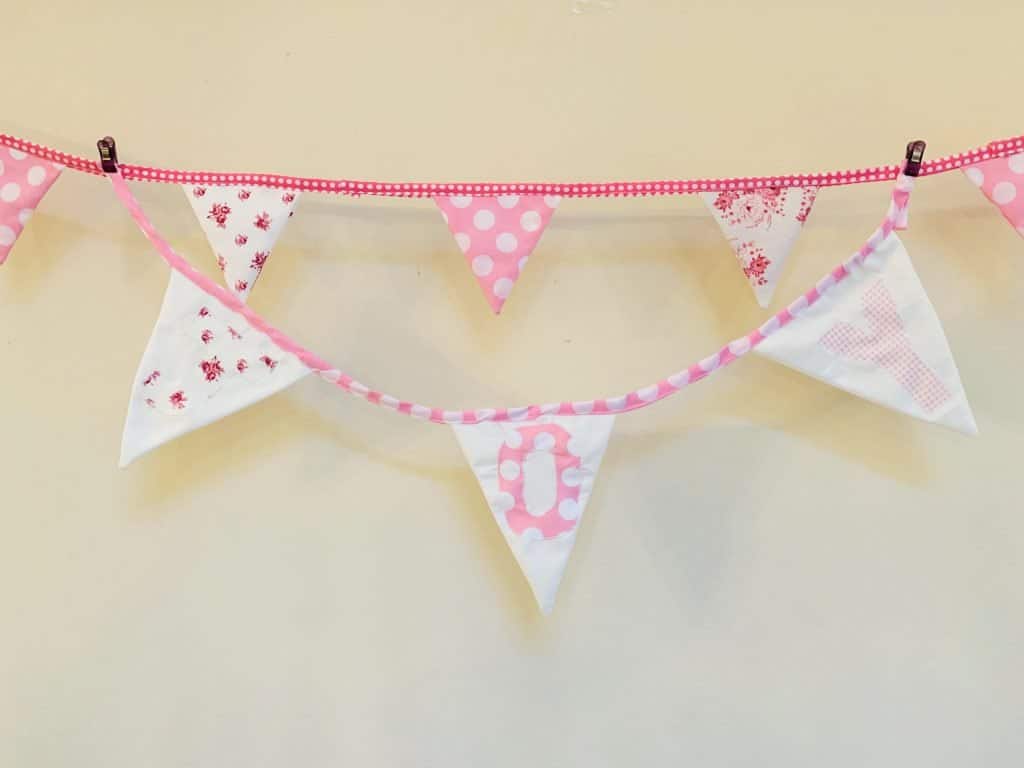
Now it is time to sew on your letters!
You can use a number of stitches to hold your letters in place. Some can be decorative or quite simple.

If you are fairly new to sewing you may find it more comfortable to do by hand with a blanket stitch.
This method is generally applique in some form. If you are looking for other methods of applique I have all the different types of applique and how to do them in another post.
Once you have sewn your letters in place, finish your bunting and hang!

I hope you have enjoyed this tutorial on how to make fabric letters for bunting and have enjoyed making your own. If you have made your own I would love to see pictures and know how you got on.

