How To Read Sewing Patterns
Some of the links below are affiliate links. As an Amazon Associate I earn from qualifying purchases. This means that, at zero cost to you, I will earn an affiliate commission if you click through the link and finalize a purchase.
Sewing patterns are a great way to get into sewing, whether it be for clothes, soft toys or cushions. They can be a great introduction to sewing but they can often come across as confusing. I decided to put together this guide on how to read sewing patterns.
There is different terminology used on sewing patterns that can leave you feeling bewildered. Along with the harder to read diagrams and fabric ways.
What Is A Sewing Pattern?
First for anyone who is completely new to sewing I wanted to clear up some other things that might be confusing. A Sewing pattern is a large sheet of thin paper/paper that has pieces printing out with numbers and letters.
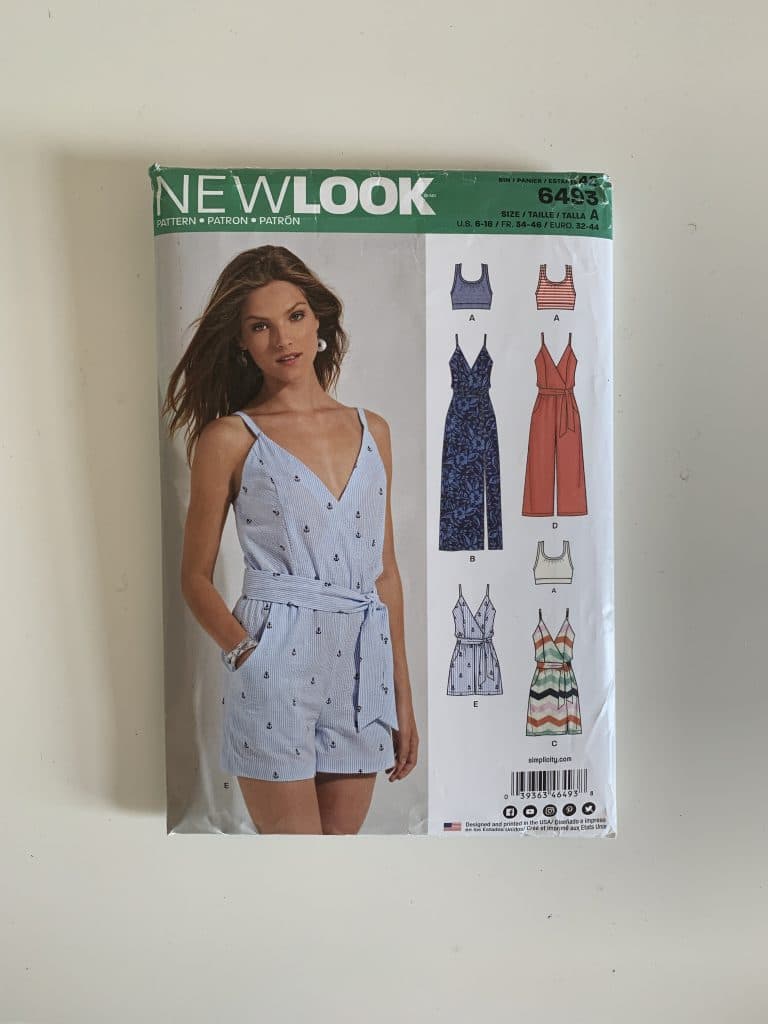
The paper pieces correlate together to create something. It can be anything fro a cushion cover to a soft toy all the way to a wedding dress. Sewing patterns are widely used for a number of things.
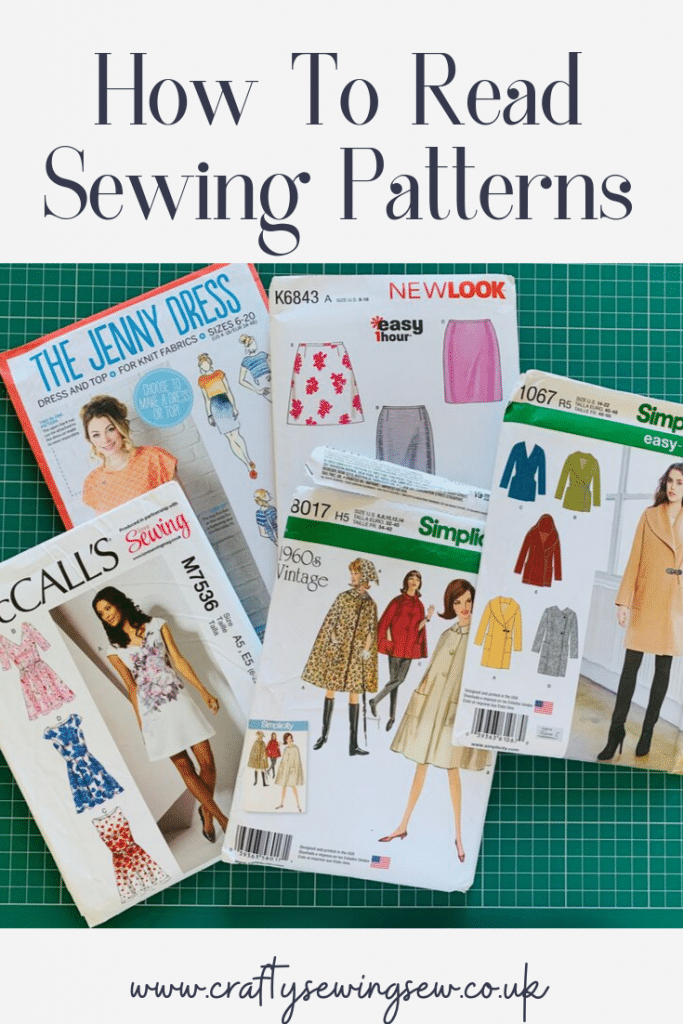
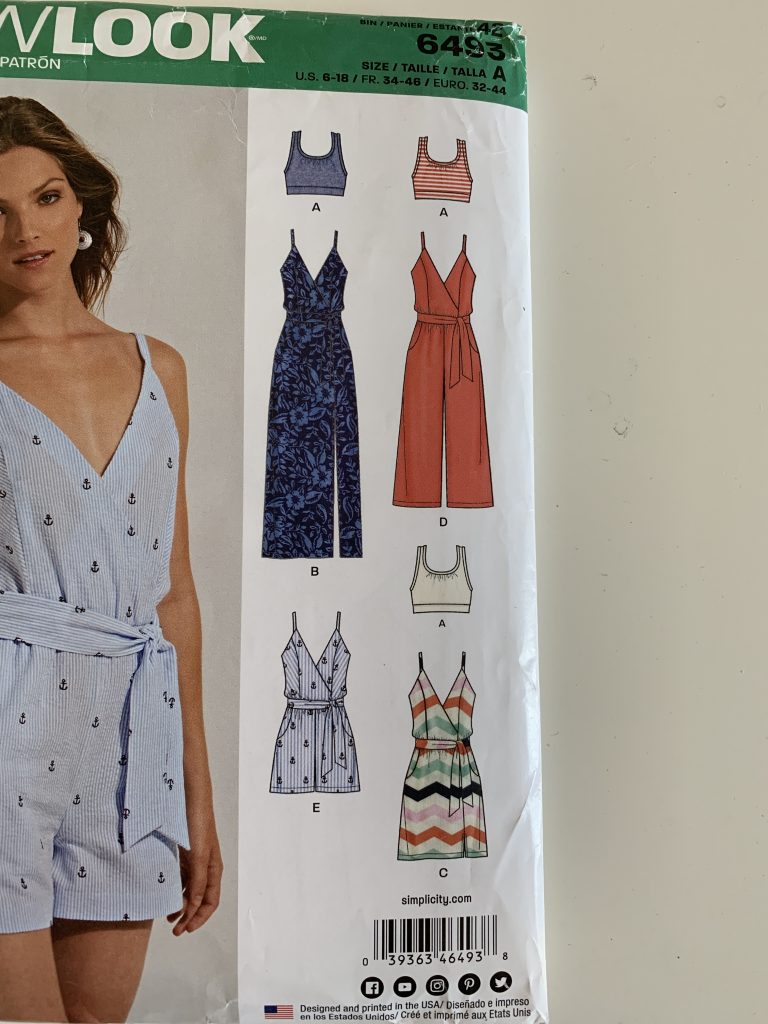
They are folded up and come in an envelope just bigger than A5. It usually has a picture of the product on the front, more often with other variations that you can also make. On the back, it has fabric suggestions, how much you will need and any other materials you need for the project.
Where Can I Buy Sewing Patterns?
Sewing patterns can be bought brand new from sewing shops and craft stores. You can also find them online from retailers, eBay and Amazon.
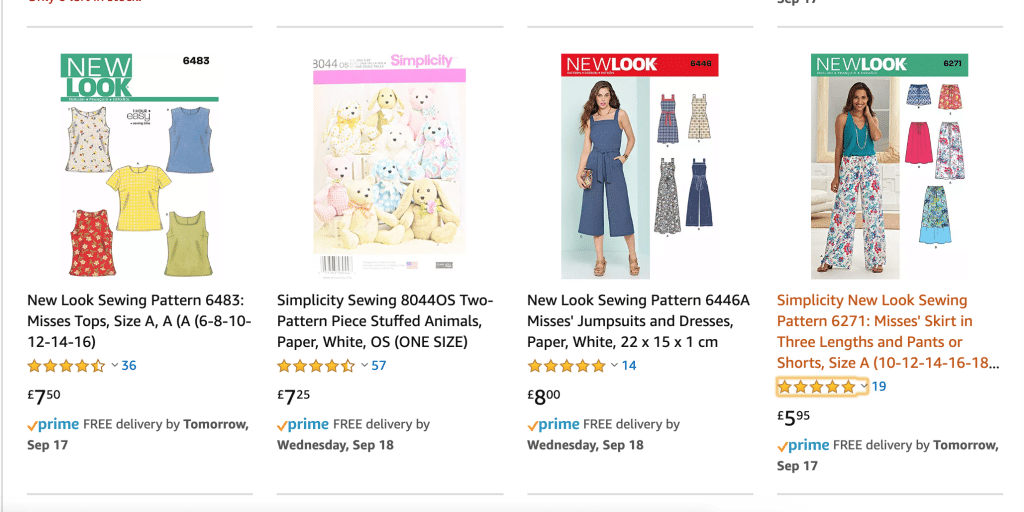
There are a number of companies that create so many different styles and variations of sewing patterns. You can find brands such as Burda, New Look, Vogue, Butterick, Tilly And The Buttons And McCalls.
You can buy them brand new or used. If you buy used make sure the pattern hasn’t been cut. (I will talk more about that later).
What Can I Make With A Sewing Pattern?
You can make a never ending amount of things with sewing patterns. There are patterns for everything from homewares to clothing and costumes. Below are just some examples of what you can make with sewing patterns
- Wedding Dress
- Formal Evening Wear
- General Clothing
- Kids/Children’s Clothing
- Pet Accessories
- Pet Clothing
- Cushions
- Fabric Bags
- Aprons
- Pj’s
- Slippers
- Garment Bags
- Table Clothes
- Table Placemats
- Paper Weights
- Ties
- Vintage Clothing
- Soft Toys
How To Read Sewing Patterns
Though sewing patterns may come across as confusing and complicated, they are actually guide simple. You can get different levels such as beginner, intermediate and advanced.
Knowing how to read sewing patterns is easy once you have read through a couple of times. Here are the top things to note when understanding sewing patterns.
Size Chart
The size chart will only apply to clothing. It can often be the most confusing and sometimes hurtful part of the sewing pattern. You don’t have to be a super genius to read sewing patterns so don’t worry.
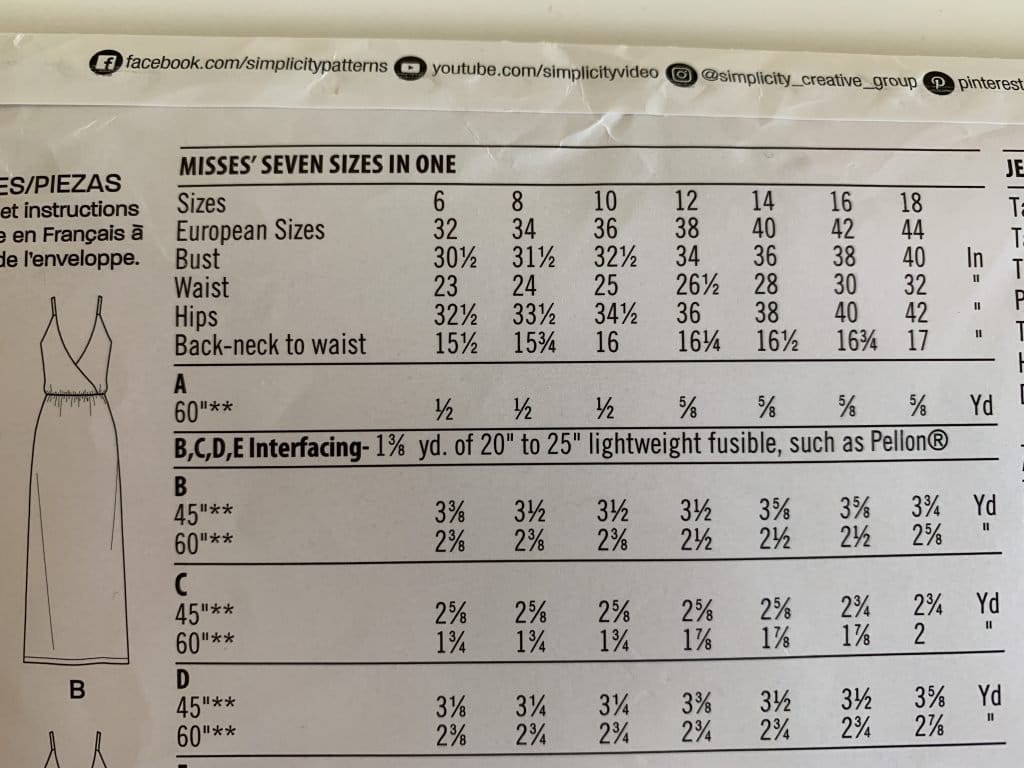
You won’t always be a perfect fit to the measurements and that is fine. The measurements are a guide to help you pick the size you need. I
f you are measuring bigger on the top vs the bottom you can go for the size up and always scale down the areas that come up too big. It is always better to give yourself more fabric to work within a garment than less.
Fabric Guide
There is a section on the back of the packet which gives you fabric recommendations. This is done so you can choose the fabrics that work best for that fit and style.
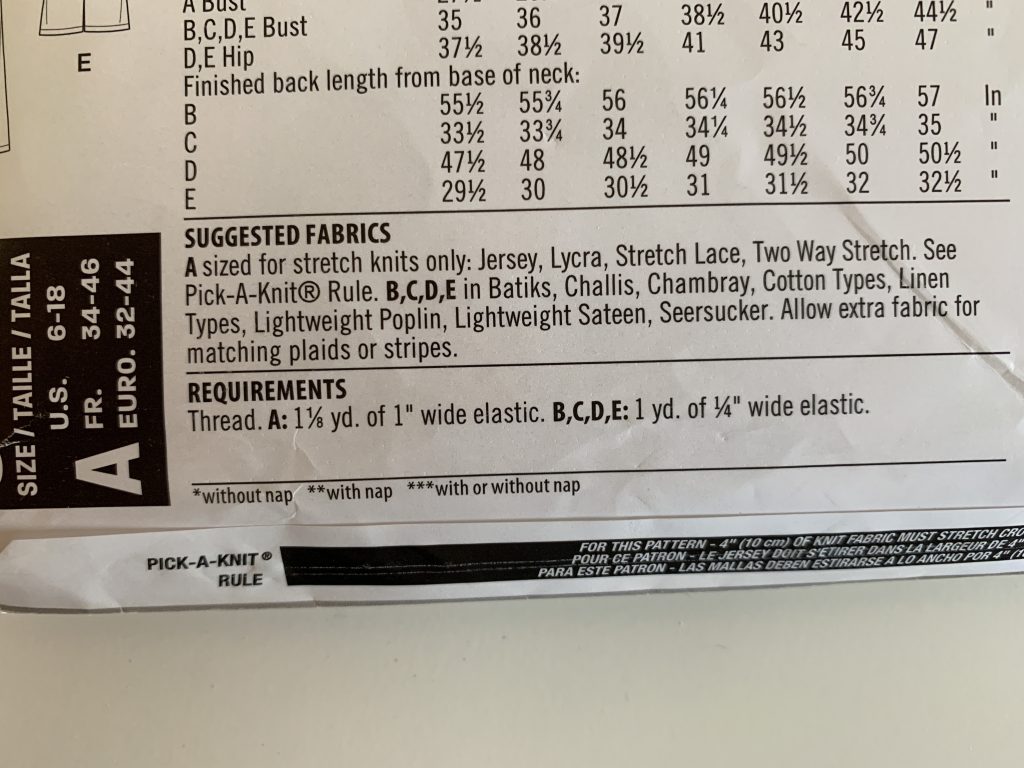
It will break down the projects by their letter and give you suggestions based on the style and cut. For example, A is a stretchy sports bra style top, this will require stretchy fabric which is shown above.
Some patterns will come with a pick a knit guide along the side. This is to help decide if the fabric you are choosing has the correct amount of stretch to it.
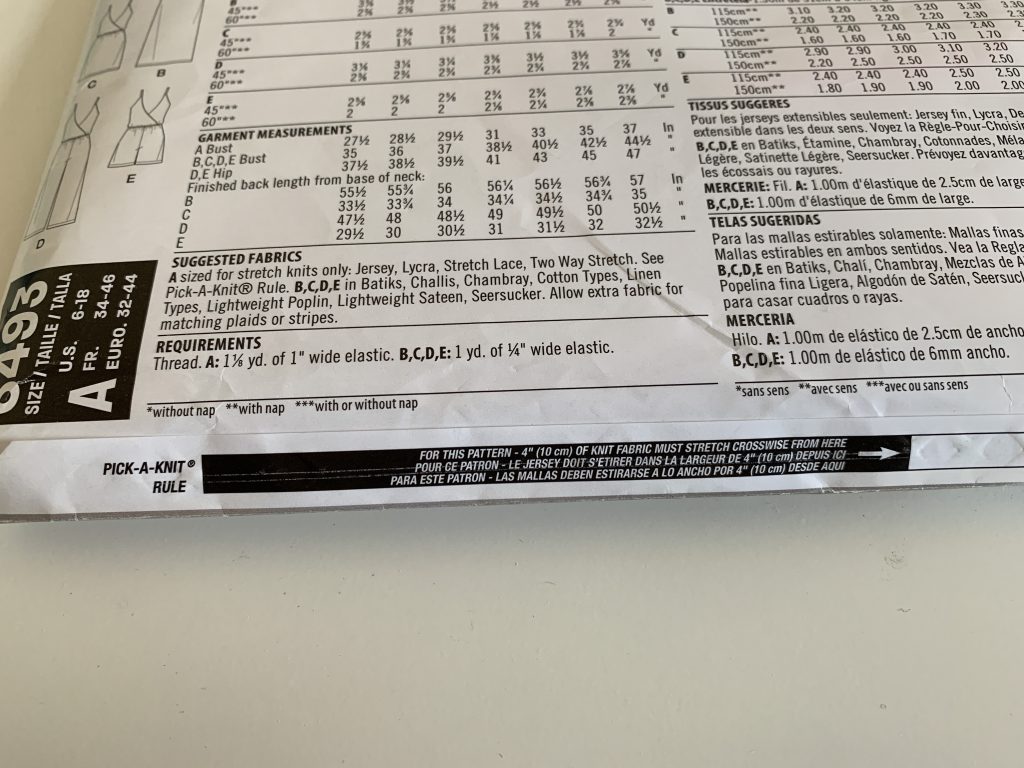
I find this really helpful as I often don’t work with stretch fabrics and wouldn’t know if I had the correct stretch/style.
You will also see further up (image below) that there may be added materials you need to buy such as interfacing, buttons or zips.
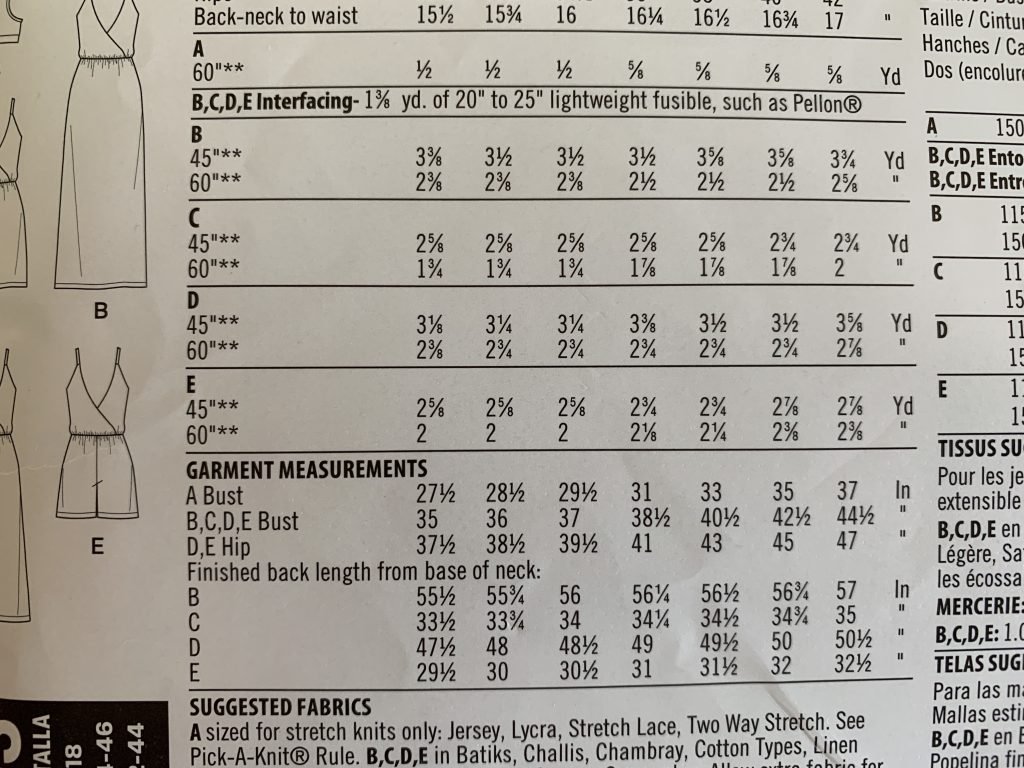
Tip: If you are new to this take your pattern to the fabric shop as they will be able to suggest the right fabrics and length for the project.
Fabric Cutting Layout
Within the pattern, it will give you directions to how best to layout your pattern pieces. This is really helpful when you are wanting to save space as get as much out of the fabric as possible.
It will show you which way to fold whether long ways or short ways and fold wrong sides together. With selvage edges together or not.
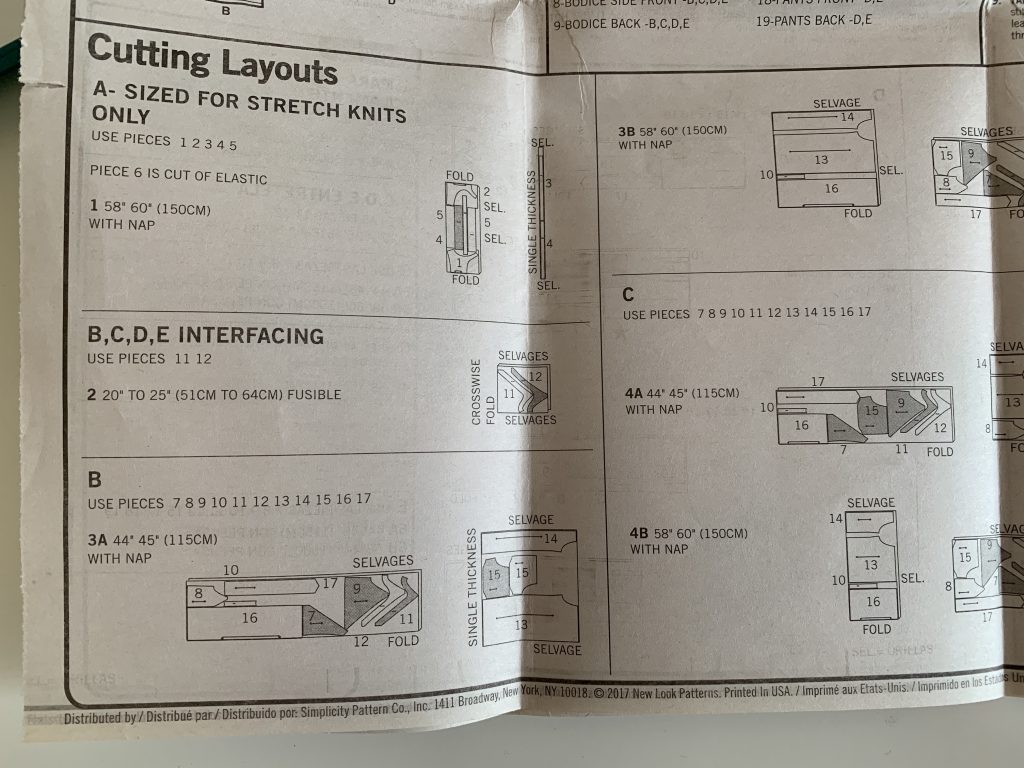
The pieces that are shaded are places on backward, this is to make space for the other pattern pieces. That doesn’t affect the cut fabric pieces as you will still get two opposite fabric pieces once cut.
What Does Nap Mean?
Nap means that on fabrics you can often get a grain. The grain is similar to the markings on wood. If you place two pieces of the fabric together that have been cut at different angles you are more than likely going to notice.

Think about stripes, you wouldn’t sew stripes horizontal on one piece but vertical on the next piece. That is what Nap is, essentially this may require a little more fabric when cutting out your pieces.
Letter/ Number System
When you decide which variation you want to make you need to look at which pieces you will need to cut out to make it. There are always letters or numbers to mark the pattern pieces.
On my example pattern, there are letters for each project. Then each pattern piece has a number, on the reverse of the packaging, there is a list. The list tells you that project B requires the piece numbers 7 to 17.
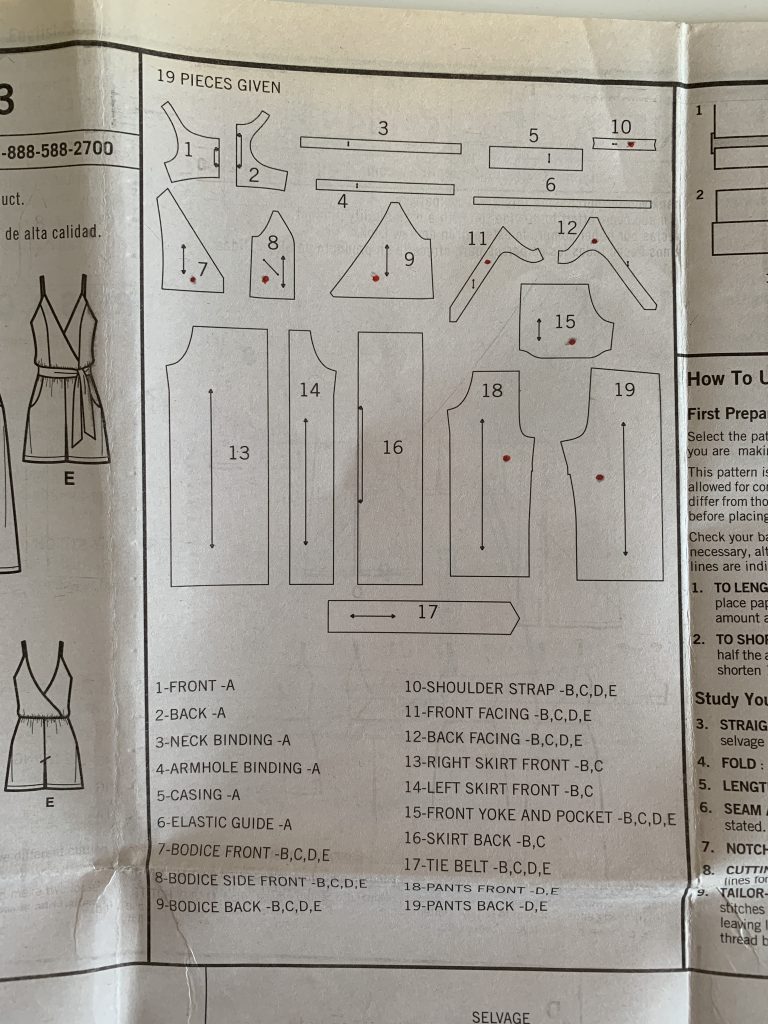
If it makes it easier I either use a pen to mark the pieces I need or create a checklist to cross off. This helps you keep track on the pieces you require for your project.
If you want to use the pattern but in larger/smaller sizes you can use tracing paper to trace the pattern. You can so this to create the size you need right now and save the new uncut pattern for a later date.
Sewing Pattern Markings
This to me can be the most confusing part of a sewing pattern. Knowing how to read a sewing pattern is important if you plan to use plenty of them.
Even in the future if you decide to draft your own you can use the markings from everyday sewing patterns on your own. That way you know exactly what everything means and it is easy to use.
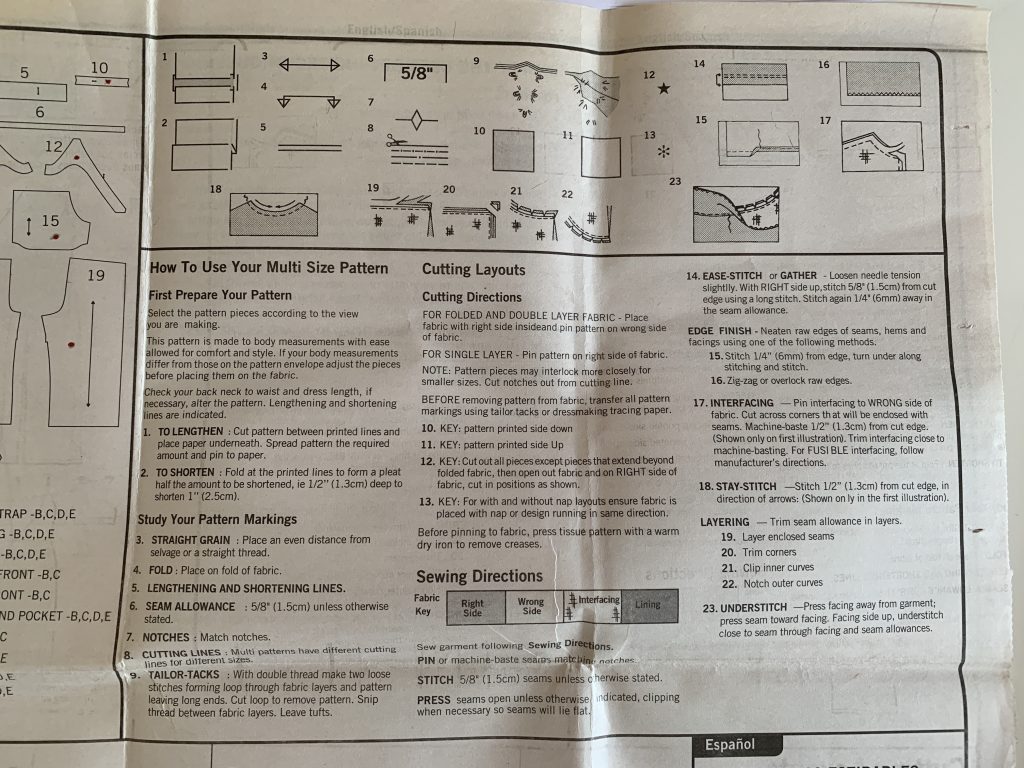
Most sewing patterns come with a chart or little block on the instructions sheets. These will talk you through the different markings, what they mean etc.
Size Lines
When it comes to cutting out your size of the pattern you may get a little muddled up. There is anything from 3 to 6 lines that each represent a size. Many patterns offer sizes 6 – 18 so that is 7 sizes.
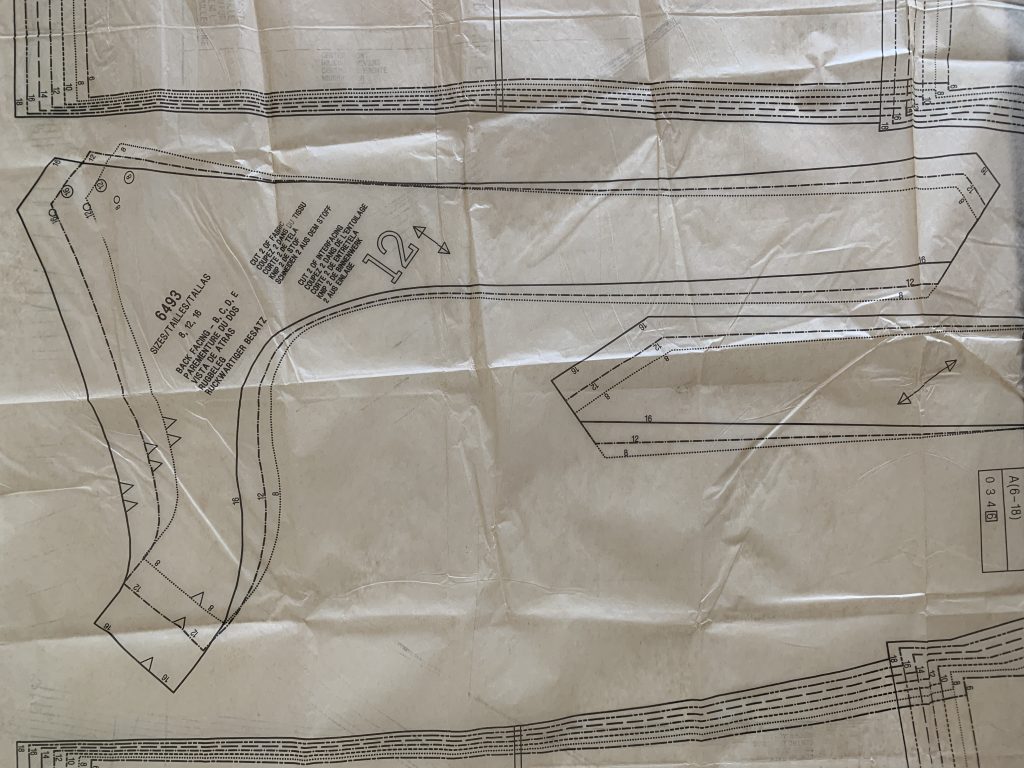
The lines each have their own style and key. This will help you determine which size you want and which line to be cut. Some of the lines overlap but if you stick as closely as you can to your lines you will be fine.
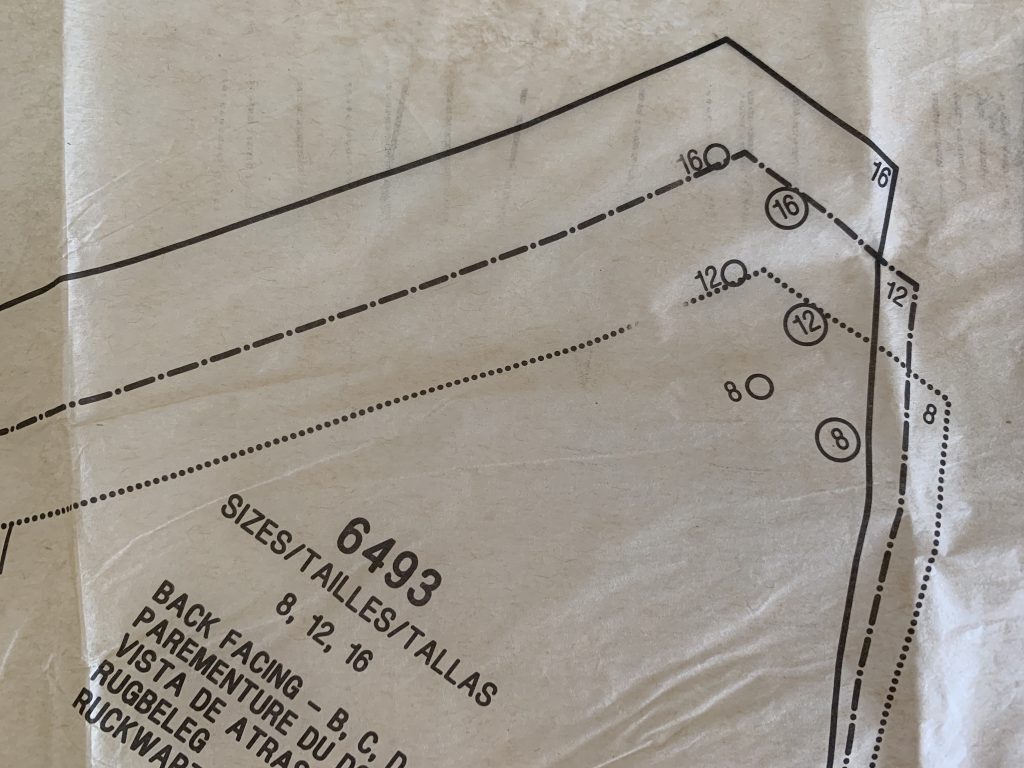
There is also information on your sewing pattern pieces you will want to know about. Part of knowing how to read sewing patterns is knowing what information you need to know.
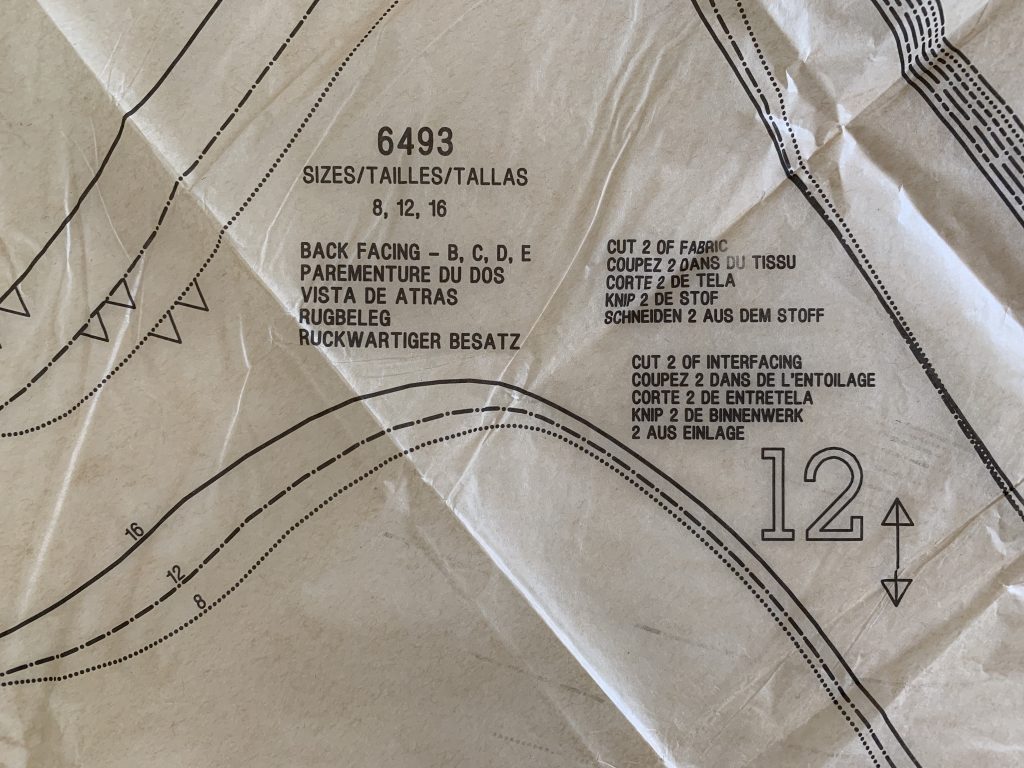
For example piece number 12 is called ‘ Back Facing’ and is used in the projects B, C, D and E. To the other side it states you want to cut 2 pieces into the chosen fabric along with 2 cut into interfacing.
Grainline
In the image below you will see the yellow circle. In the yellow circle is an important part of how to read sewing patterns. This is the line to show you how the pattern needs to be laid onto the fabric.

Remember talking about Nap above? This is the straight grainline when you come to layout your pattern pieces onto fabric this line needs to follow the grain. See the image below for an example.

For example, if you are using stripes that line needs to be following the stripes vertically or at 90 degrees horizontally. The end result of your project will then have matching stripes all going the right way.
Place On Fold
Another helpful marking to know when learning how to read sewing patterns is this one. The place on fold marking is used for pieces that don’t require a seam and are a continuous piece.

This is common for items like t-shirts, skirts and dresses. They can present you with half of the pattern and it gets cut on the fold. Then as you open up the fabric again you have a full piece.
Seam Allowance
Seam allowance can be confusing, some sewing patterns include it and some don’t. This particular pattern has the seam allowance already built into the pattern pieces.

The pattern markings will indicate whether to add seam allowance or not. It will also tell you how much to add if you require it. This pattern specifies to stitch with a 1.5 cm seam allowance.
This is commonplace for a fashion clothing pattern. If you want to make sure you stick to that seam allowance you can use a stitch guide foot to help. You can also measure it and mark it with tape on your machine.
Notches
Notches are probably going to be the most useful of the sewing pattern markings throughout the sewing process. You only need to take note of these when you come to cut out your pattern pieces into fabric.

These small triangles are notches, these indicate what side of the pattern pieces joins to another. For example piece 12 has 1 notch which will match piece 13 with the other notch.
There are pieces that will also have 2 notches together, that is so you can clearly see that the 1 notch matches to 1 notch and so on. It is like piecing together a jigsaw.

When you come to cut your fabric pieces you can do a number of things to mark these notches. You can use a fabric marking tool to draw them on, cut the out of the seam allowance or cut a triangle going the opposite way.
Tailor Tacks
This is the key showing tailors tacks. These are loose stitches made by hard to mark something on the fabric. It is mostly used to mark darts within the pattern piece.

To create the tailors’ tacks you simply use doubled thread create a large loop and sew through again with your needle. This will stay in place as you remove the paper pattern piece.
Fabric Key
The fabric key is really simple to understand but you can often feel lost when you are trying to remember everything else. The image below shows what the fabric key will look like on sewing pattern.

The different colour variants on the pattern represent different variants of the fabric. This shows the right way of the fabric, the wrong way, interfacing and lining.
Seam Trimming/ Layering
There are some things that are important when you are learning how to read sewing patterns is to remember about trimming seams.
Many times we work on projects that have curved seams, bulky seams or just untidy seams. The best way to have a beautiful finished project is to tidy up your seams as you along and at the end.

This can occur in a couple of ways from layering, that means cutting out the inner layers of the seam. This is used if you are using anything from 4 + layers of fabric combined in one seam. (19 on the diagram)
Cutting off corners, this is mostly used on cushions, bags and square corners. Cutting the corner off and creating a dull edge means you can get rid of the bulk fabric and make a crisp neat corner on the outside. (20 on the diagram above)
Clip Inner Curves, this is used when you have made something that has a rounded/curved seam. The fabric within the seam can cause the curve to buckle and be bulky. You want to cut small triangles from the seam to alleviate the tension of the seam. (21 on the diagram)

Notch Outer Curves are for curves that have seams on the outer curve. (see image for more details) Cutting small lengths into the seam will alleviate the tension of the seam. (22 on the diagram)
Tip: When creating the fabric pieces, remember to transfer all information such as notches, darts and stay stitch lines. You can go this with a fabric marker or tailors tacks.
That is everything you need to know about how to read sewing patterns. If you have any questions I am more than happy to help. If you know any other terms that occur in sewing patterns I should talk about let me know in the comments below.
