
How To Transfer Pattern Markings To Fabric
Some of the links below are affiliate links. As an Amazon Associate I earn from qualifying purchases. This means that, at zero cost to you, I will earn an affiliate commission if you click through the link and finalize a purchase.
Are you looking at how to transfer pattern markings to fabric?
Working out sewing patterns and knowing how to read sewing patterns and understand them can be tricky enough. I sometimes feel I need to take a degree level course in sewing patterns before I can use one.
But then the added confusion of how to mark on seams, notches and darts can be another minefield to get through.
You may think you will remember where the dart belongs and what joins to what but once you take the pattern piece away all knowledge goes out the window.
What Pattern Markings Should You Mark?
If you are just getting started and are trying to soak up all the sewing pattern information you can like a sponge then you might want to know what markings you should be looking for.
There are a number of different lines and dots and triangles that will grab your attention. Some you don’t need to pay attention to and some you need to make sure you mark.
Tip: Each sewing pattern is different from the next, they are very similar but can often use different markings depending on the manufacturer and origin.
These are some of the markings you should be looking for on your pattern to take notice of:
- Button & Buttonholes
- Darts
- Notches
- Pleats
- Gathers
- Pocket Placement
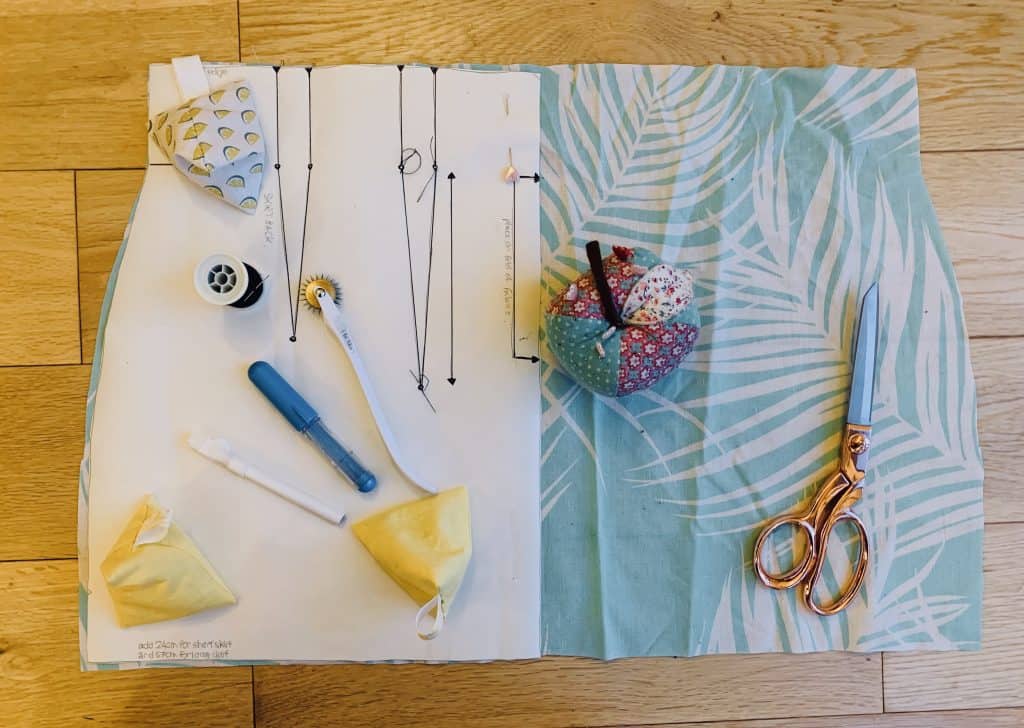
Tools & Equipment
I wanted to add a quick section of items you may want to keep to hand, some of these you will already have for your pattern cutting anyway. But I decided to add some things to the list you may not have thought of using.
- Pins
- Fabric marking tools – have a variety to use on different materials and colours.
- Notch Cutter
- Tracing Wheel
- Needle & Thread
How To Transfer Pattern Markings To Fabric
Some patterns are very simple and have very minimal markings to transfer and some patterns are quite complex with many different markings to transfer.
Try and keep one type of pattern marking technique to one pattern mark, for example the notch cutter should just be used for the notches on the pattern.
Keeping a clean index of what you are using and for where is going to be the best way of knowing what everything means when you start sewing.
Make sure your pattern piece is still on your fabric while you transfer the markings, otherwise you might get lost and forget which piece is which.
If you are working with a pattern that requires you to cut on the fold, simlply remove the pins and lay the fabric in place. I like to use pattern weights to keep the fabric and pattern in place.
Mark your notches, darts etc and then flip the pattern to match the other side.
Clipping Notches
Clipping small notches and lines into the seam allowance is the easiest and quickest way of marking notches.
Notches are a marking that indicate where two pattern pieces will join. Usually marked with a triangle or double triangle on many sewing patterns.
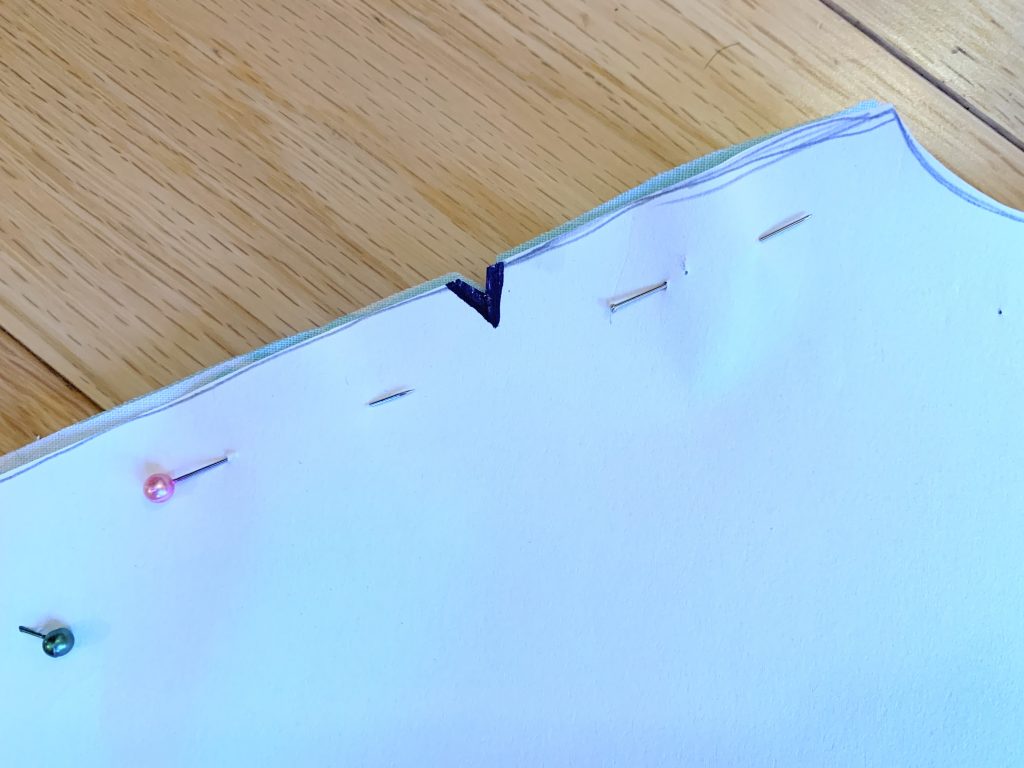
You can either cut a small cut through the pattern and fabric into the seam allowance – don’t cut the full width of the seam allowance, only a small section.
Or you can make a mark cutting the triangle going outwards, this type of marking is more distinct and can be trimmed down later in the sewing process.
Mark With Pins
The most used method of transfering pattern markings is by using pins. It is easy to use them as we already have them to hand but using them on everything can get confusing.
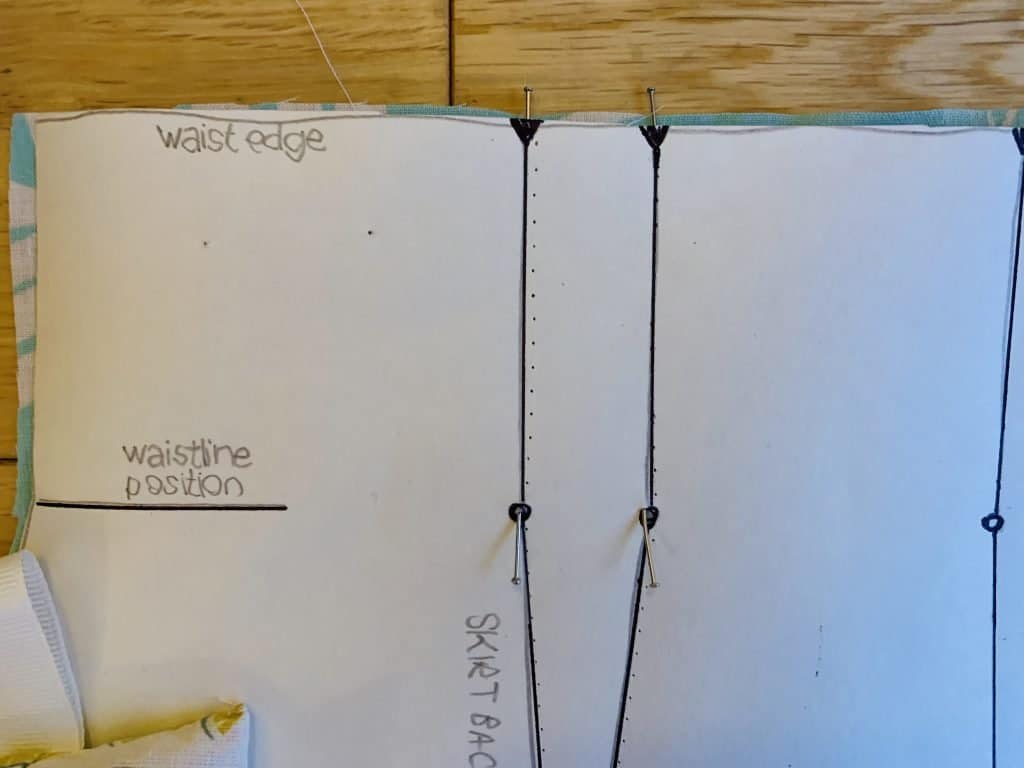
This is probably better used for things such as pocket placements, darts and pleats.
Tip: If like you feel like you constantly miss pins and simply don’t see them look at using glass or ball topped pins. These make it easier to see and are much easier to handle.
To mark a dart remember to mark the twice points on the side along with the point in the middle of the pattern.
Fabric Marking Tool
The easiest method to transfer pattern markings is using a good old fabric marking tool. The most common are items such as tailor’s chalk, the Clover chaco chalk pen, and frixion pens.
I prefer to use chalk as it has a least chance of staining the fabric and can be removed with water, by rubbing or washing.
You can use these to mark all your markings if you wanted and use different colours to mark different things.
Personally I love using these to mark bigger or longer things such as pocket placements, seam allowance and darts.
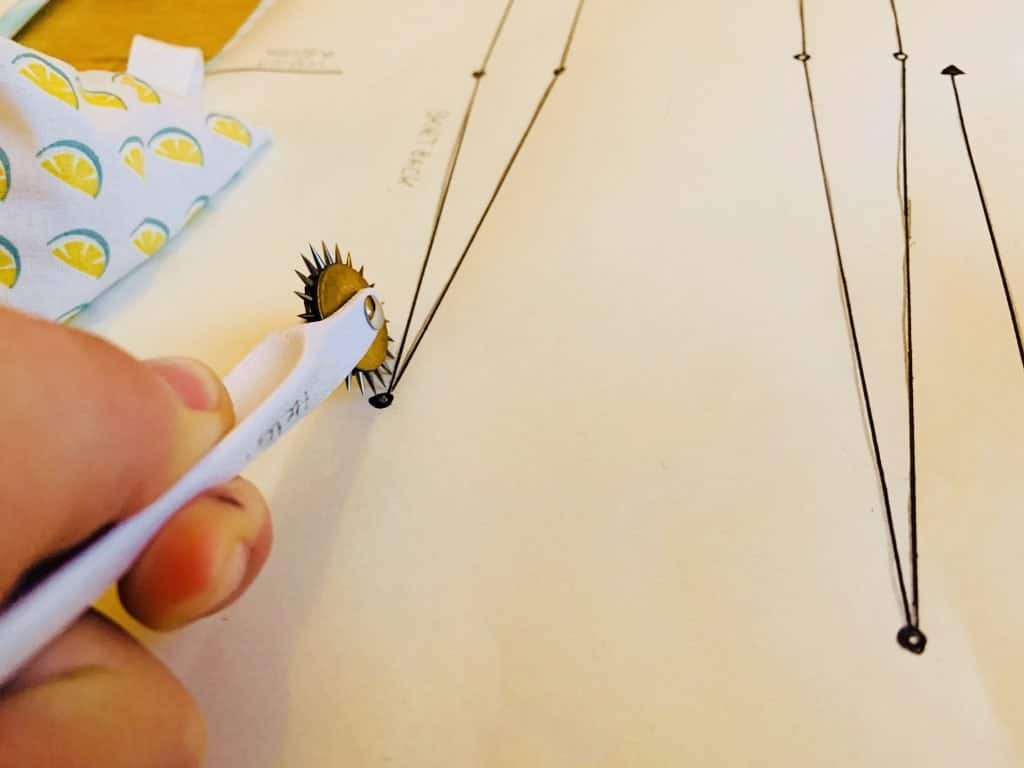
Using A Tracing Wheel
I have had a tracing wheel since university and honestly used a handful of times.
It is so easy to use, similar to a rotary cutter. I would advise to use this with a self healing cutting mat behind so you don’t damage your table or floors. I have also done that once before!
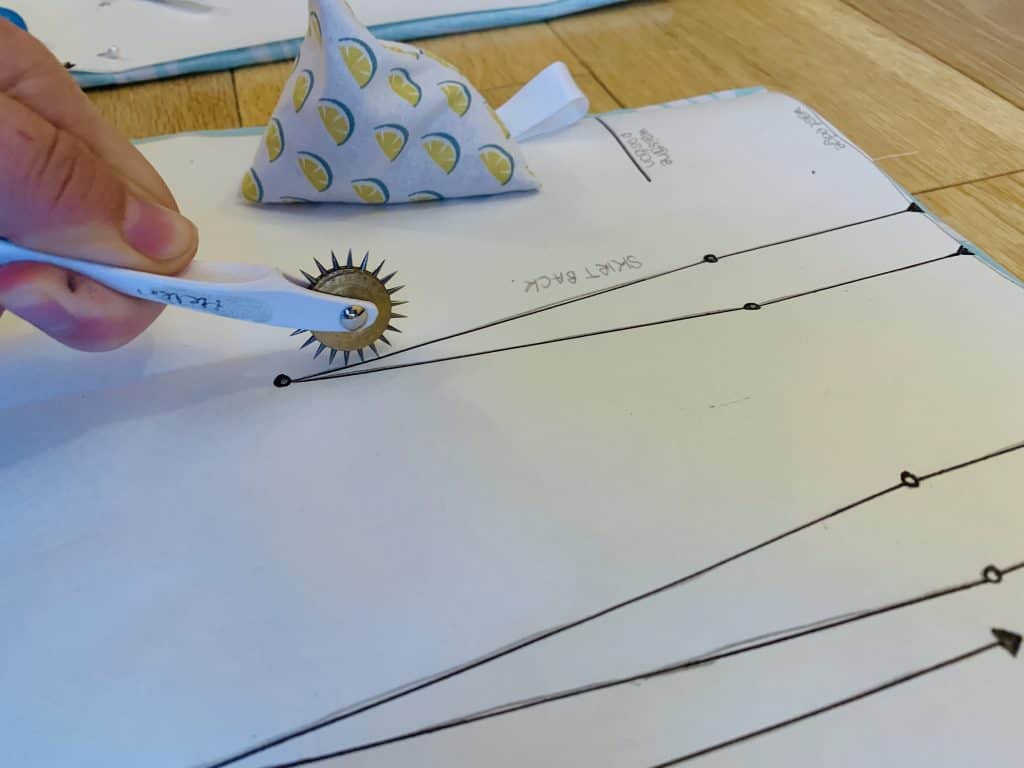
I wanted to add it to the list as this is a great way of marking hemlines, seam allowance and even darts.
Use the tracing wheel in conjunction with tailor’s chalk to mark the lines once they are indented in the fabric.
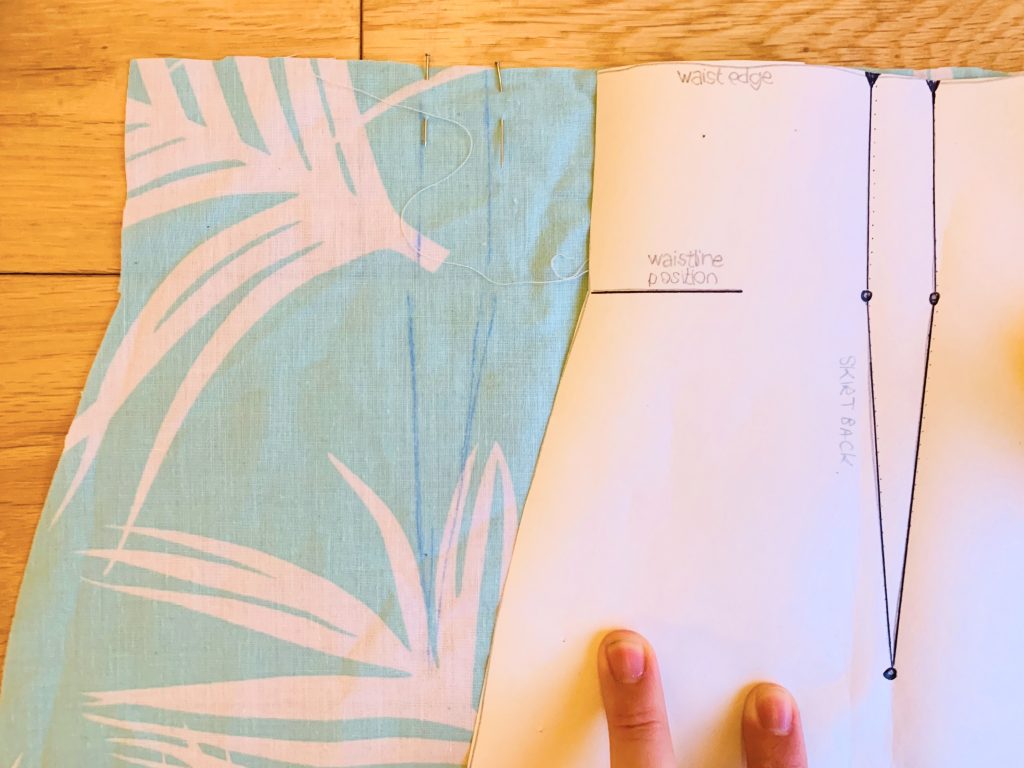
Use Tailors Tacks
Tailors tacks are one of the most useful ways of transfering pattern markings to fabric.
These are extremely handy for a number of pattern markings but great for marking button placements and buttonholes. For these you don’t need to split the 2 layers of fabric as you can create the loose dart going through all layers.
When it comes to taking the pieces apart gently pull them and snip down the middle. Leaving behind threads on each side.
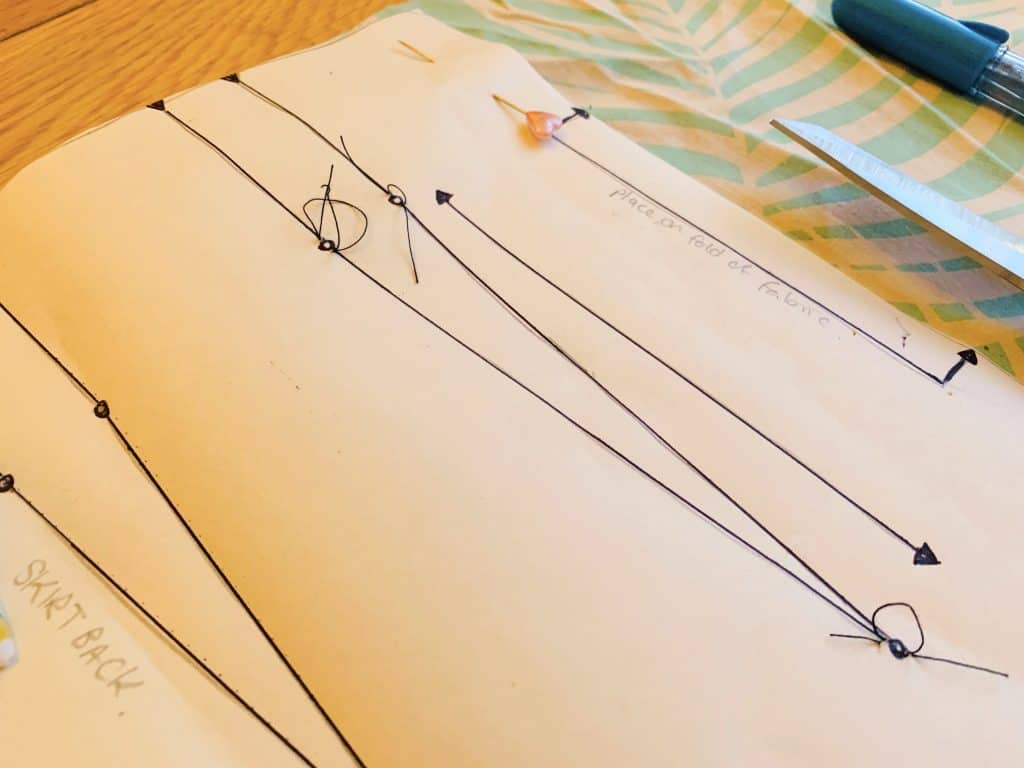
Tailors tacks are loose loops made with a needle and thread to mark a specific point in fabric. It can be done on one layer of fabric or two.
They are really simple to remove and are the most effective as they don’t move or rub off.
I hope you have found this guide helpful and you have learned a lot about how to transfer pattern markings to fabric. If you have any techniques you want to share let me know in the comments.

